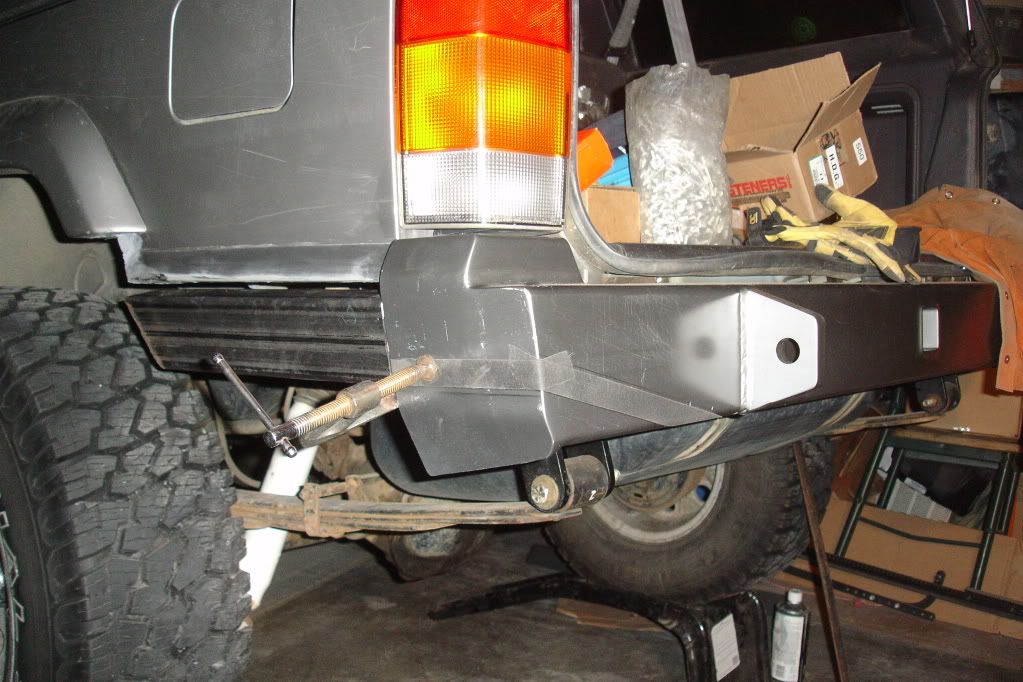
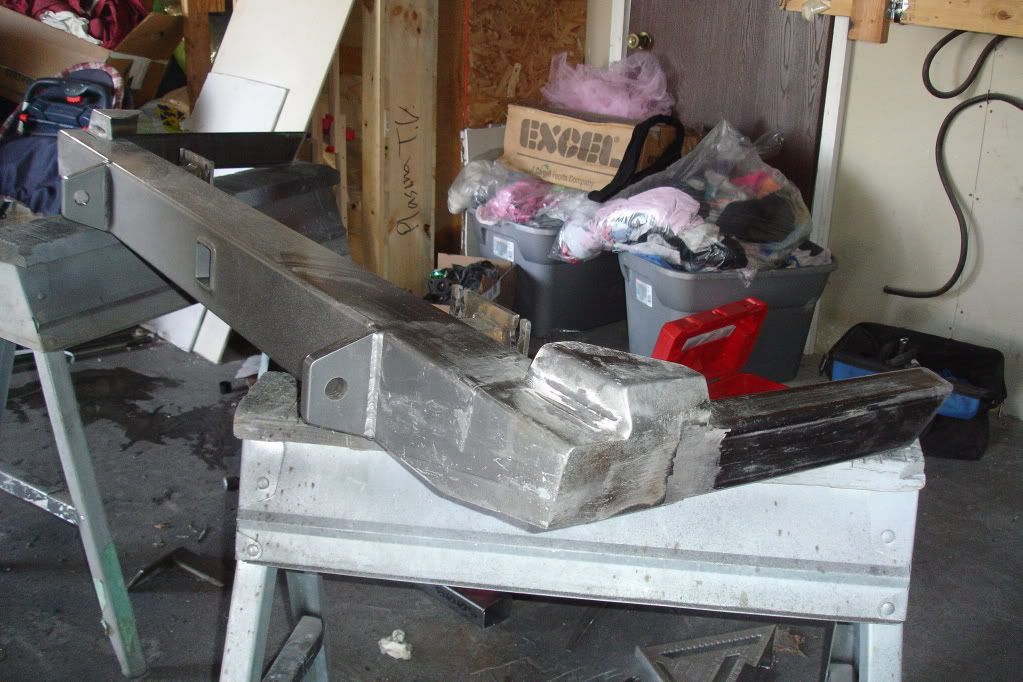
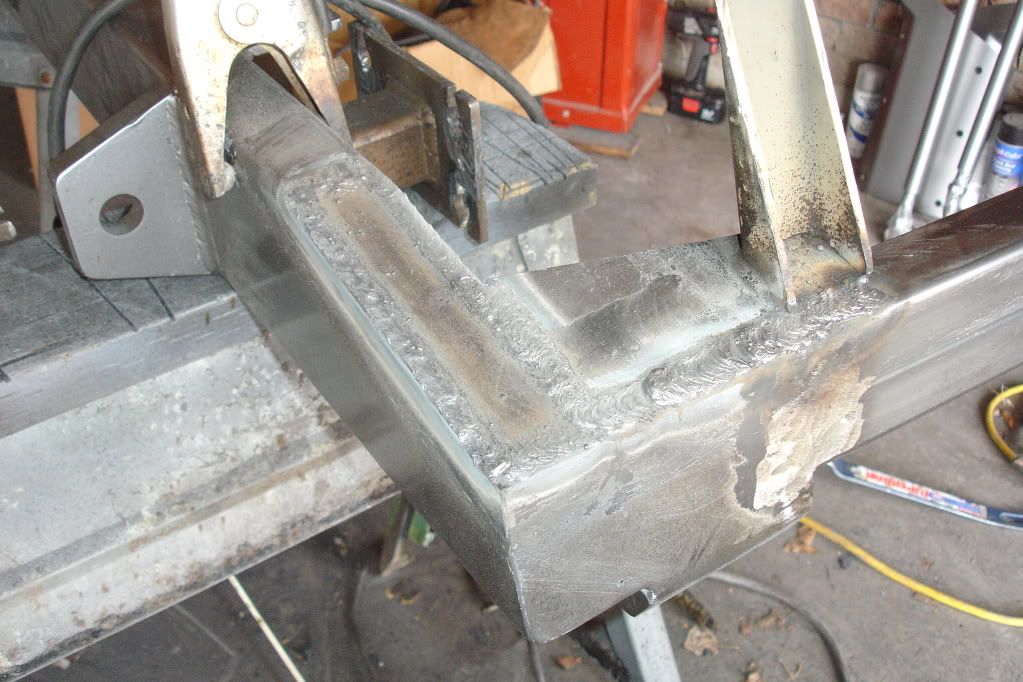
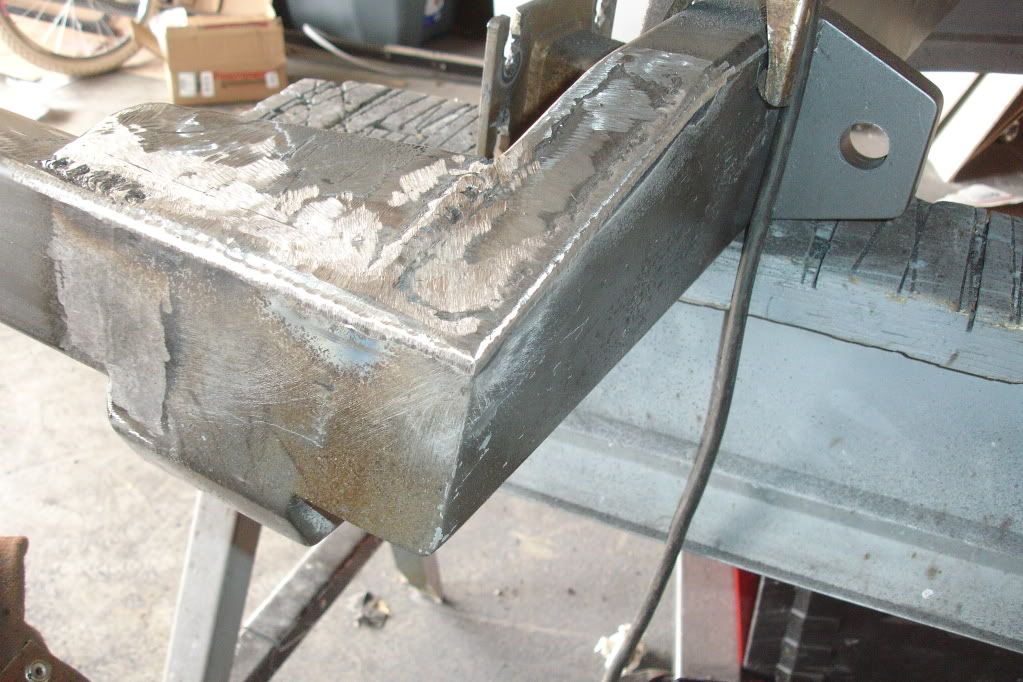
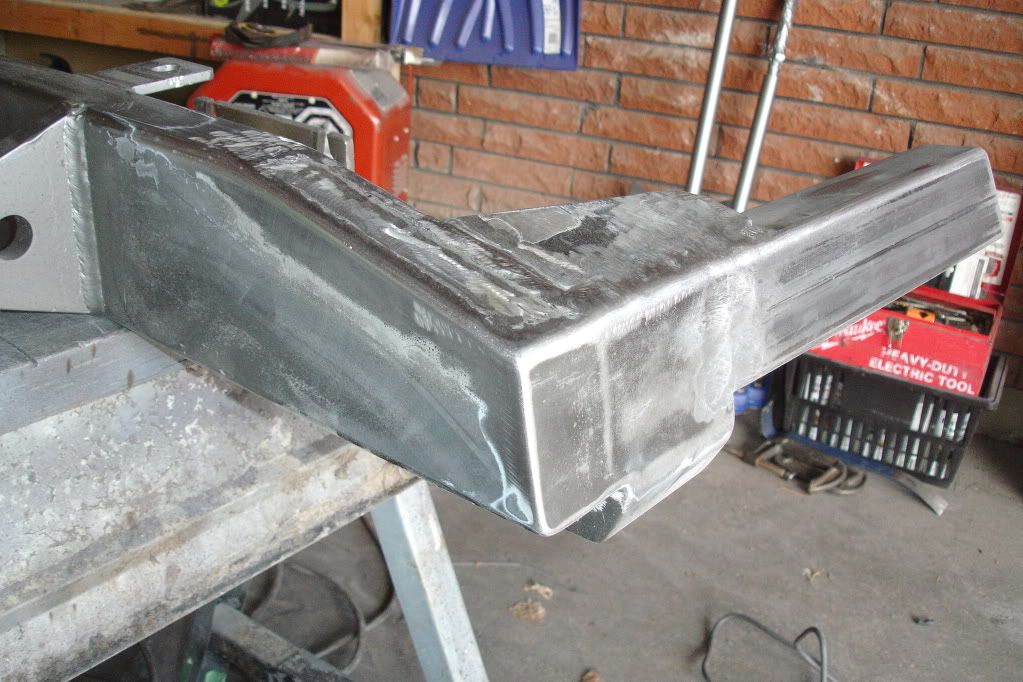
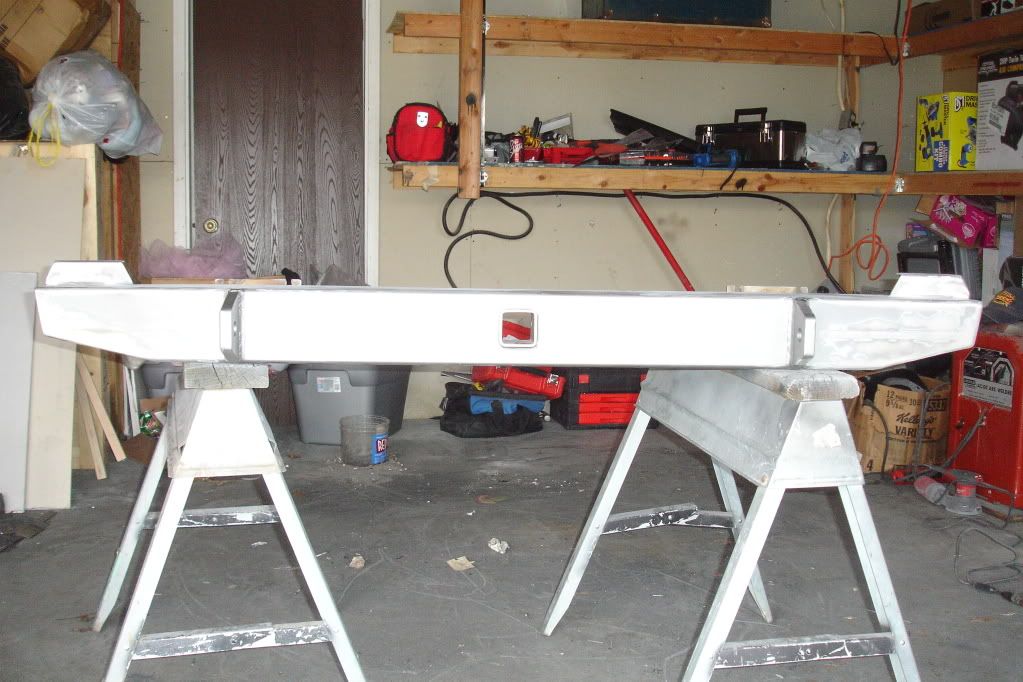
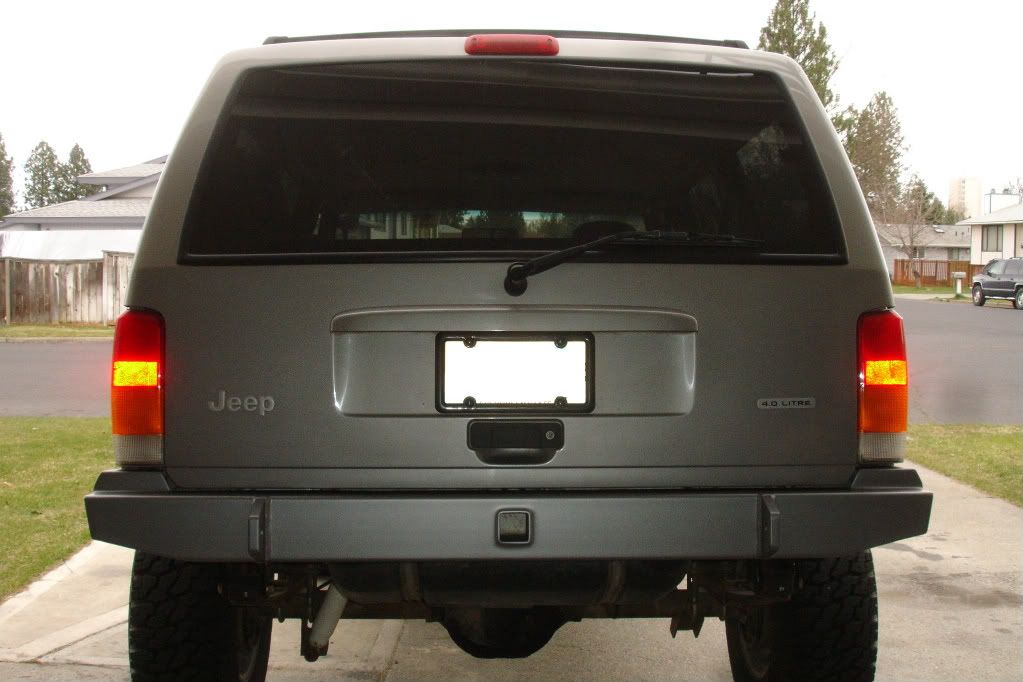
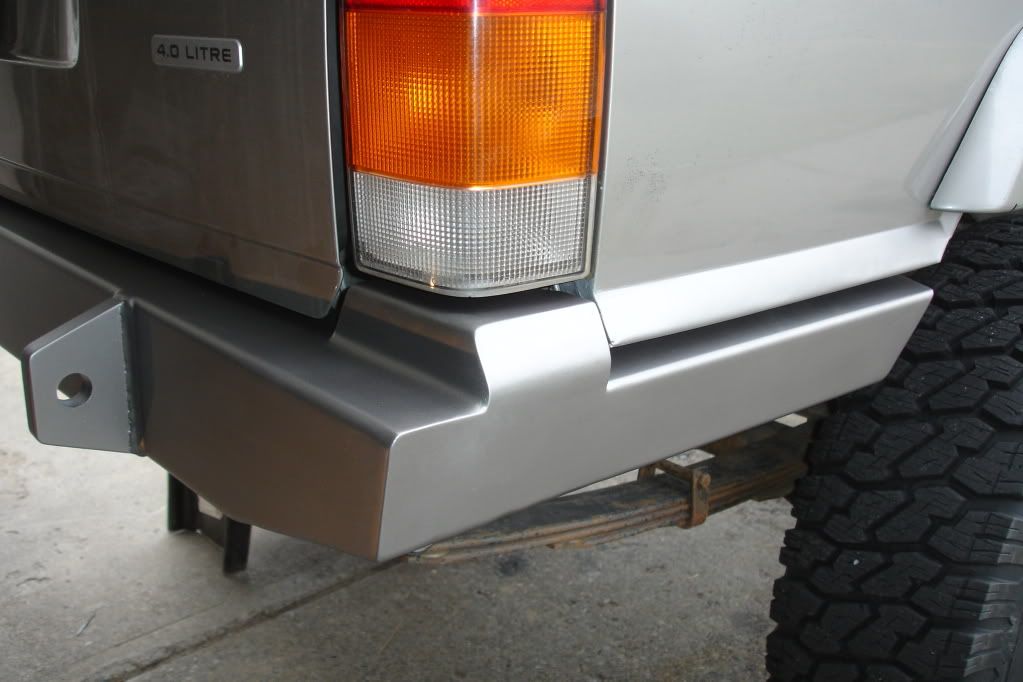
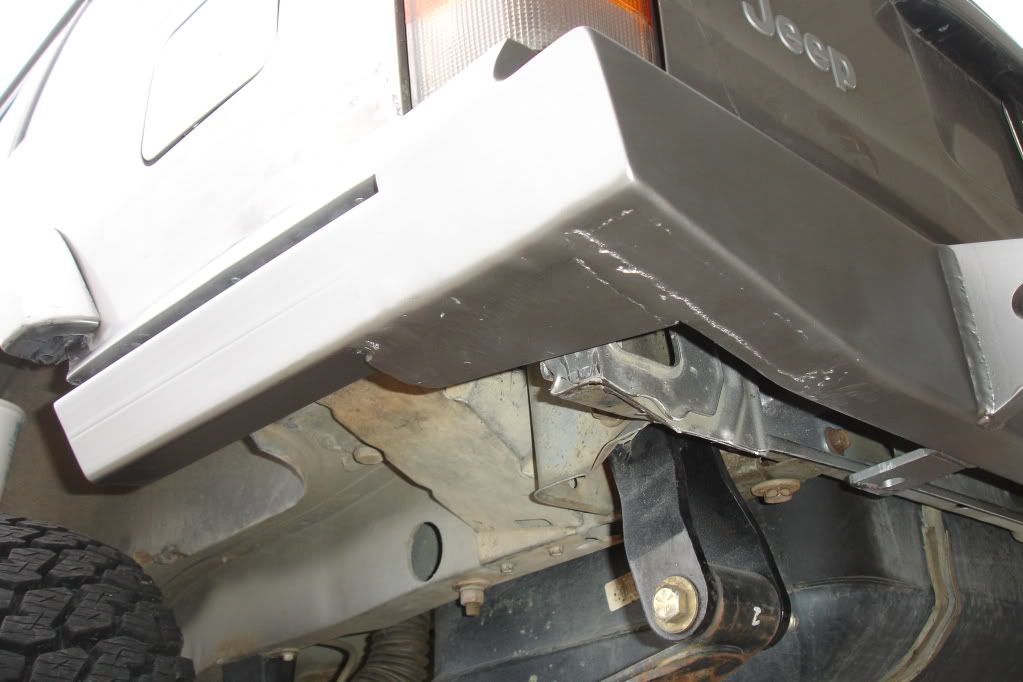
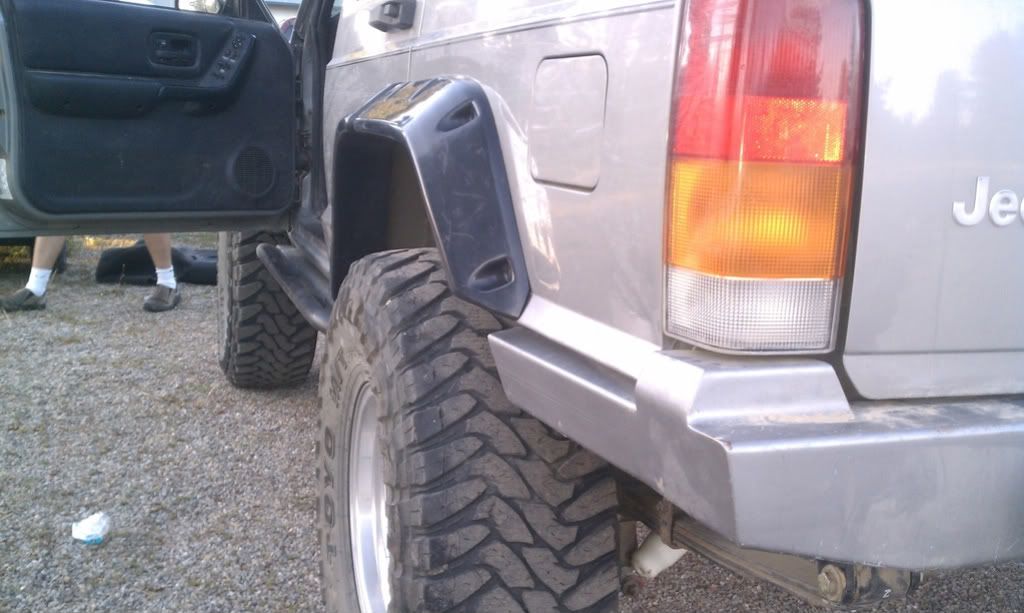
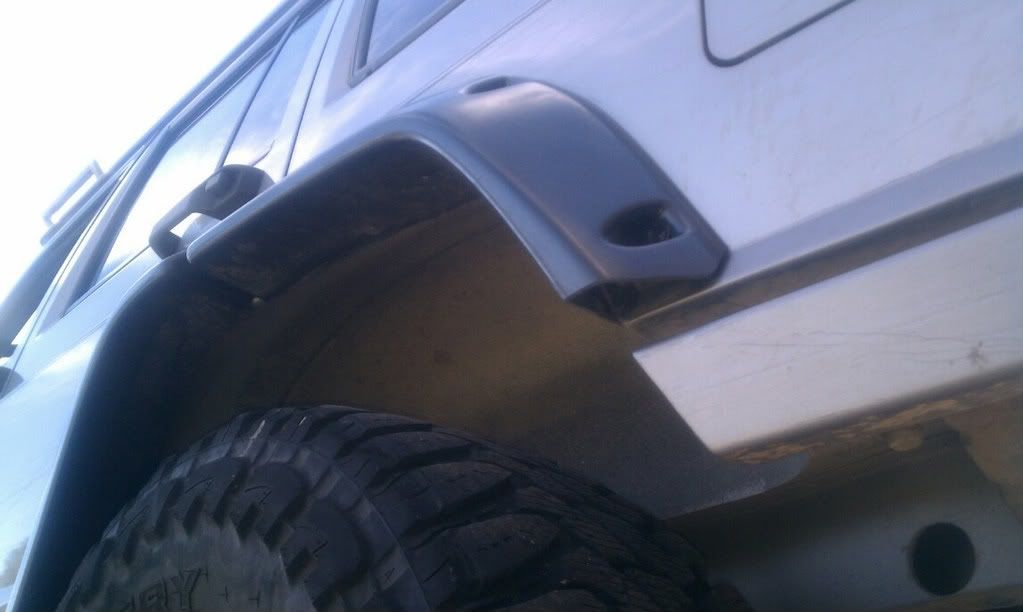
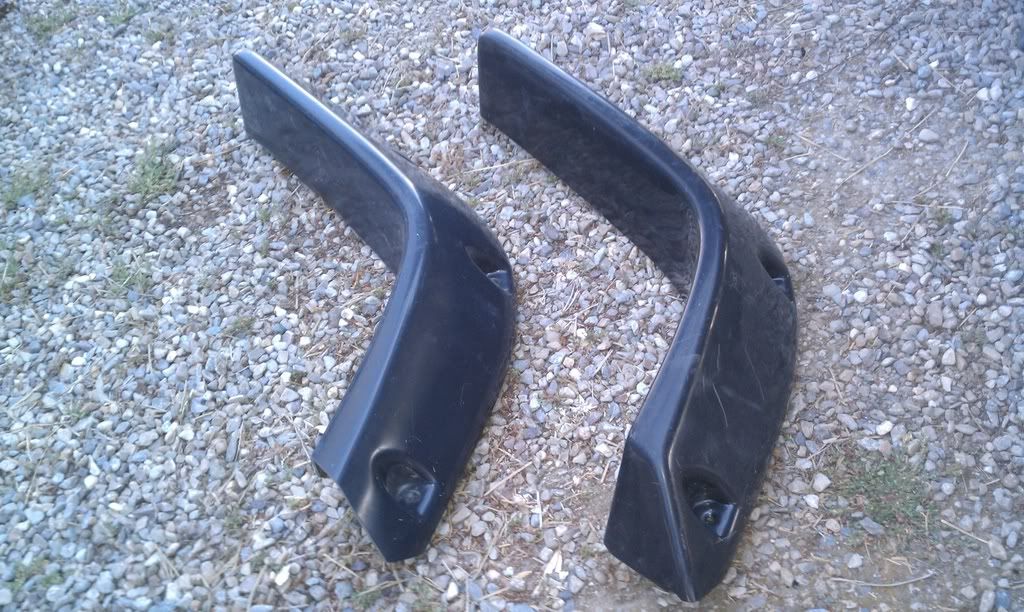
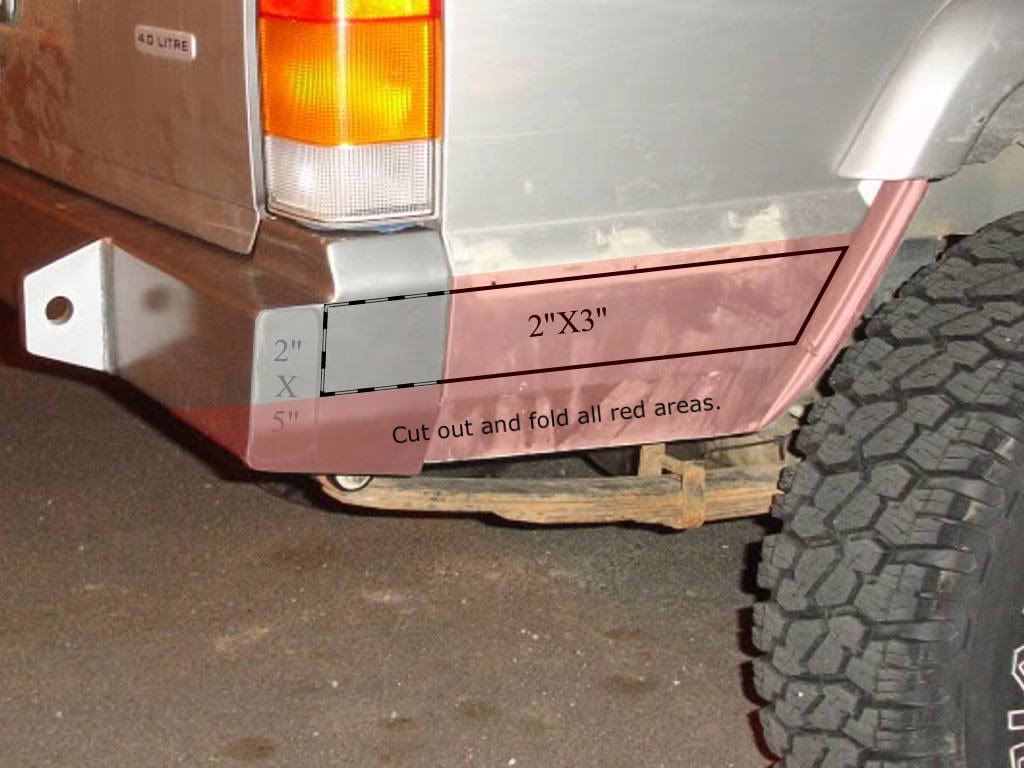
I originally planned on installing JCR Offroad Lower quarter panel armor along with their Stage 2 rear bumper I bought from them, but I wasn't at all happy with how bulky the corners were. So I decided to scrap the lower quarter armors and go with the much better cut and fold method and then modify the bumper ends to provide full protection for my quarter panels. I figured the extra work is well worth the clearance and protection I'm gaining. Here's my plan:
![Image]()
This entire process took me three hours, not including the seam sealer and the finish work. I will be providing precise measurements and explaining exactly where to cut and where to bend in a step by step, easy to follow color coded guide for those of you who want to do this mod, but aren't sure where to start and what all it entails.
TOOLS NEEDED:
Put the rear axle on jack stands or back up onto some ramps for easier access.
Remove the bumper using the 15mm socket.
Remove the gas fill hose cover panel and tail light housing using a10mm driver bit.
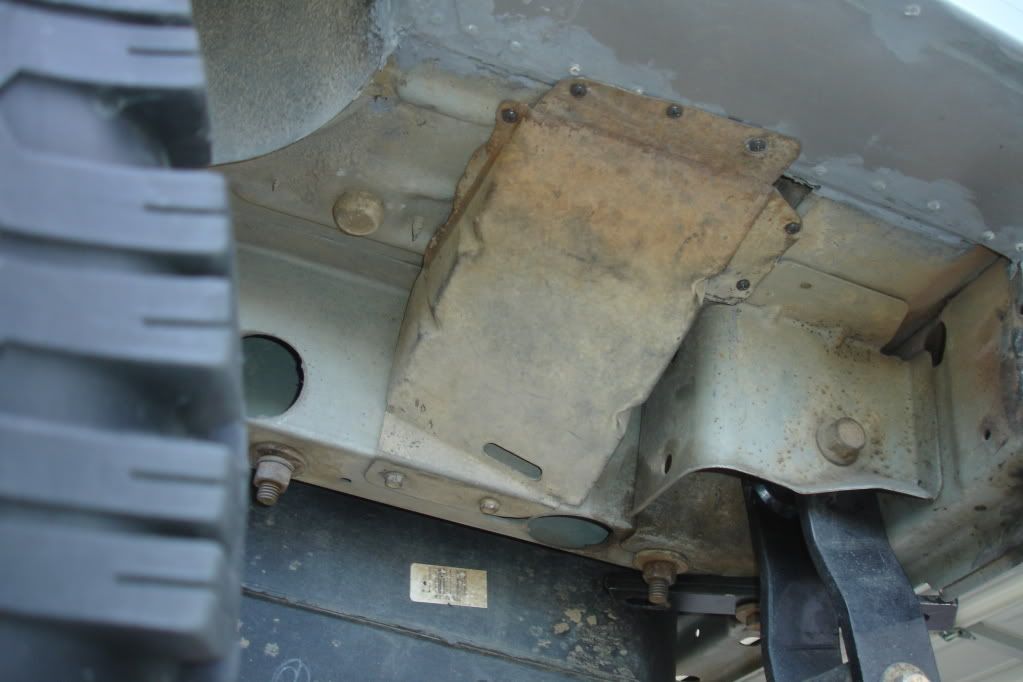
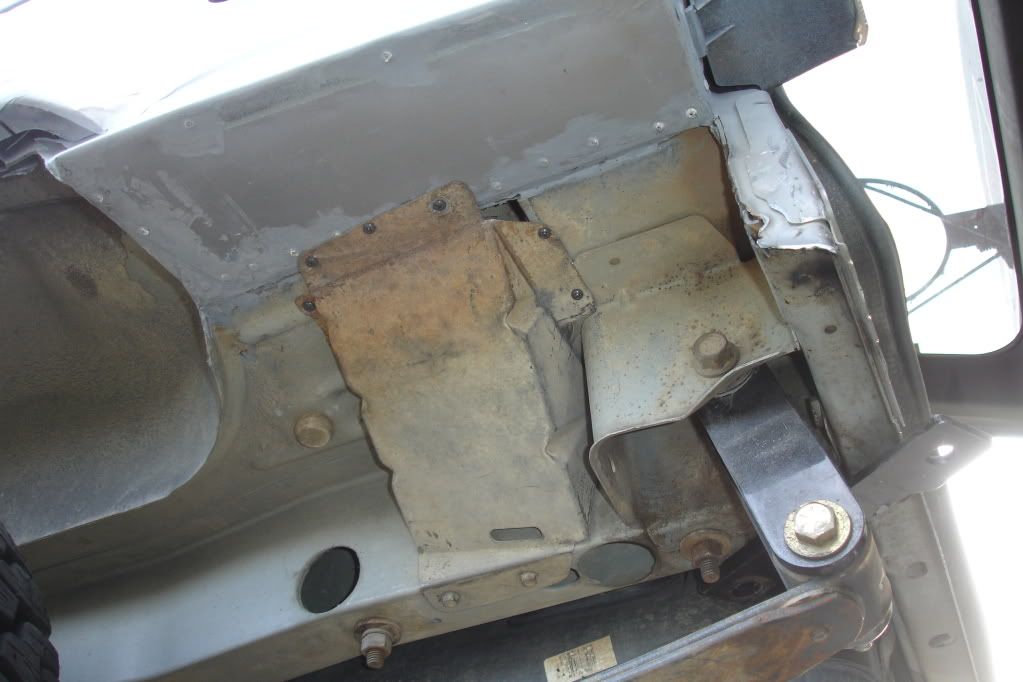
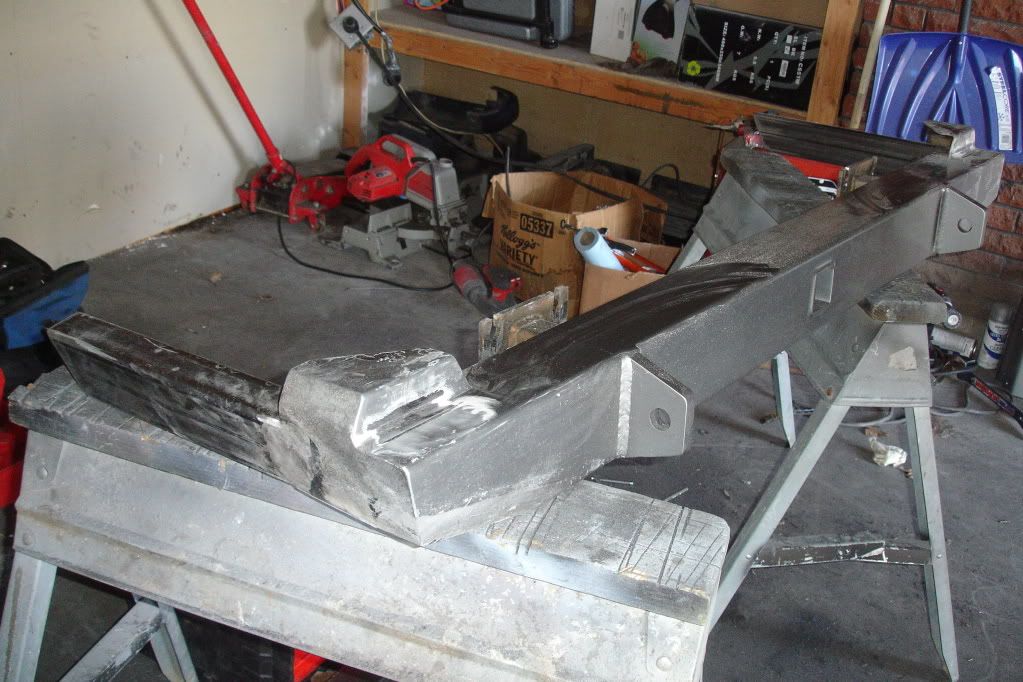
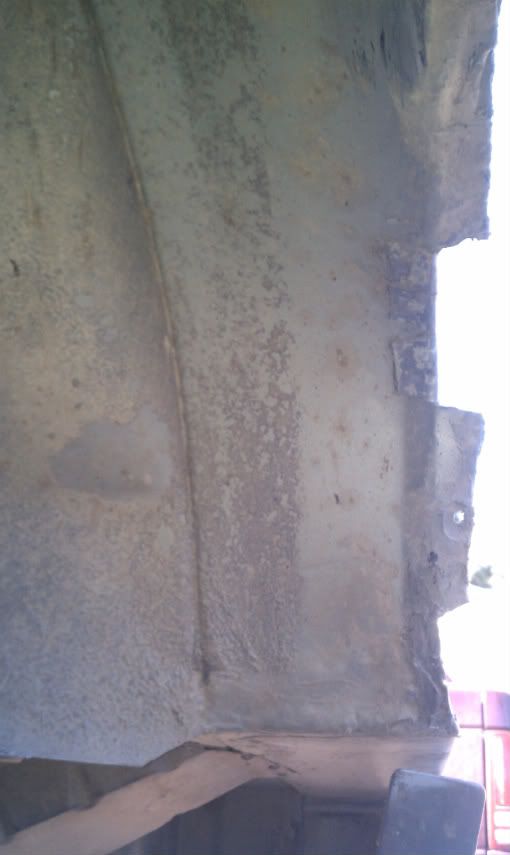
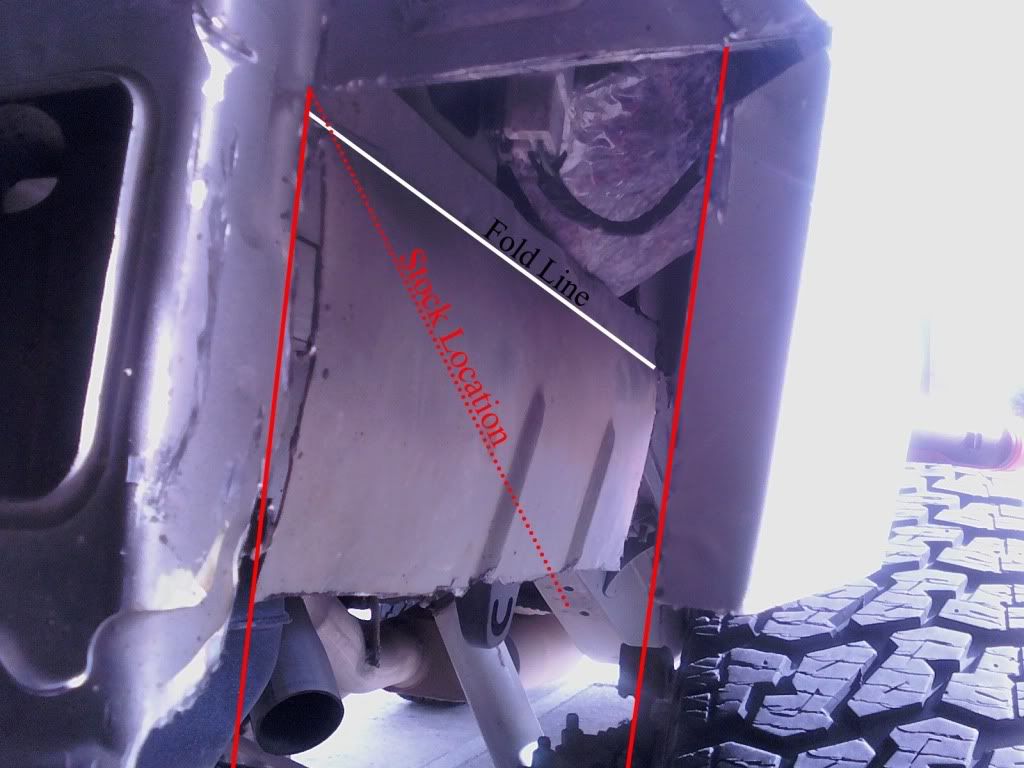
Cut all the way down along the bottom corner piece above the rear shackle and also all the way down along the rear weld seam. The dotted line here shows approximately where the inner piece was before I pushed it back to make my measurements.
![Image]()
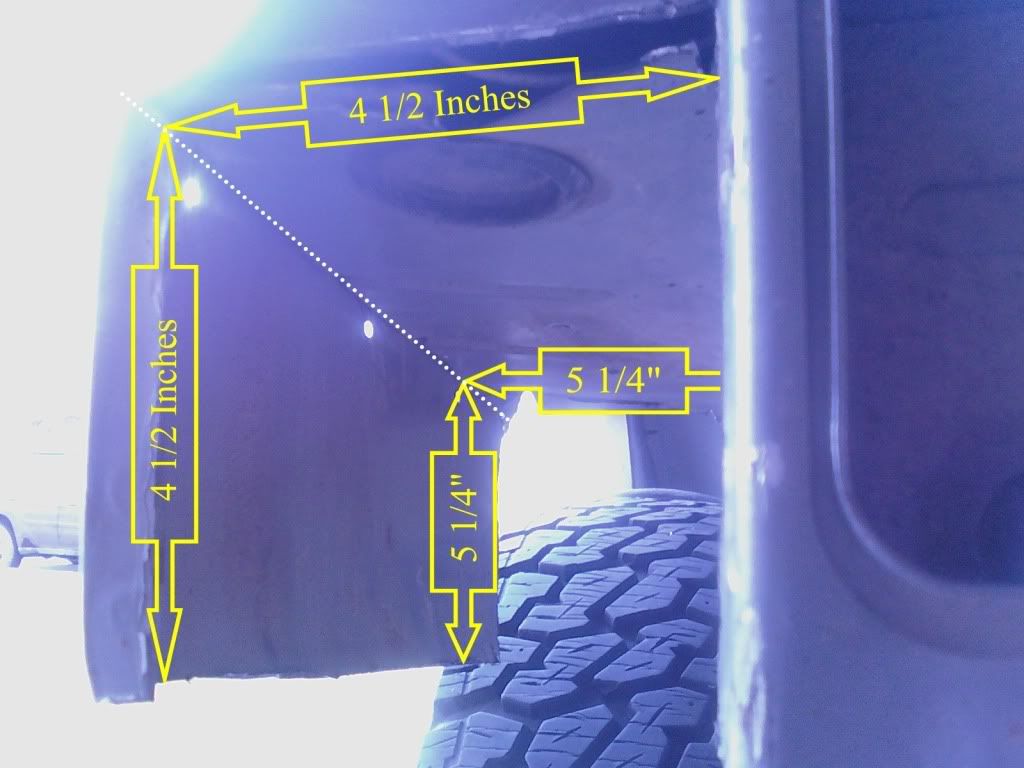
Mark your measurements on the outermost edges of the exterior panel. Take in consideration that you should double check these measurements as each XJ is likely slightly different. However, after removing all the material here, there is a bit of give either way, so these measurements I'm providing should be right on.
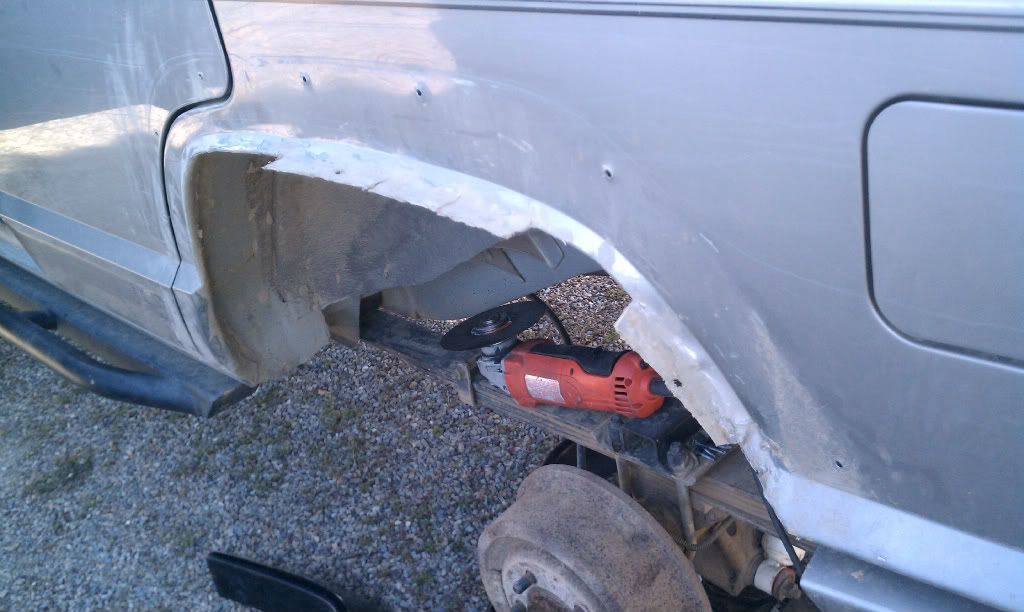
Use a length of tape to mark the cut line and make your cut.
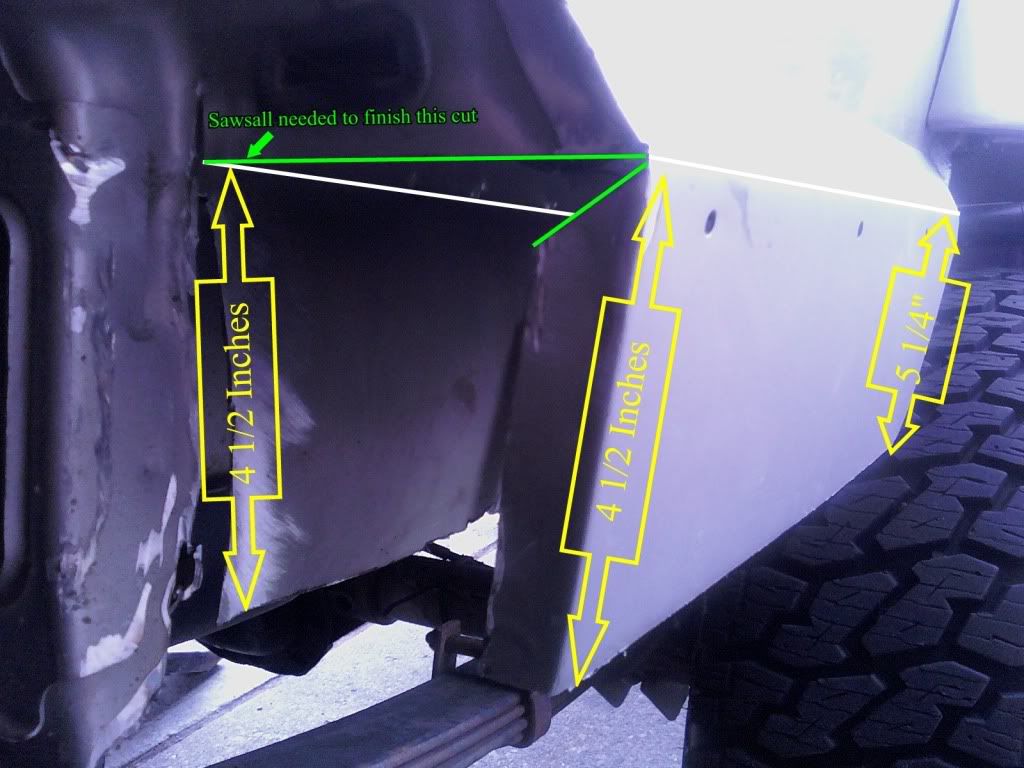
Cut horizontally level from the outer body line or bend line all the way into the corner. This was the only place I needed to use my sawsall. When making this cut, it is important that the actual cut line be approximately 1/16" higher than the outer bend line. This will take in account the thickness of the material and allow for a perfect outer finish bend.
Remove the material between the cuts. Make a short cut at about the angle shown so that there is no material hanging over after bending up the outer panel.
Apparently, I forgot to snap a couple photos, so you'll need to skip ahead and a couple to see where to cut off the front triangle so that you can push back the inner panel in order to make your measurements on it as well.
![Image]()
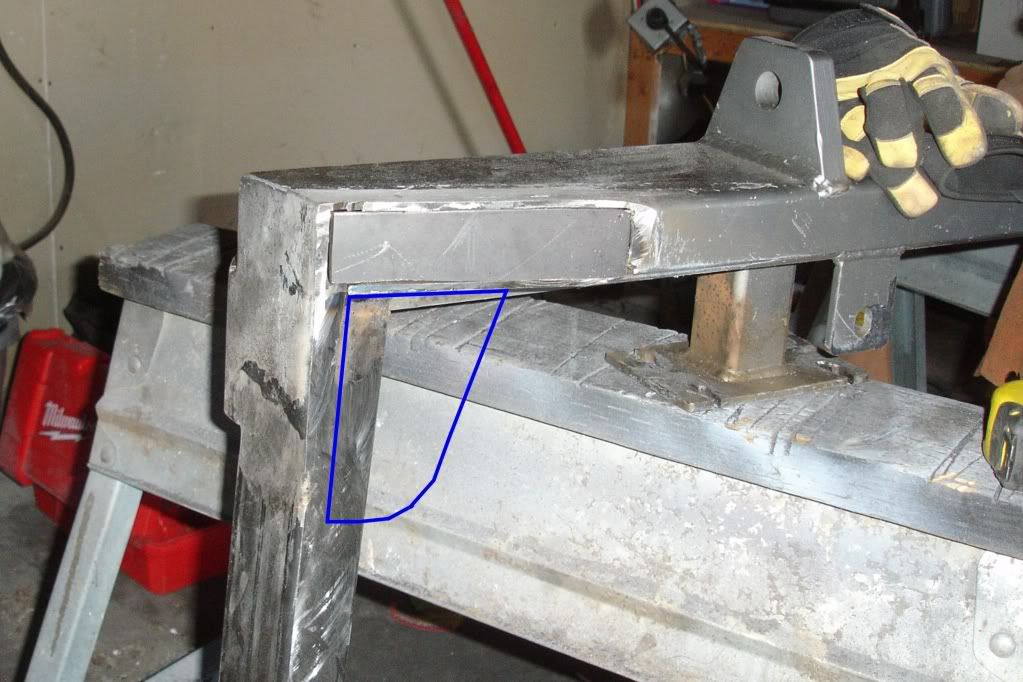
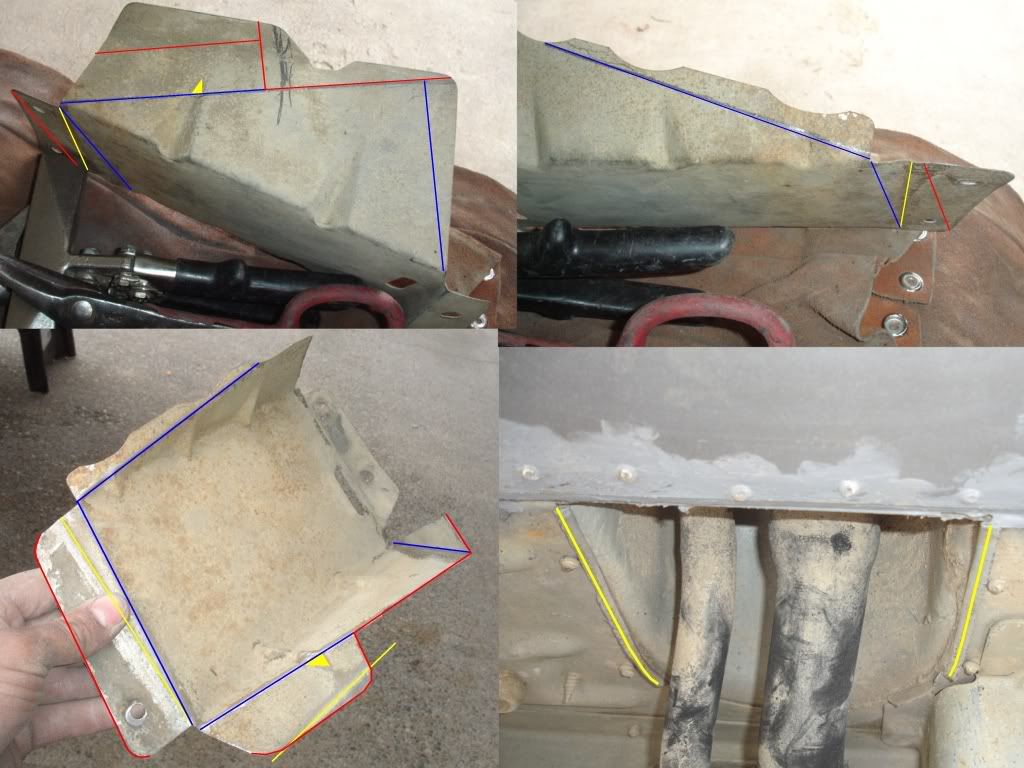
Make a line from the inner panel's bend line to the outer panel's bend line. This is represented by the dotted line. You are going to bend at this point up towards the rear, so don't cut it off there. Cut at least 1 1/4" below that line.
There are two strengthening ridges rolled into the factory inner panel. Be sure to grind those up a bit so that they do not interfere with the outer body panel after it is bent up into place.
Just in case someone notices, I should point out that I got ahead of myself on the passenger's side and cut straight across at 4 1/2" across that inner panel. The driver's side was done correctly. My mistake, your gain!
![Image]()
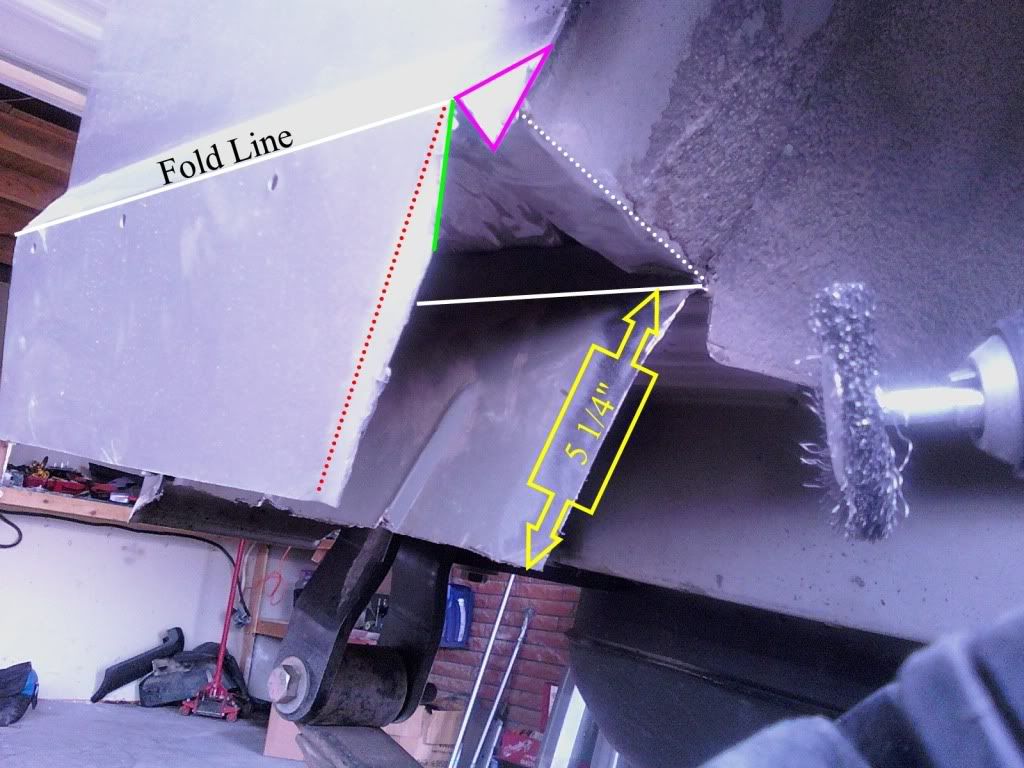
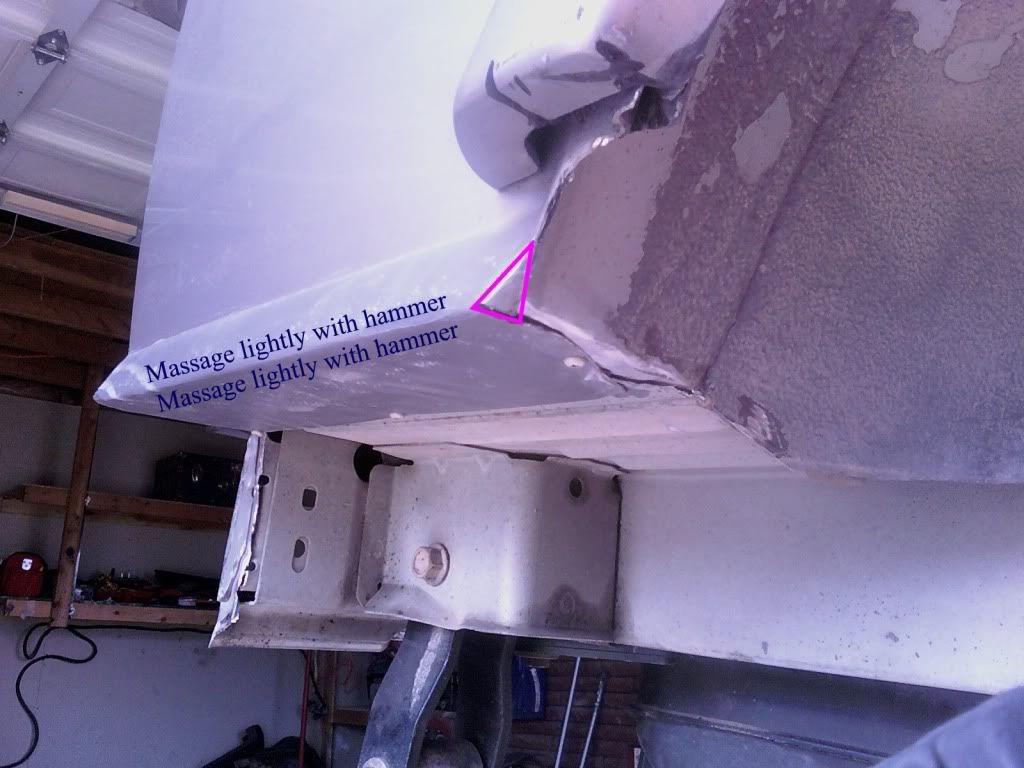
Bend it up making sure that it is approximately 1/16" higher than the inner and outer bend lines. This will again allow for a better fit after the inner and outer panels are bend up in to place.
Be sure to leave some material to bend underneath on this little triangle.
Cut straight down perpendicular to the outer bend line even with the front most edge you just bent up so that it folds under just right.
Flatten out the factory bend represented by the red dotted line.
![Image]()
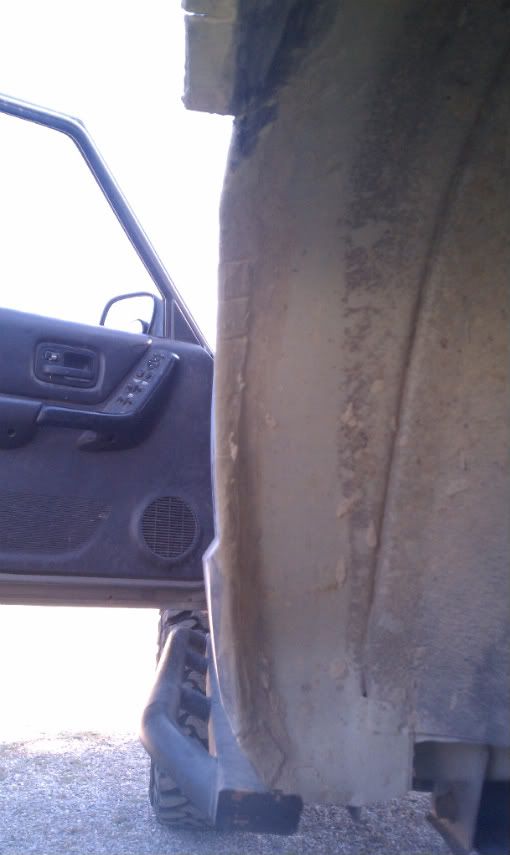
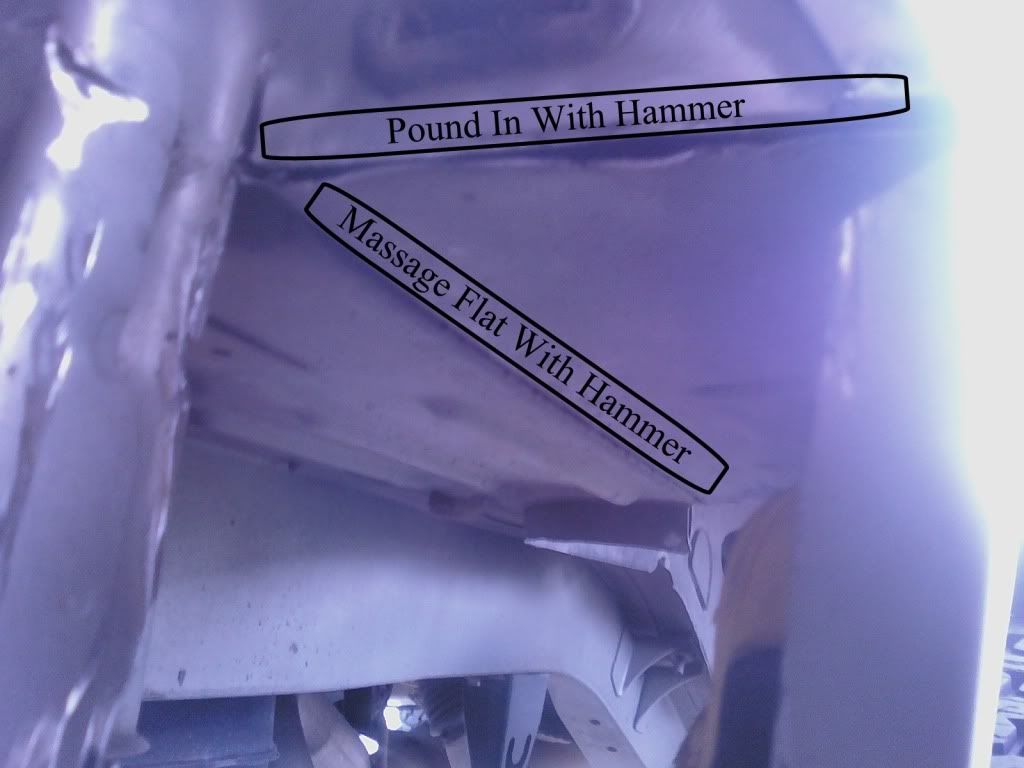
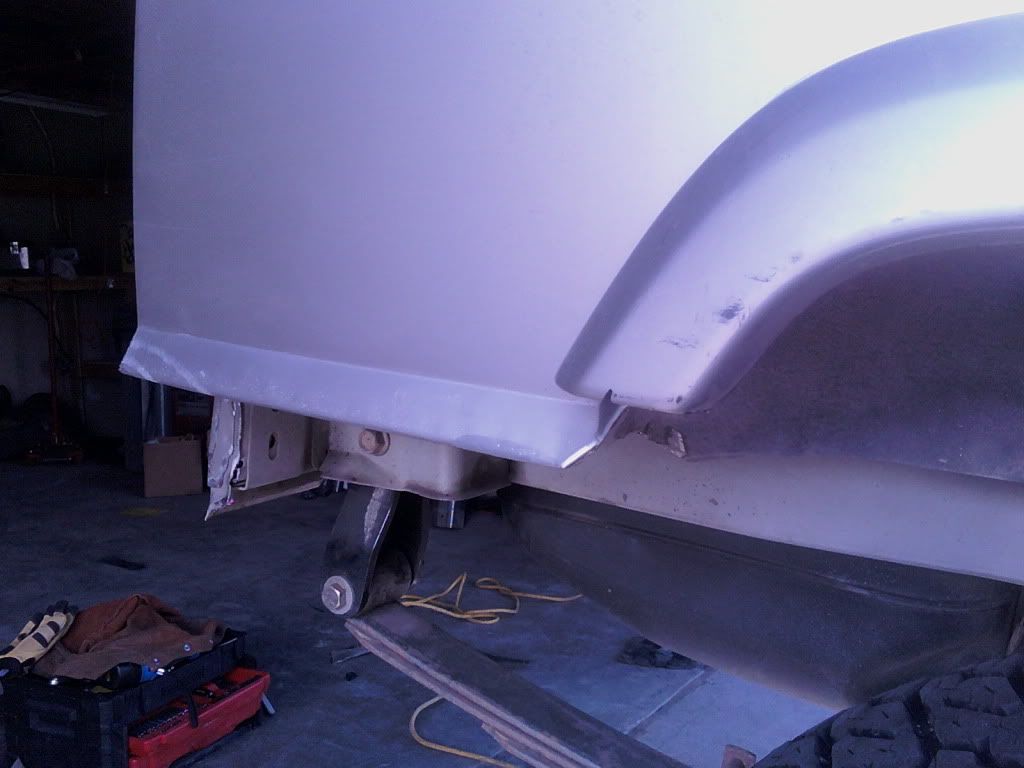
Bend up the inner panel by hand. Be sure it fits and then massage it into place with a body hammer.
Pound in the area just a bit below the taillight housing so that the outer panel will fold up into place properly.
![Image]()
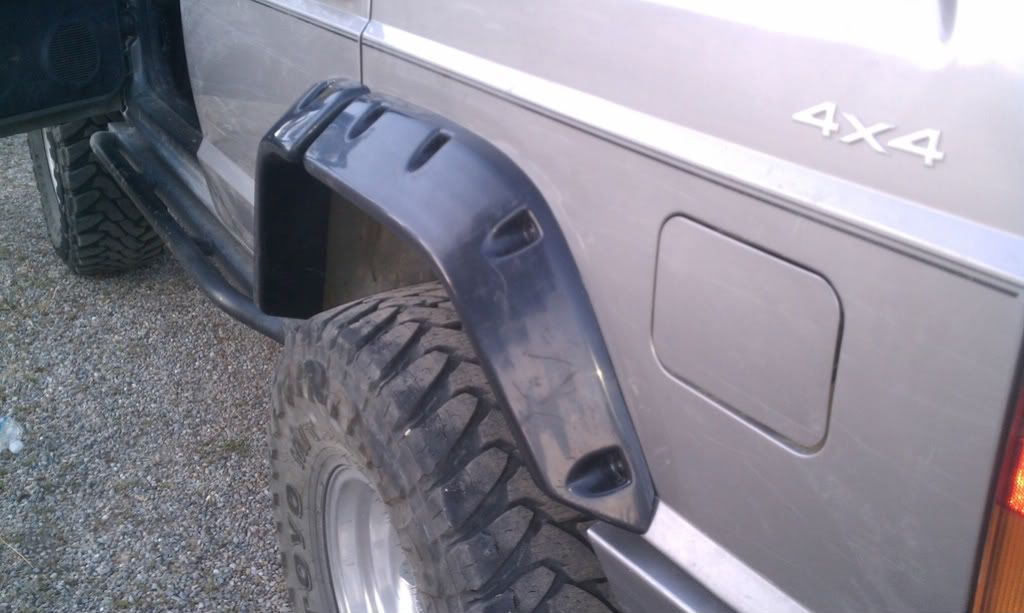
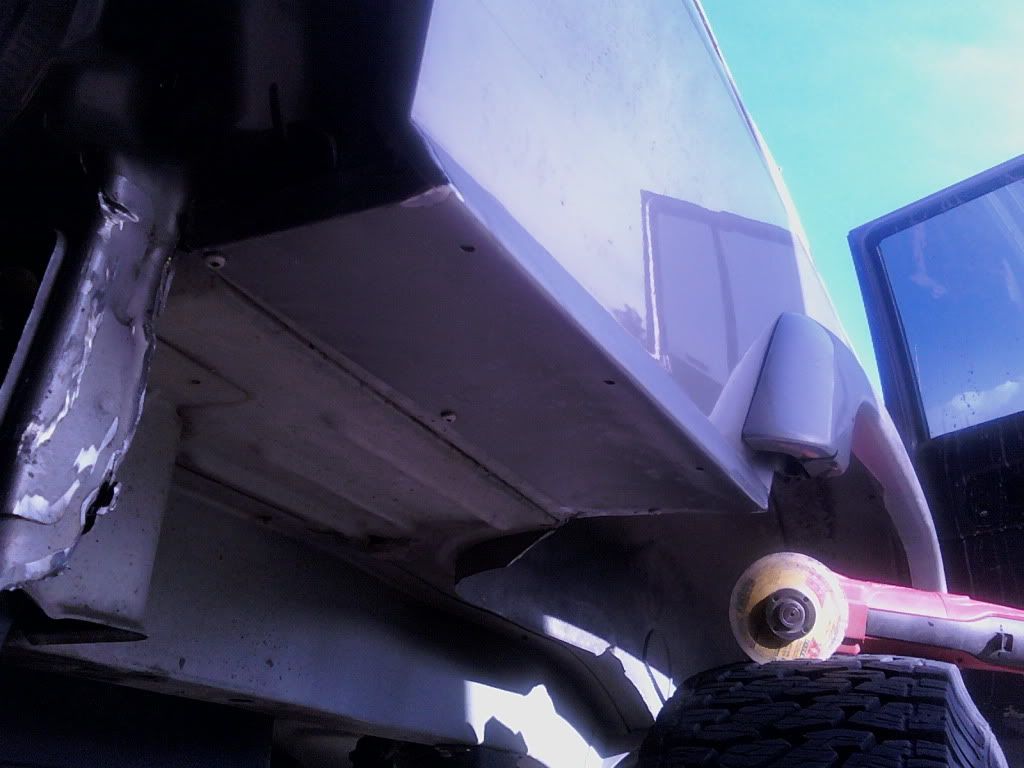
I thought I should include a couple shots of the driver's side. Take some time here so that you have a good fit with a straight edge inside that outer body line. By providing something to bend around, this will make bending up the outer panel much easier
![Image]()
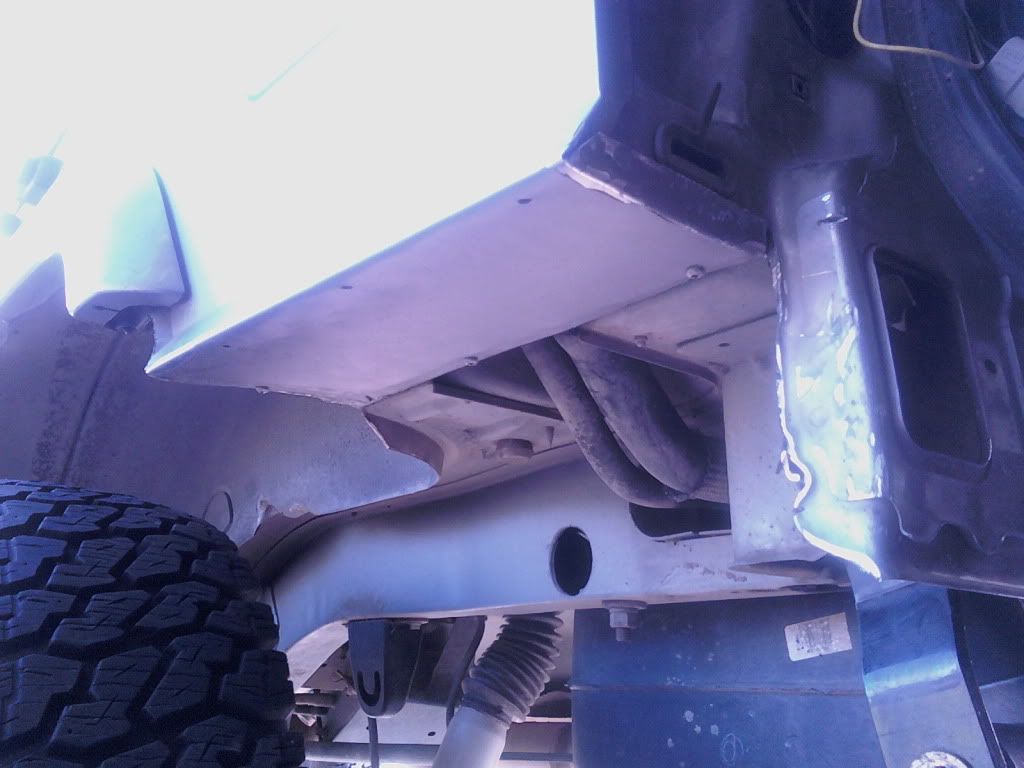
Before bending up the outer panel, take a minute to clean off all the areas that will be getting seam sealer with a wire wheel.
I found that by drilling a 1/8" hole through the bottom layer of sheet metal, I was able to suck together the two pieces with a sheet metal screw. I will go back through later with my pop rivet gun all around the perimeter of both sides. I'll replace those few screws with rivets too.
Once it is all secured, bend over that little triangle.
![Image]()
I'll replace these few pictures and update this guide after I get the pop rivets in and the seam sealer on.
![Image]()
![Image]()
![Image]()
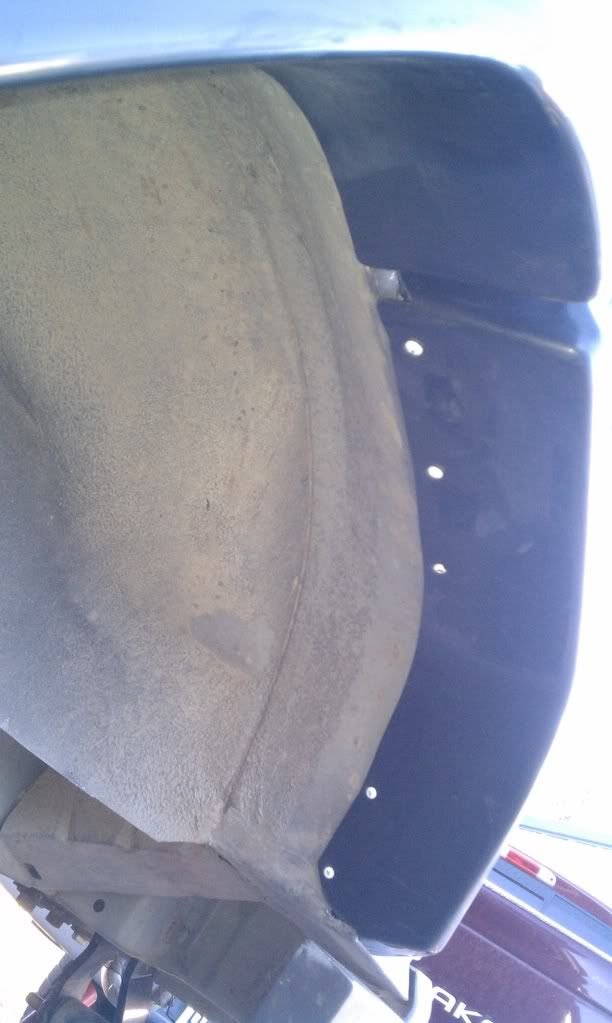
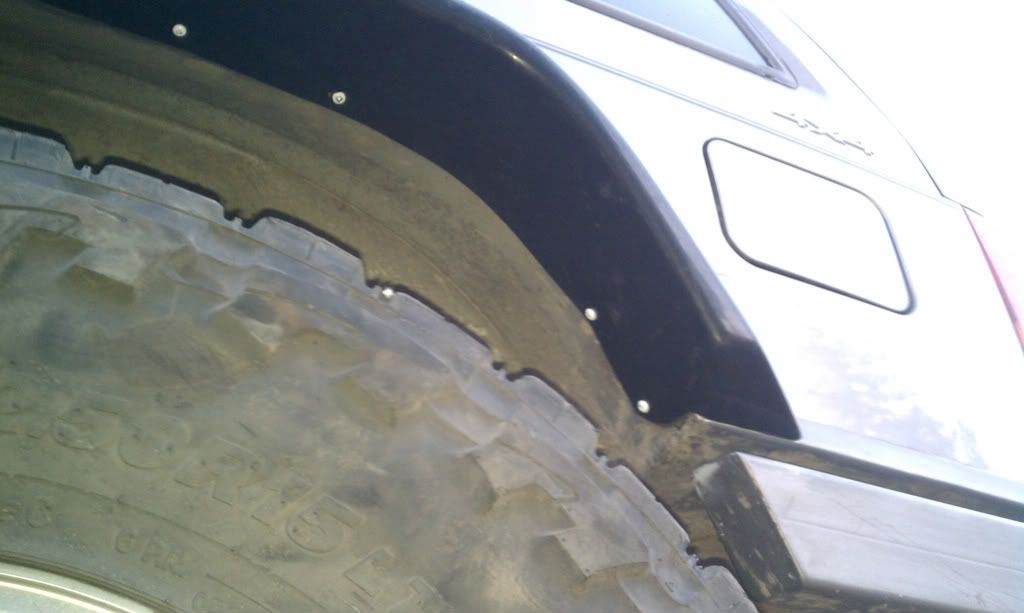
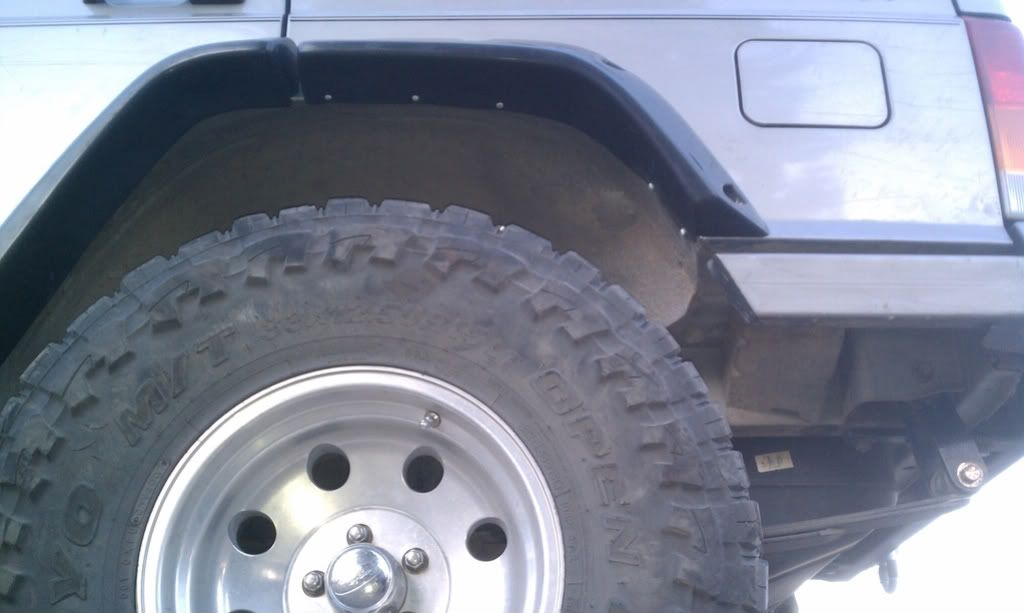
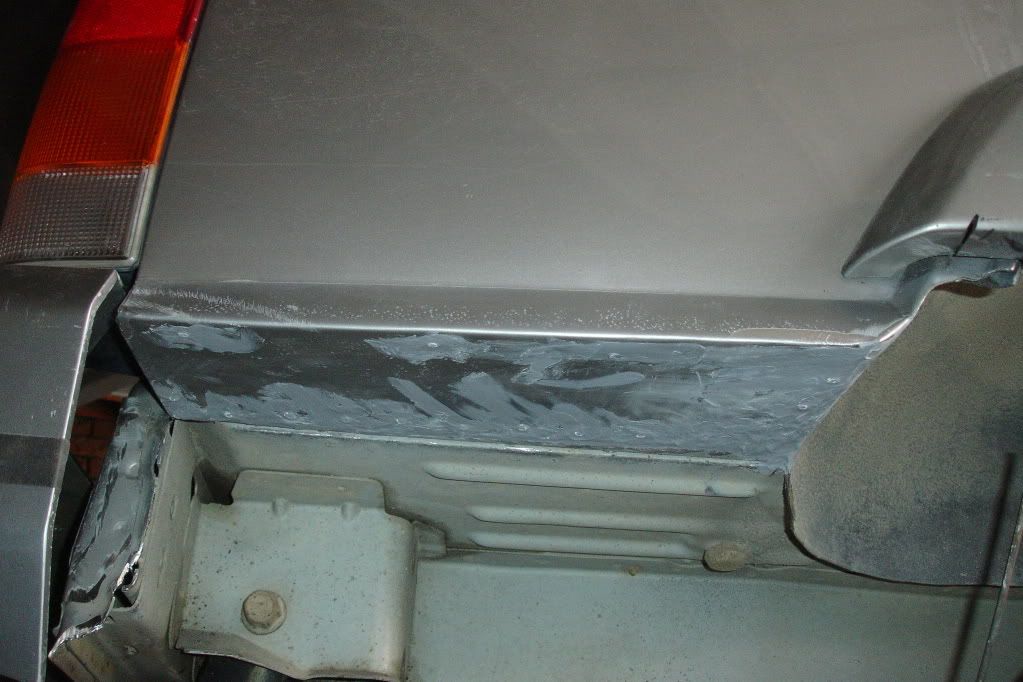
Seam Sealer and Pop Rivets installed. I'll make them look nice tomorrow.
EDIT: It would look much cleaner if the seam sealer was applied from the inside. I would have, but I didn't want to deal with taking apart the interior.
![Image]()
![Image]()
Gas Fill Lines Cover... CUT BEND FLATTEN
![Image]()
I opted to use some self-tapping sheet metal screws rather than pop rivets here since I had them readily available.
![Image]()
![Image]()
This entire process took me three hours, not including the seam sealer and the finish work. I will be providing precise measurements and explaining exactly where to cut and where to bend in a step by step, easy to follow color coded guide for those of you who want to do this mod, but aren't sure where to start and what all it entails.
TOOLS NEEDED:
- 15mm Socket & (Air)Wrench
- 10mm Socket or Driver Bit
- Jack Stands or Ramps
- Cutoff Wheel Either Numatic or Angle Grinder Type
- Sawsall or Hacksaw
- Abrasive Pad or Wire Wheel or Brush
- (Body)Hammer, Tape Measure, Marking Paint or Pencil
- Automotive Seam Sealer
- Pop Rivet Gun & Rivets and/or Self-Tapping Sheet Metal Screws & Drill
- Sandpaper, Body Filler(If Desired), Primer, Paint
Put the rear axle on jack stands or back up onto some ramps for easier access.
Remove the bumper using the 15mm socket.
Remove the gas fill hose cover panel and tail light housing using a10mm driver bit.
Cut all the way down along the bottom corner piece above the rear shackle and also all the way down along the rear weld seam. The dotted line here shows approximately where the inner piece was before I pushed it back to make my measurements.
Mark your measurements on the outermost edges of the exterior panel. Take in consideration that you should double check these measurements as each XJ is likely slightly different. However, after removing all the material here, there is a bit of give either way, so these measurements I'm providing should be right on.
Use a length of tape to mark the cut line and make your cut.
Cut horizontally level from the outer body line or bend line all the way into the corner. This was the only place I needed to use my sawsall. When making this cut, it is important that the actual cut line be approximately 1/16" higher than the outer bend line. This will take in account the thickness of the material and allow for a perfect outer finish bend.
Remove the material between the cuts. Make a short cut at about the angle shown so that there is no material hanging over after bending up the outer panel.
Apparently, I forgot to snap a couple photos, so you'll need to skip ahead and a couple to see where to cut off the front triangle so that you can push back the inner panel in order to make your measurements on it as well.
Make a line from the inner panel's bend line to the outer panel's bend line. This is represented by the dotted line. You are going to bend at this point up towards the rear, so don't cut it off there. Cut at least 1 1/4" below that line.
There are two strengthening ridges rolled into the factory inner panel. Be sure to grind those up a bit so that they do not interfere with the outer body panel after it is bent up into place.
Just in case someone notices, I should point out that I got ahead of myself on the passenger's side and cut straight across at 4 1/2" across that inner panel. The driver's side was done correctly. My mistake, your gain!

Bend it up making sure that it is approximately 1/16" higher than the inner and outer bend lines. This will again allow for a better fit after the inner and outer panels are bend up in to place.
Be sure to leave some material to bend underneath on this little triangle.
Cut straight down perpendicular to the outer bend line even with the front most edge you just bent up so that it folds under just right.
Flatten out the factory bend represented by the red dotted line.
Bend up the inner panel by hand. Be sure it fits and then massage it into place with a body hammer.
Pound in the area just a bit below the taillight housing so that the outer panel will fold up into place properly.
I thought I should include a couple shots of the driver's side. Take some time here so that you have a good fit with a straight edge inside that outer body line. By providing something to bend around, this will make bending up the outer panel much easier
Before bending up the outer panel, take a minute to clean off all the areas that will be getting seam sealer with a wire wheel.
I found that by drilling a 1/8" hole through the bottom layer of sheet metal, I was able to suck together the two pieces with a sheet metal screw. I will go back through later with my pop rivet gun all around the perimeter of both sides. I'll replace those few screws with rivets too.
Once it is all secured, bend over that little triangle.
I'll replace these few pictures and update this guide after I get the pop rivets in and the seam sealer on.
Seam Sealer and Pop Rivets installed. I'll make them look nice tomorrow.
EDIT: It would look much cleaner if the seam sealer was applied from the inside. I would have, but I didn't want to deal with taking apart the interior.

Gas Fill Lines Cover... CUT BEND FLATTEN
I opted to use some self-tapping sheet metal screws rather than pop rivets here since I had them readily available.