

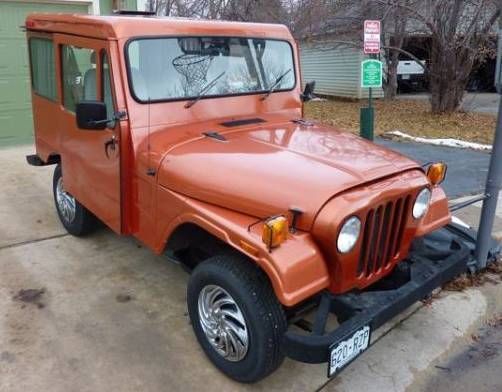
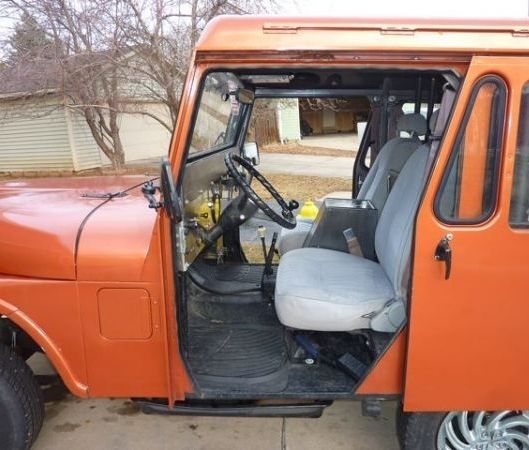
As a member for nearly five years and the owner of a LH Drive 83 AMC Postal Jeep, I have enjoyed lurking in the background looking forward to buying an XJ for use at our farm.
I have wanted to contribute to the forum where I could but never really felt I had any new information to offer that might benefit other members.
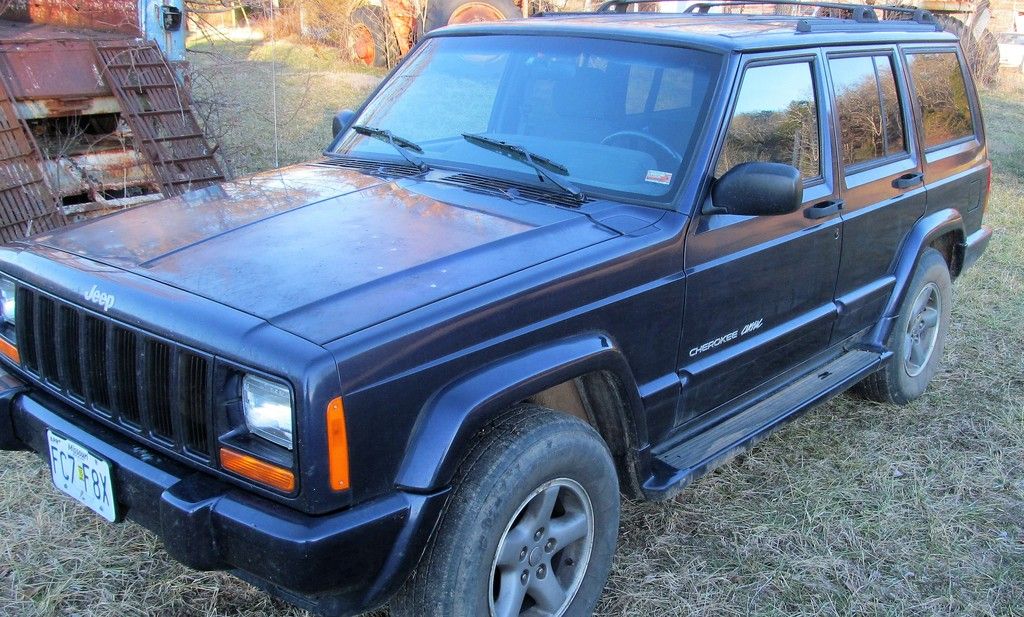
However, recently I purchased a one owner 1999 XJ Classic from a widow neighbor who is planning to move out of state and did not want to transport her Jeep. It has high miles but was serviced and maintained well. It appears to be a very solid Jeep purchased new and driven 16 years by the same woman. It has never seen any off-road use…just was driven on many rural dirt back roads and two lane black top.
Over the past month I have been repairing and replacing parts that needed attention on the XJ.
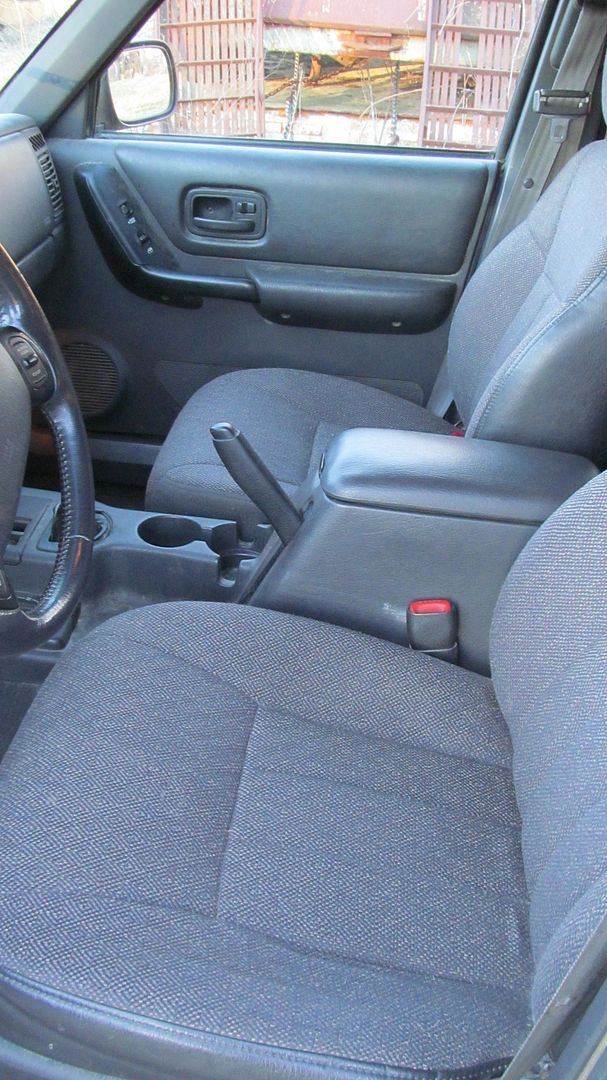
I am a retired 67 year old manufacturing engineer who is 6'4 and 255 lbs.. One of the first shortcomings I noticed on this XJ was the limited leg room in the front seat and the difficulty getting in and out of the four door driver's door. I simply needed more leg room.
I looked at the Misch Big Boy seat extensions for the XJ but felt the $150 for two pair of extensions for both seats was more than I wanted to spend for such simple brackets.
So I fired up an old CAD program, made some initial sketches from my seats and seat mounts and prepared a working drawing which I replicated in ¼ x 1" 1018 CRS.
One issue that came to light early was that the mounts of the factory seats are not totally consistent from one seat to the other or one track to the other. The variation in C/C distances from the mounting studs was not great, but it was more than I had expected. It is one reason why the Misch Mounts are slotted to account for this variation. However not everyone has a Bridgeport or bench mill in their shop, so I wanted to design something that was easy to reproduce on any conventional drill press.
If you don't have the tools or skill to read a dimensional drawing…then the Misch mounts remain your best option.
For those who can read a print and have a drill press at hand…then this thread will allow you to build your own brackets very economically. I have a total of less than $20 invested for both sets of mounts needed.
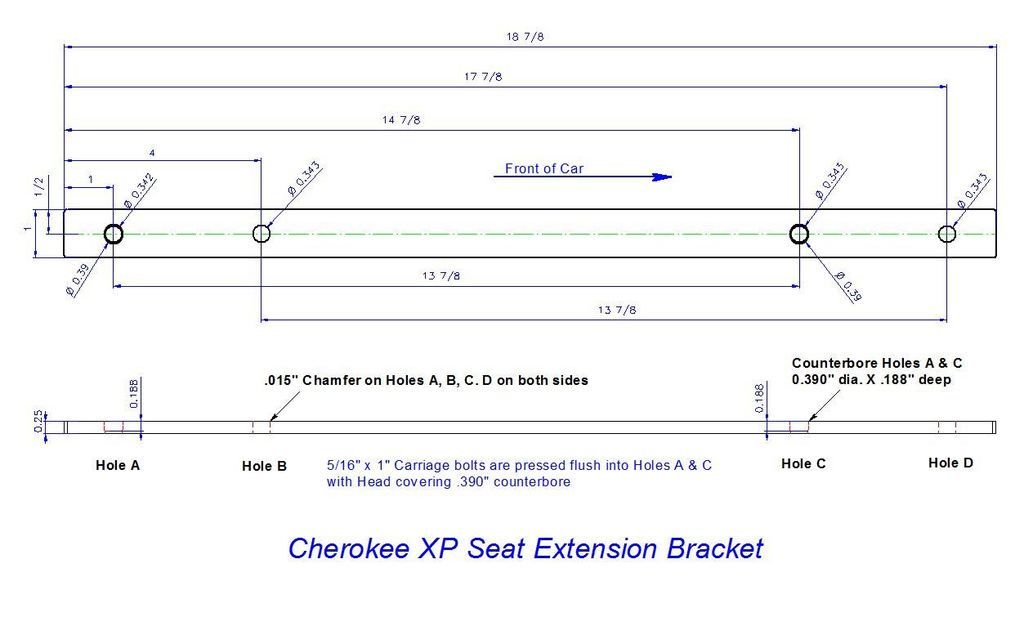
The drawing attached has all the necessary information needed to reproduce a set of mounts for both driver and passenger seats.
However there are a few details worthy of note before you start.
As mentioned earlier, Misch slotted the mounting holes to accommodate variations from one seat mount to another. But the slotted mounts also served a secondary purpose. That of securing 5/16" x 1" carriage bolts to allow tightening the matching lock nuts without requiring a second wrench on the backside to keep the carriage bolt head from turning. This works fine…but again, not everyone has a milling machine to produce the needed 5/16" wide slots.
There is an alternative method that will accomplish the same end result… using nothing more than a drill press and a bench vise.
The key is to insure all the thru holes are drilled to a .343" diameter using an 11/32 drill. The holes marked "B" and "D" require no further prepping, other than a light .015" chamfer on both sides to remove burrs.
However holes marked "A" & "C" are holes into which the 5/16" x1" carriage bolts will be pressed. In order to secure these bolts and prevent them from turning you simply need to prep these holes as follows:
- Drill thru hole with 11/32 drill.
- Drill a counter bore 3/16" deep using a 25/64 drill bit. This .390" diameter and .188" depth are critical to allow the square shoulder of the carriage bolt to press into place and prevent the bolt head from turning.
- After lightly deburring these holes…again with a .015" chamfer…you will see that the carriage bolt when placed into these counter bored holes will not sit flush on the 1018 CRS steel bar. The head will project about 1/16" above the face. That is what you want.
- You can then take a deep well 3/8 drive socket and place the socket over the body of the bolt and press the carriage bolt head into the bar using a hydraulic or hand press…or a simple bench vise.
- Once you apply pressure to the bolt head it will swage itself into the counter bored lip that was left between the .343" and .390" hole diameters…effectively locking the bolt head in place.
The Carriage bolt head is now locked in place.…without use of a slot or milling machine.
The rest of the drawing and attached pictures should be self-explanatory.
I hope that as my first contribution…other tall long legged XJ owners find this drawing helpful.


I have wanted to contribute to the forum where I could but never really felt I had any new information to offer that might benefit other members.
However, recently I purchased a one owner 1999 XJ Classic from a widow neighbor who is planning to move out of state and did not want to transport her Jeep. It has high miles but was serviced and maintained well. It appears to be a very solid Jeep purchased new and driven 16 years by the same woman. It has never seen any off-road use…just was driven on many rural dirt back roads and two lane black top.


Over the past month I have been repairing and replacing parts that needed attention on the XJ.
I am a retired 67 year old manufacturing engineer who is 6'4 and 255 lbs.. One of the first shortcomings I noticed on this XJ was the limited leg room in the front seat and the difficulty getting in and out of the four door driver's door. I simply needed more leg room.
I looked at the Misch Big Boy seat extensions for the XJ but felt the $150 for two pair of extensions for both seats was more than I wanted to spend for such simple brackets.
So I fired up an old CAD program, made some initial sketches from my seats and seat mounts and prepared a working drawing which I replicated in ¼ x 1" 1018 CRS.
One issue that came to light early was that the mounts of the factory seats are not totally consistent from one seat to the other or one track to the other. The variation in C/C distances from the mounting studs was not great, but it was more than I had expected. It is one reason why the Misch Mounts are slotted to account for this variation. However not everyone has a Bridgeport or bench mill in their shop, so I wanted to design something that was easy to reproduce on any conventional drill press.
If you don't have the tools or skill to read a dimensional drawing…then the Misch mounts remain your best option.
For those who can read a print and have a drill press at hand…then this thread will allow you to build your own brackets very economically. I have a total of less than $20 invested for both sets of mounts needed.
The drawing attached has all the necessary information needed to reproduce a set of mounts for both driver and passenger seats.
However there are a few details worthy of note before you start.
As mentioned earlier, Misch slotted the mounting holes to accommodate variations from one seat mount to another. But the slotted mounts also served a secondary purpose. That of securing 5/16" x 1" carriage bolts to allow tightening the matching lock nuts without requiring a second wrench on the backside to keep the carriage bolt head from turning. This works fine…but again, not everyone has a milling machine to produce the needed 5/16" wide slots.
There is an alternative method that will accomplish the same end result… using nothing more than a drill press and a bench vise.
The key is to insure all the thru holes are drilled to a .343" diameter using an 11/32 drill. The holes marked "B" and "D" require no further prepping, other than a light .015" chamfer on both sides to remove burrs.
However holes marked "A" & "C" are holes into which the 5/16" x1" carriage bolts will be pressed. In order to secure these bolts and prevent them from turning you simply need to prep these holes as follows:
- Drill thru hole with 11/32 drill.
- Drill a counter bore 3/16" deep using a 25/64 drill bit. This .390" diameter and .188" depth are critical to allow the square shoulder of the carriage bolt to press into place and prevent the bolt head from turning.
- After lightly deburring these holes…again with a .015" chamfer…you will see that the carriage bolt when placed into these counter bored holes will not sit flush on the 1018 CRS steel bar. The head will project about 1/16" above the face. That is what you want.
- You can then take a deep well 3/8 drive socket and place the socket over the body of the bolt and press the carriage bolt head into the bar using a hydraulic or hand press…or a simple bench vise.
- Once you apply pressure to the bolt head it will swage itself into the counter bored lip that was left between the .343" and .390" hole diameters…effectively locking the bolt head in place.
The Carriage bolt head is now locked in place.…without use of a slot or milling machine.
The rest of the drawing and attached pictures should be self-explanatory.
I hope that as my first contribution…other tall long legged XJ owners find this drawing helpful.


