I have successfully avoided ANY body work other then that which can be 'fixed' with a 2# sledge.
NOT ONE body mount have I had to replace or deal with in over 9 CJ's going back to my first vehicle / CJ - A 1969 Flat Head 4 cyl CJ-5.
39 years of continuous ownership of Jeeps and not once was I reasonably convinced to do anything about those hokey pucks.
And yes, I did have one 'emergency' CJ-5 that the PO drilled-out and used real hockey pucks - smoooooth ride that one.
So, with heavy heart and sober mind (don't blame me, my liver and I are not on speaking terms...), I undertake to replace all 9 on my 1984 CJ-7.
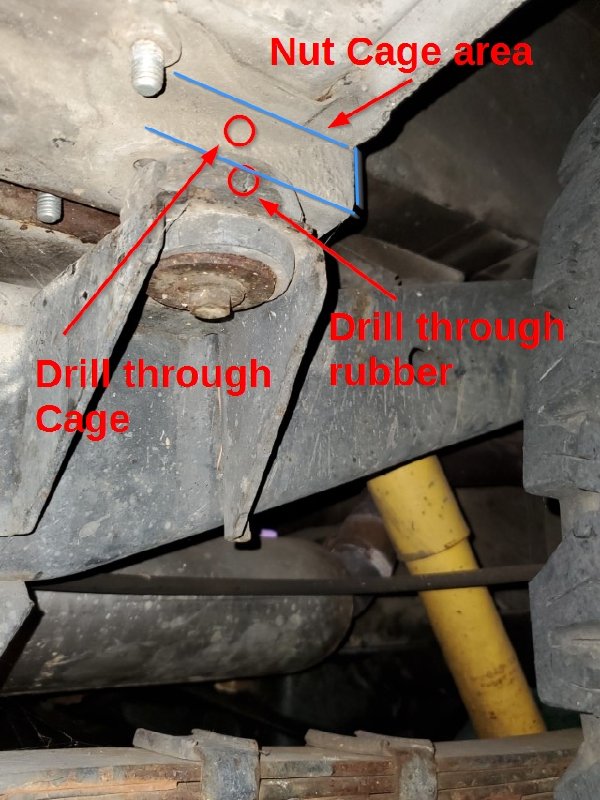
This is from https://www.jeepforum.com/forum/f8/ad...me-up-1363422/ and embodies my great fear:
![Image]()
See those words - patch, weld, nut cage - ALL of that scares me - especially that last bit.
(SIDE NOTE: By the way, this guys, acgcoug, is either a master craftsman or crazy - you should read his entire rebuild page - WOW! When you get done, you'll be convinced he can fix anything with a grinder, some flakes of rust, four baby wipes and about $10k - a miracle worker.)
I've taken the sage advice of Keith (and others) and went rubber (over poly) and stainless steel with this kit:
![Image]()
It's pricey and not completely original (SS thick fender washers are tough to source I guess) but otherwise seems just fine.
So, now the reason for this wind-bag post - how to get these do-whatever-you-can-not-to-snap-off-bolts out.
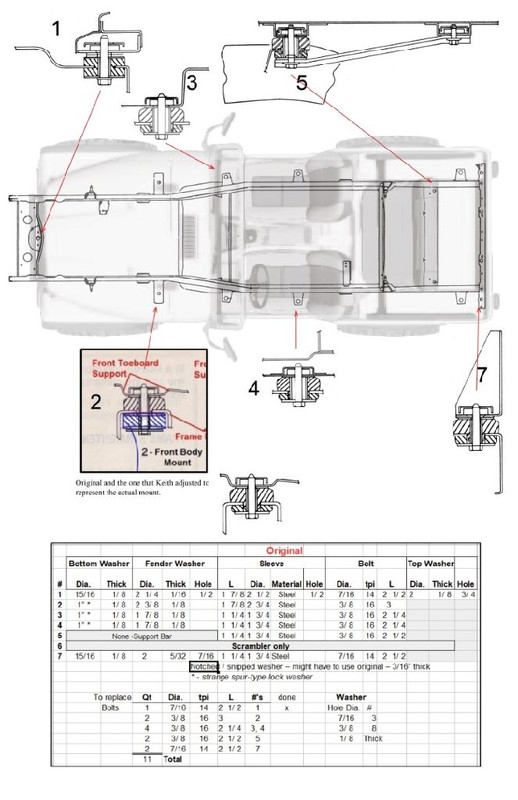
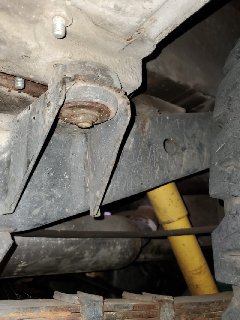
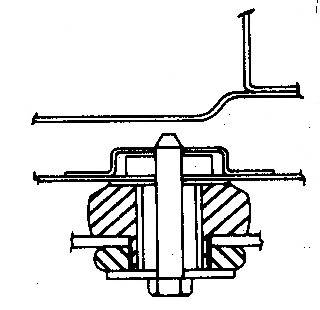
Quick pic of my existing mounts and the corresponding schematic from the manual so you can see the condition there in:
![Image]()
![Image]()
I got two on the passenger side off pretty easy (#2 and #3).
But the other's don't seem to be willing to meet their fate. These appear to be all original without salt problems (thanks California!)
Because of the way the steel sleeve goes around the bolts, shooting it with WD-40 is impossible.
Anybody have any good strategies. I was thinking of taking a sharp sacrificial chisel to the rubber to get it removed then use a MAP torch to heat up the bolt and see if that helps.
Any ideas?
NOT ONE body mount have I had to replace or deal with in over 9 CJ's going back to my first vehicle / CJ - A 1969 Flat Head 4 cyl CJ-5.
39 years of continuous ownership of Jeeps and not once was I reasonably convinced to do anything about those hokey pucks.
And yes, I did have one 'emergency' CJ-5 that the PO drilled-out and used real hockey pucks - smoooooth ride that one.
So, with heavy heart and sober mind (don't blame me, my liver and I are not on speaking terms...), I undertake to replace all 9 on my 1984 CJ-7.
This is from https://www.jeepforum.com/forum/f8/ad...me-up-1363422/ and embodies my great fear:
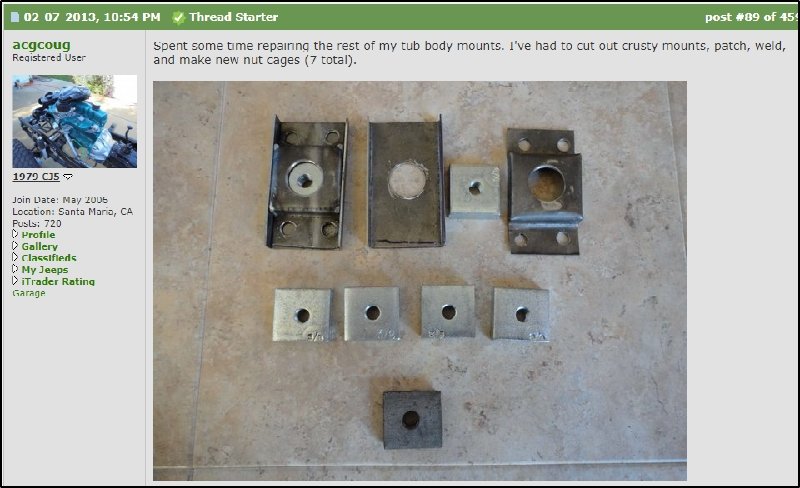
See those words - patch, weld, nut cage - ALL of that scares me - especially that last bit.
(SIDE NOTE: By the way, this guys, acgcoug, is either a master craftsman or crazy - you should read his entire rebuild page - WOW! When you get done, you'll be convinced he can fix anything with a grinder, some flakes of rust, four baby wipes and about $10k - a miracle worker.)
I've taken the sage advice of Keith (and others) and went rubber (over poly) and stainless steel with this kit:
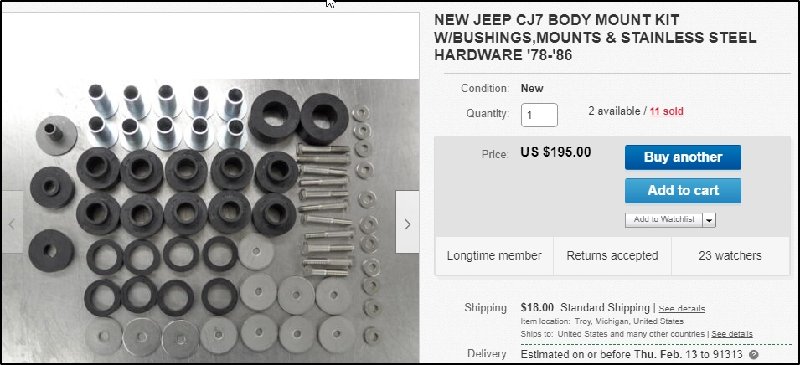
It's pricey and not completely original (SS thick fender washers are tough to source I guess) but otherwise seems just fine.
So, now the reason for this wind-bag post - how to get these do-whatever-you-can-not-to-snap-off-bolts out.
Quick pic of my existing mounts and the corresponding schematic from the manual so you can see the condition there in:
I got two on the passenger side off pretty easy (#2 and #3).
But the other's don't seem to be willing to meet their fate. These appear to be all original without salt problems (thanks California!)
Because of the way the steel sleeve goes around the bolts, shooting it with WD-40 is impossible.
Anybody have any good strategies. I was thinking of taking a sharp sacrificial chisel to the rubber to get it removed then use a MAP torch to heat up the bolt and see if that helps.
Any ideas?