In this thread, I am going to remove and restore the Heater Box and Fresh Air Duct from my 1979 CJ7. I want to start by thanking all of the contributors to the previously posted thread on this topic as it jumpstarted my research and really pointed me in the correct direction. That thread spanned over 8 years and the solutions changes with new contributors offering alternatives. I have collected all of those thought here and have executed what I thought were the best ideas.
The original thread can be reviewed here:
https://www.jeepforum.com/forum/f8/cj-heater-box-restoration-pic-heavy-975999/
That thread is about 8 years old and throughout the years many contributors continually provided great suggestions and new alternatives to the restoration of these units. I took many notes and pulled what I thought was the best options and applied them to my restoration.
UPGRADE INCLUDED DURING THIS RESTORATION
There are several items that will be fixed or upgrade during this process. Here is a short list of those items
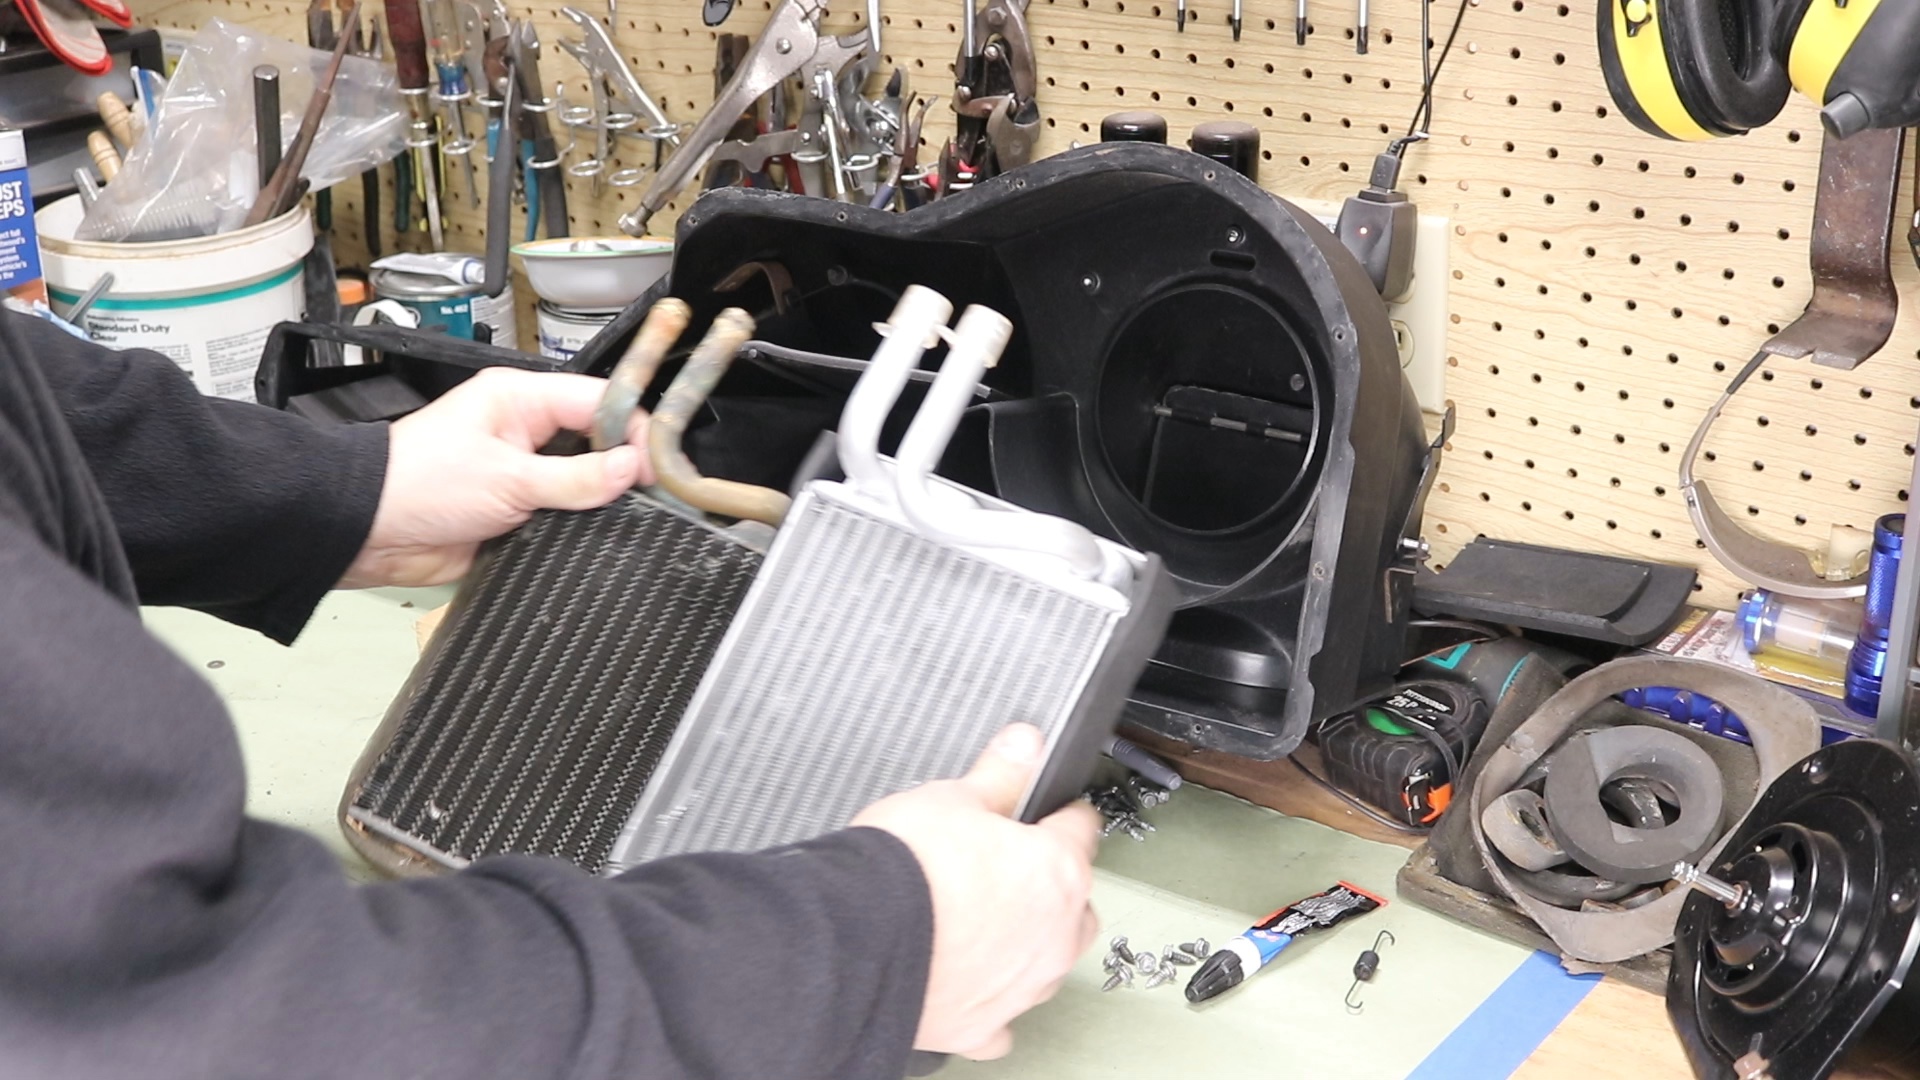
• Heater Core Replacement
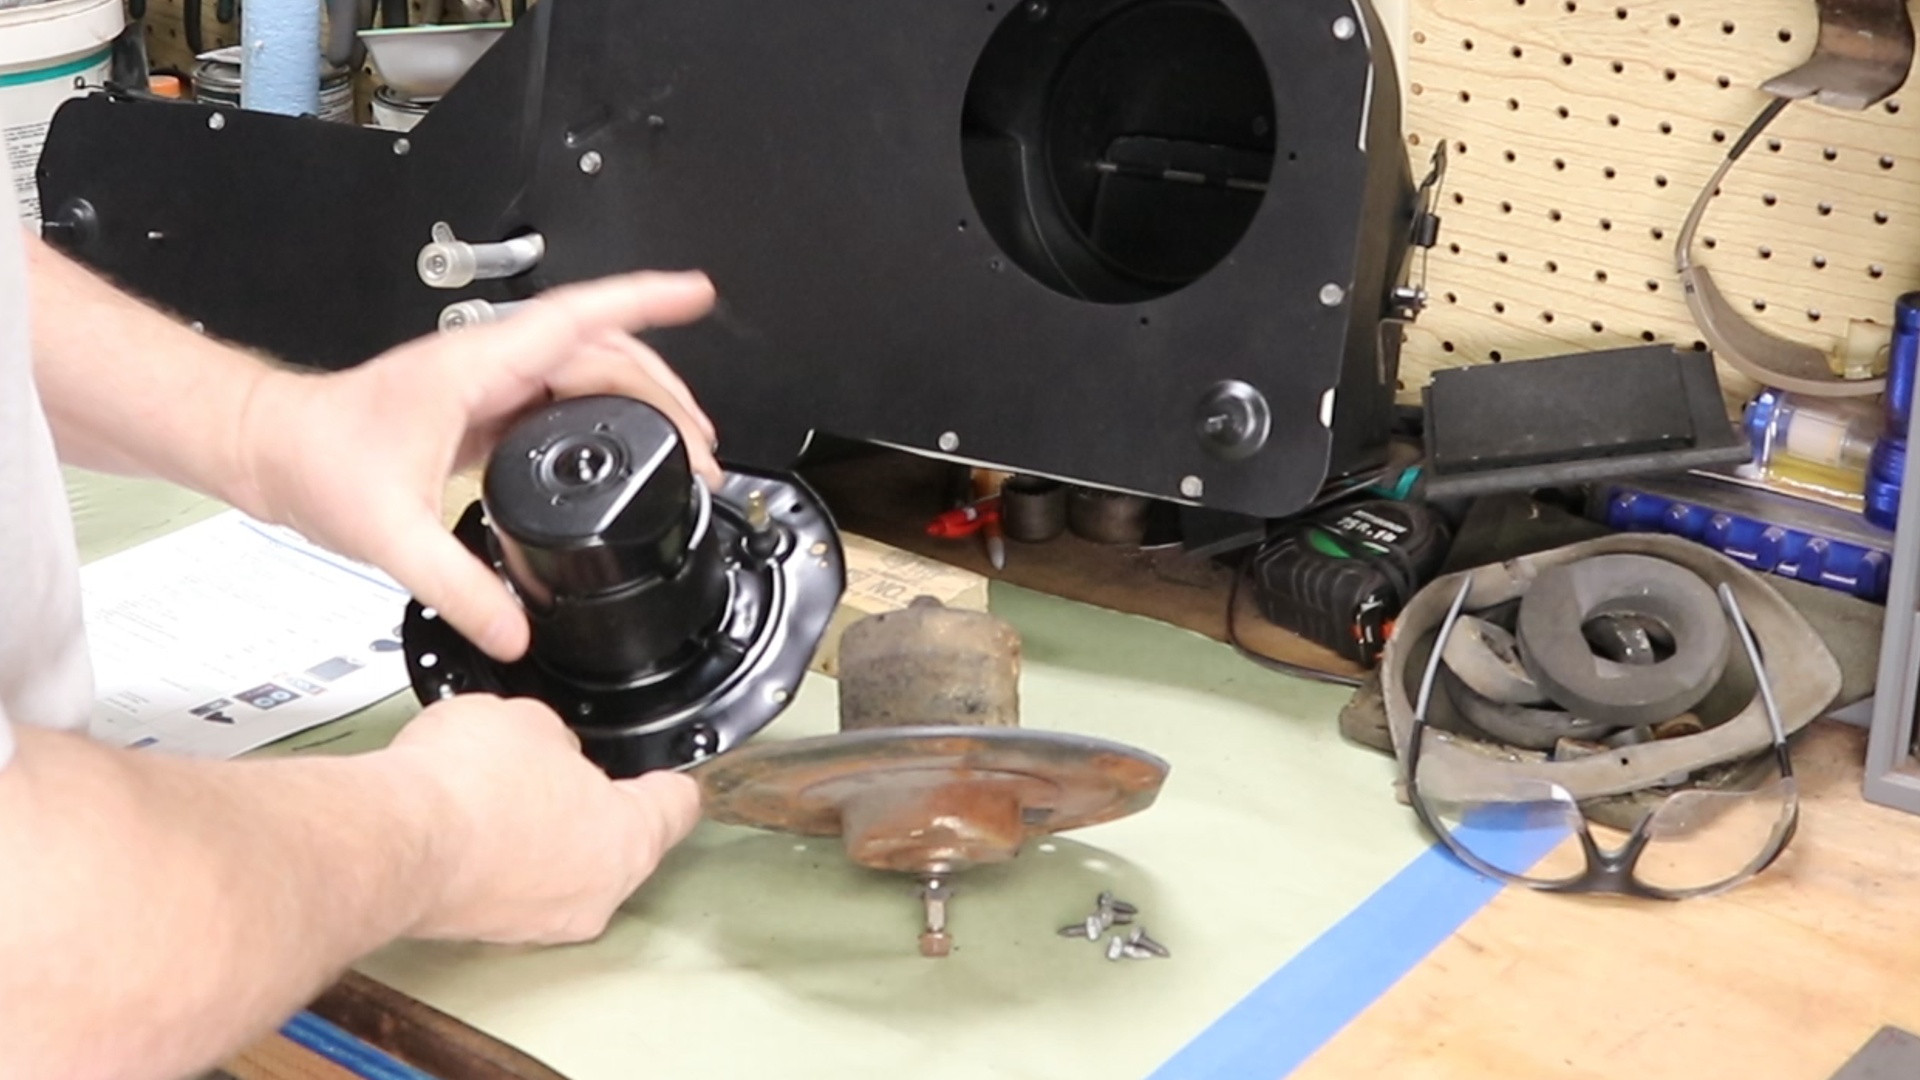
• Blower Motor Upgrade (Mod) - More CFM with upgraded motor
• Replace Foam padding on Air Diverter Gates - Improve control of airflow
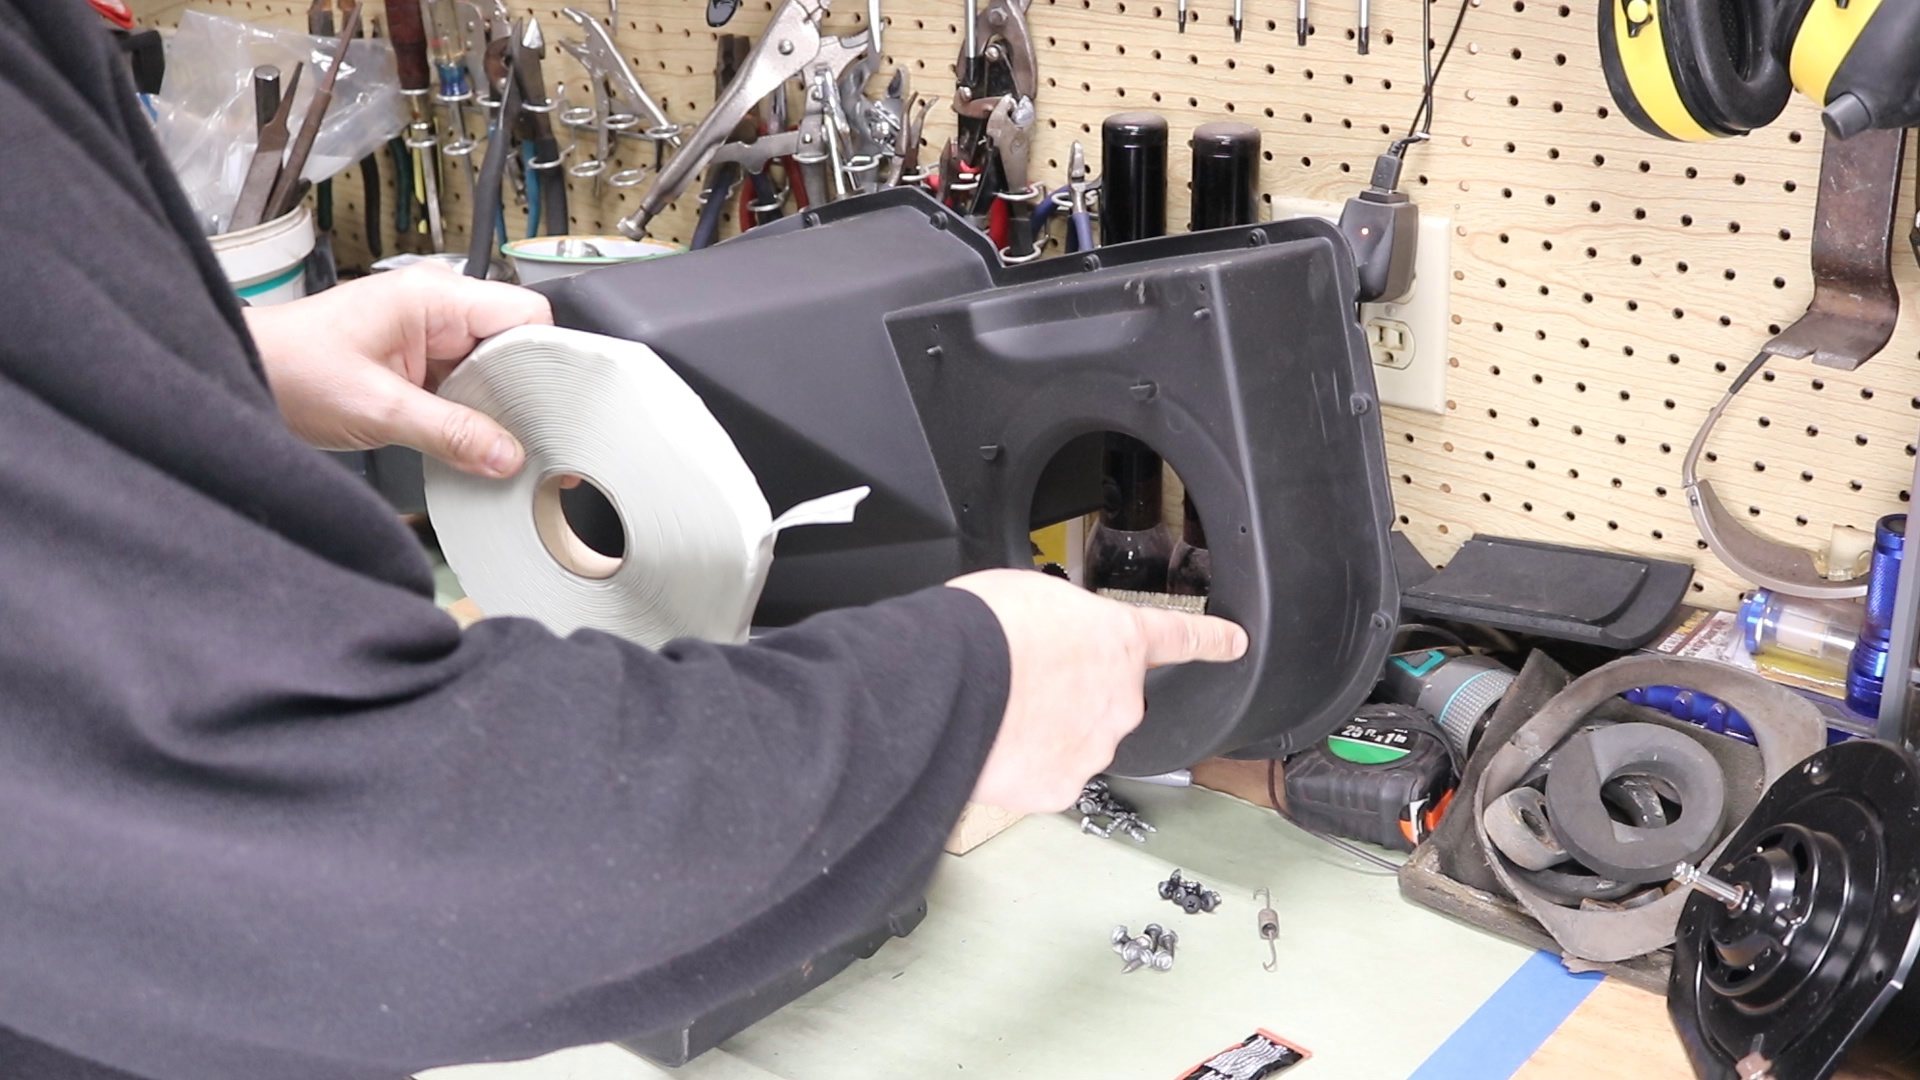
• Seal Lower portion of Heater Box to prevent possible leaks into vehicle
PART LIST and DIAGRAMS of FOAM PIECES FOR THE GATES are located in a document that is attached to this thread. It can be downloaded for Free.
I recorded many of the options that others provided in a document and I highlighted the options that I took which will match the photos that I provide below. I also will include a link to video that wil walk you through the process that I took.
As mentioned later in this thread, I decided to create full size templates of the pads needed for the diverter gates as well as the large penetration gaskets that I used. This really helped in cutting out the replacement parts. The Parts List and Templates are available as a free downloadable 4 page PDF at the link above.
PROCESS
In my situation, I have just removed my dash as a part of the complete restoration project that I am currently working on. Removing the dash is not required to remove the Heater Box, and I cannot see any reason why the Fresh Air Duct would not also be easy to remove without removing the dash. This thread will include both items, but you could certainly use this information for just the Heater Box if that is your intent.
![Image]()
That's enough of an introduction and I hope you decide to follow along. And hope that this helps someone update their ole Jeep.
Mike
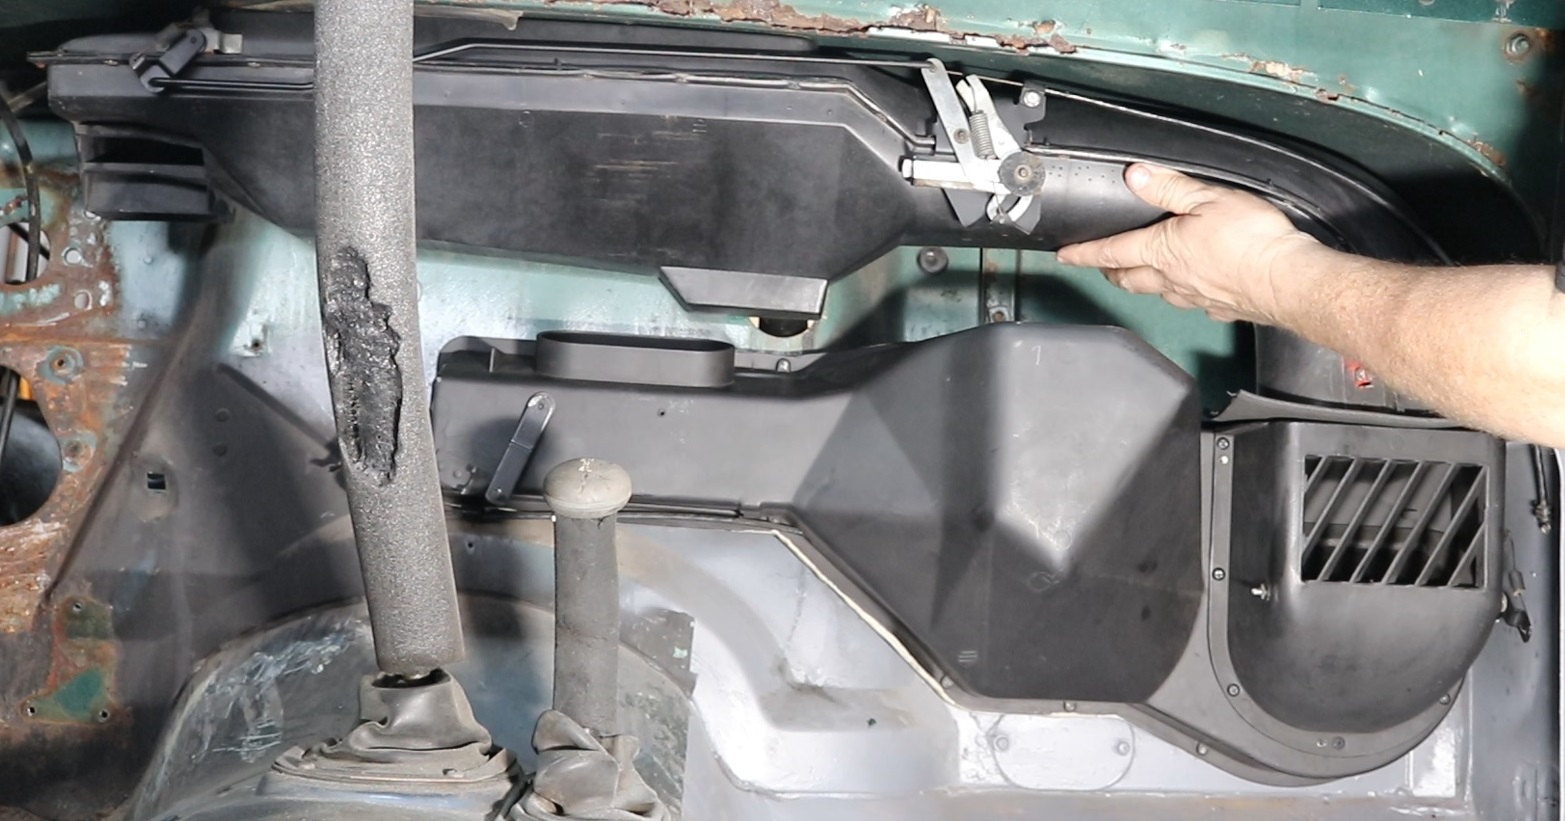
Let's dig in! I started by disconnecting anything that was attached to the units.
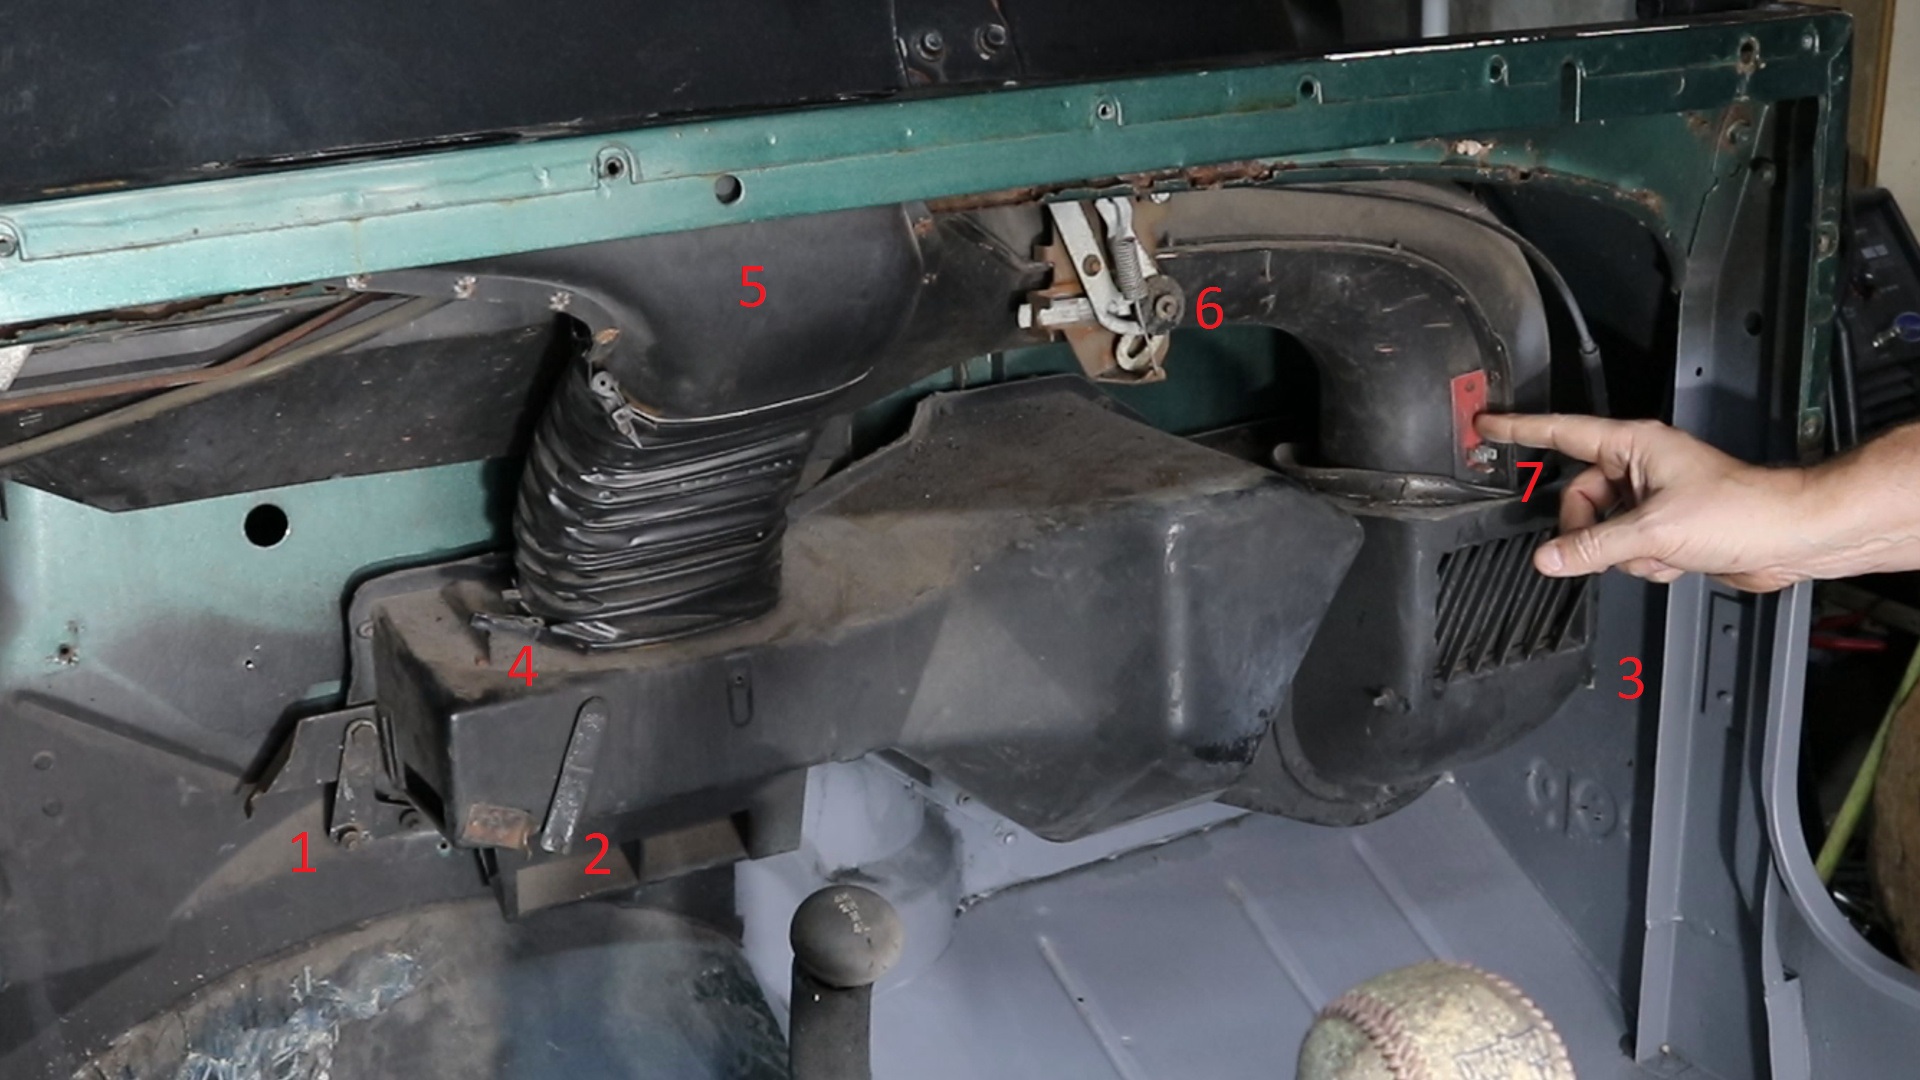
If you are just removing the Heater Box, you will need to disconnect the following items and then the
Heater box can be removed:
1. Temperature Mixing Gate Cable
2. Defrost Gate Cable
3. Passenger Vent Gate Cable (far right side)
4. Defrost flexible duct lower connection
If you are removing both the Heater Box and Fresh Air Duct, you will want to remove the Heater Box first, then also disconnect the following items:
5. Defrost vent (2 screws from the top)
6. Fresh Air Gate Cable
7. Blower Motor Resister electrical connection
![Image]()
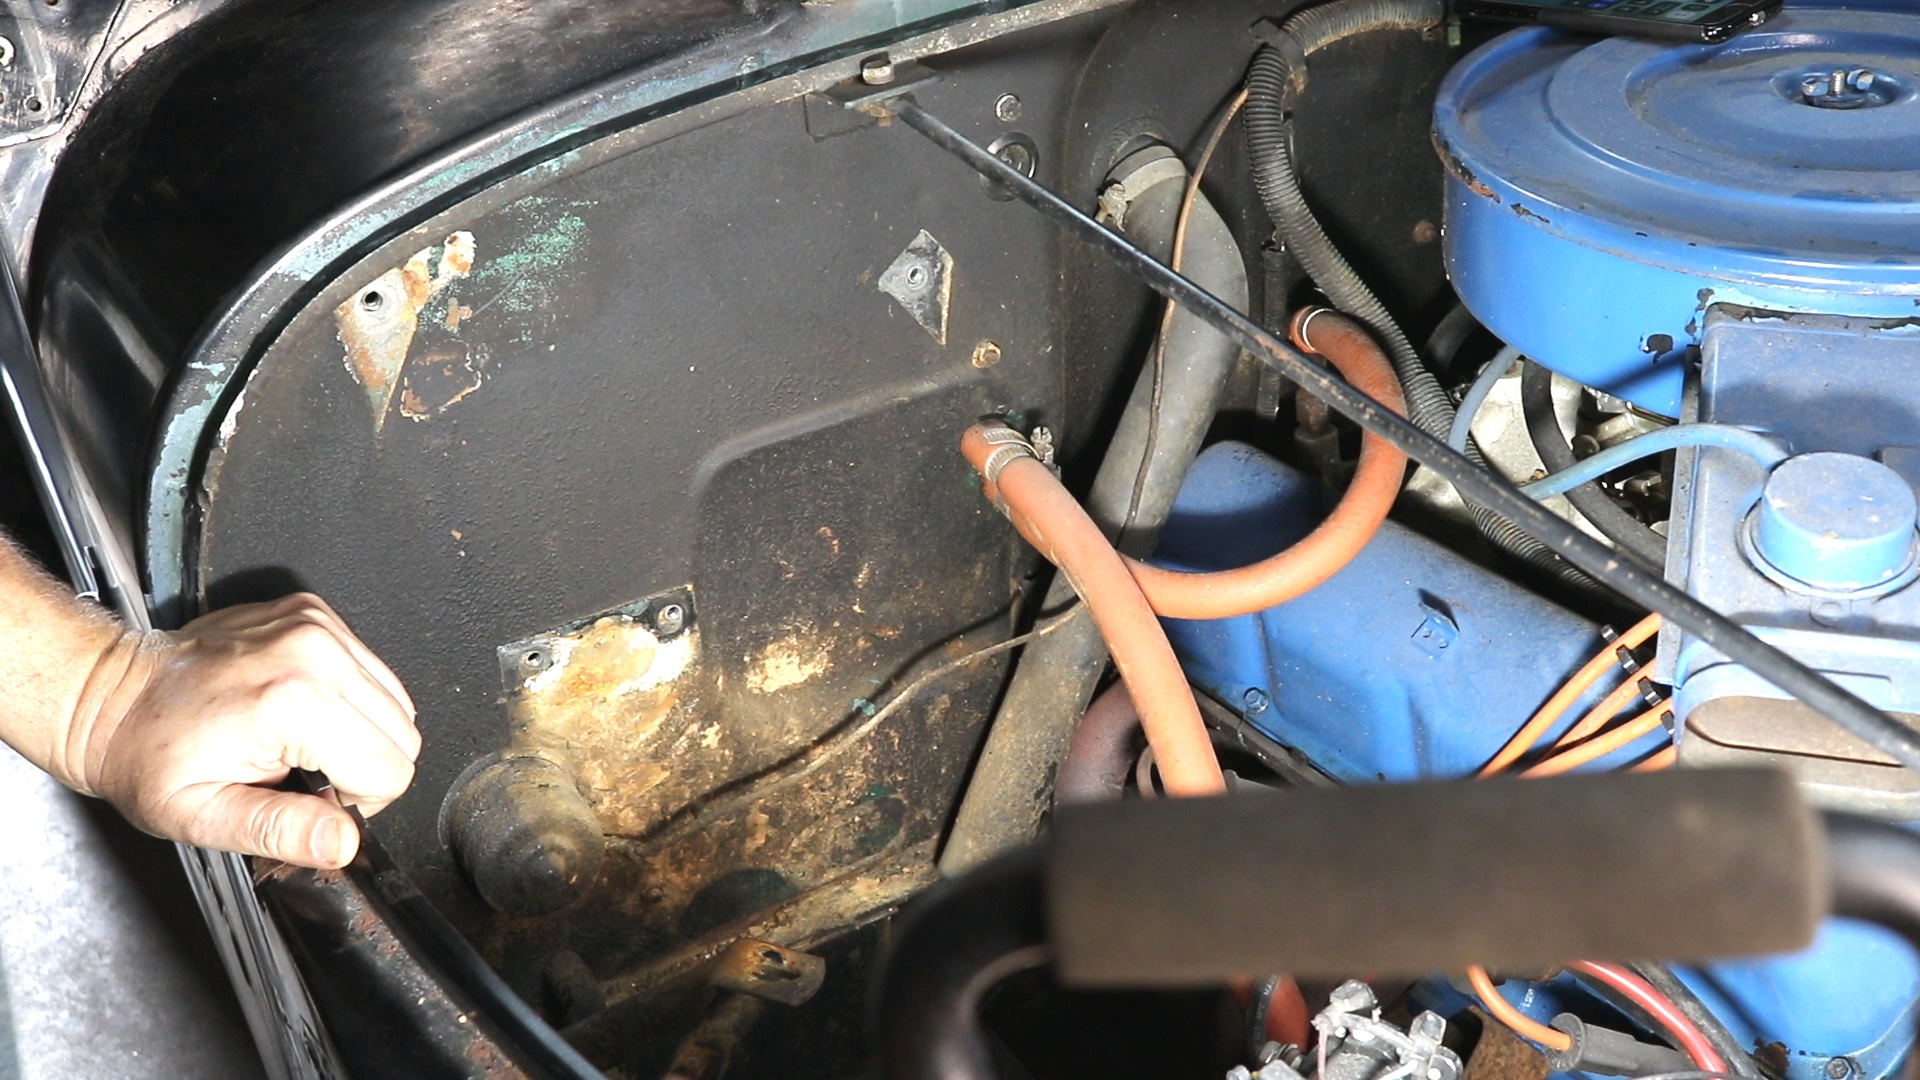
Under the hood, I removed my Battery and Battery Tray. Here is a list of items that will need to be disconnected:
1. Heater Box Drain Hose (below the Blower Motor)
2. Blower Motor Electrical connection
3. 2 Heater Core Hoses (orange)
4. 4 Nuts (behind the air filter, above the heater core hoses, and two near the blower motor)
5. Fresh Air Duct Drain (only if you are removing the Fresh Air Duct)
![Image]()
Next, since I am remove the Fresh Air Duct, I needed to remove this grill. There are 6 screws holding on this grill and then 4 more screws underneath it. These are the only screws securing the Fresh Air Duct to the vehicle.
![Image]()
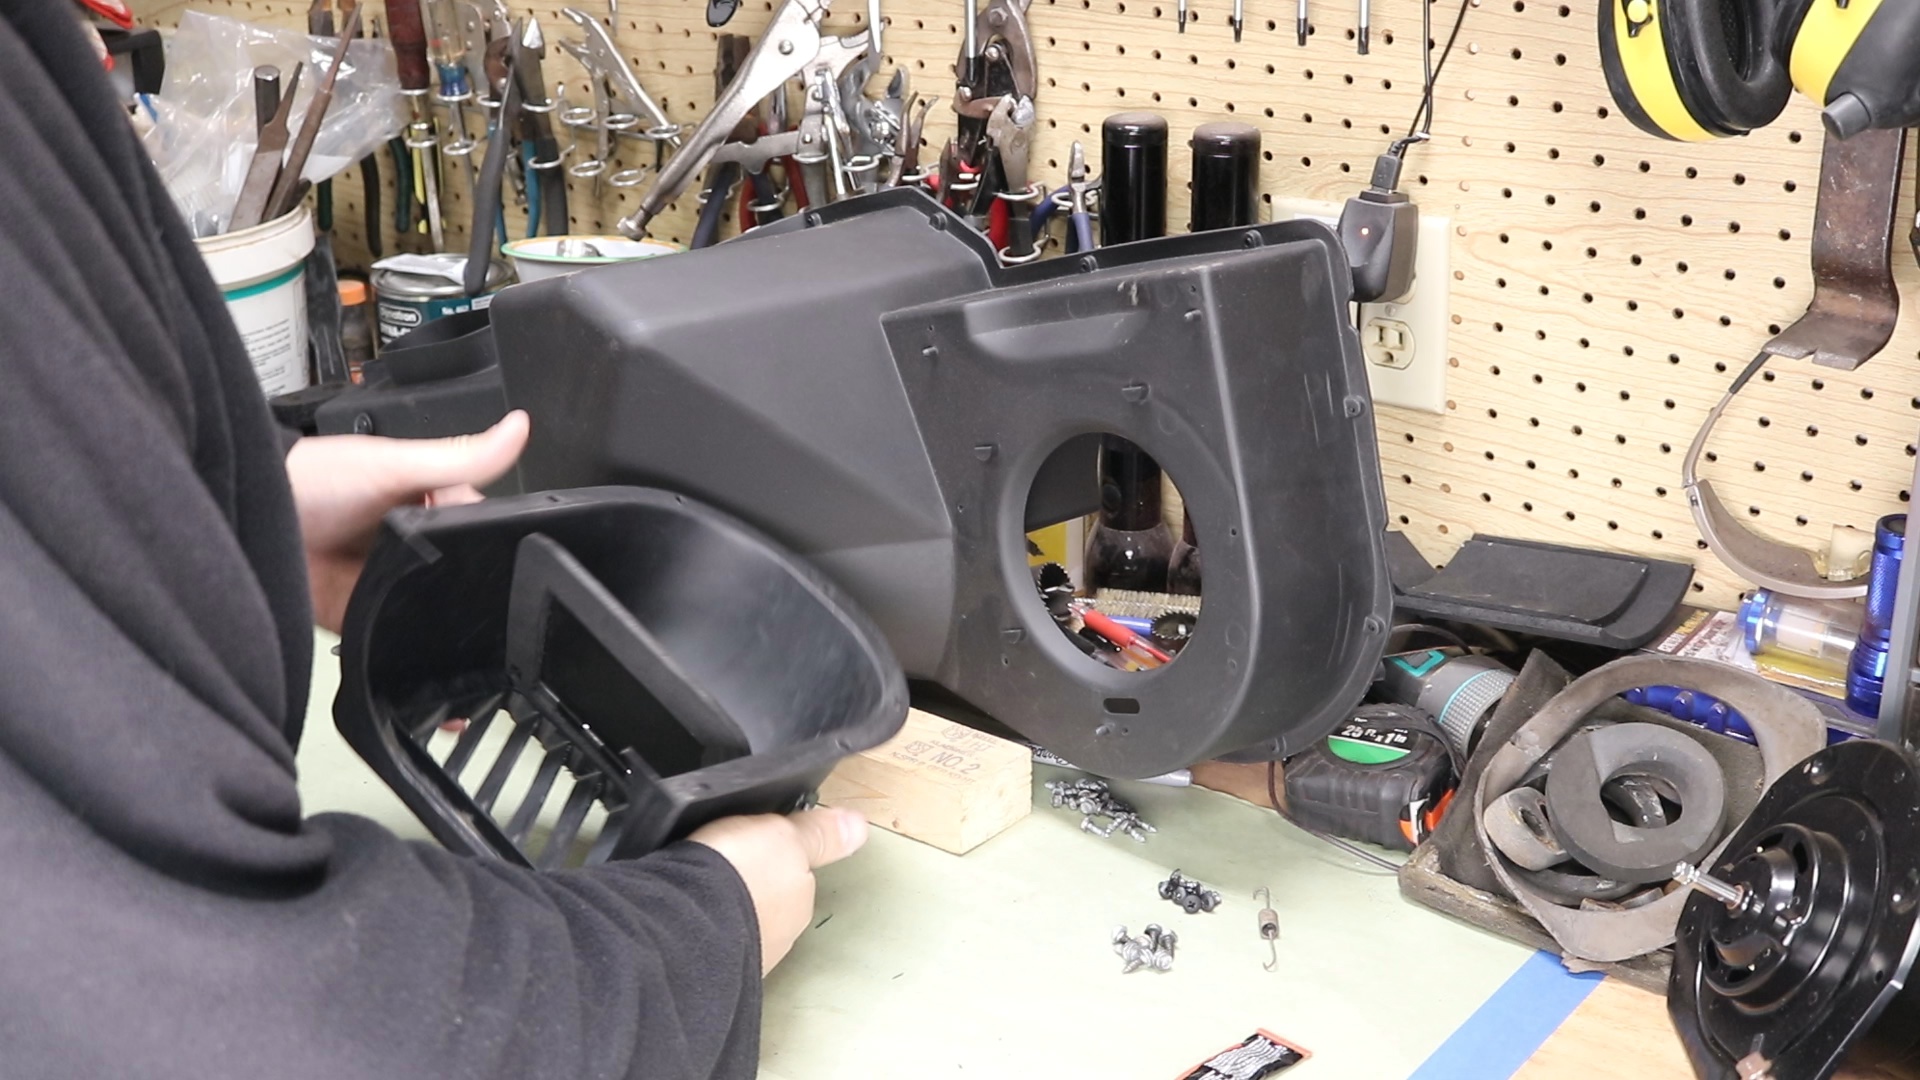
With those items disconnected, I was able to remove both the Heater Box and Fresh Air Duct from the vehicle.
![Image]()
![Image]()
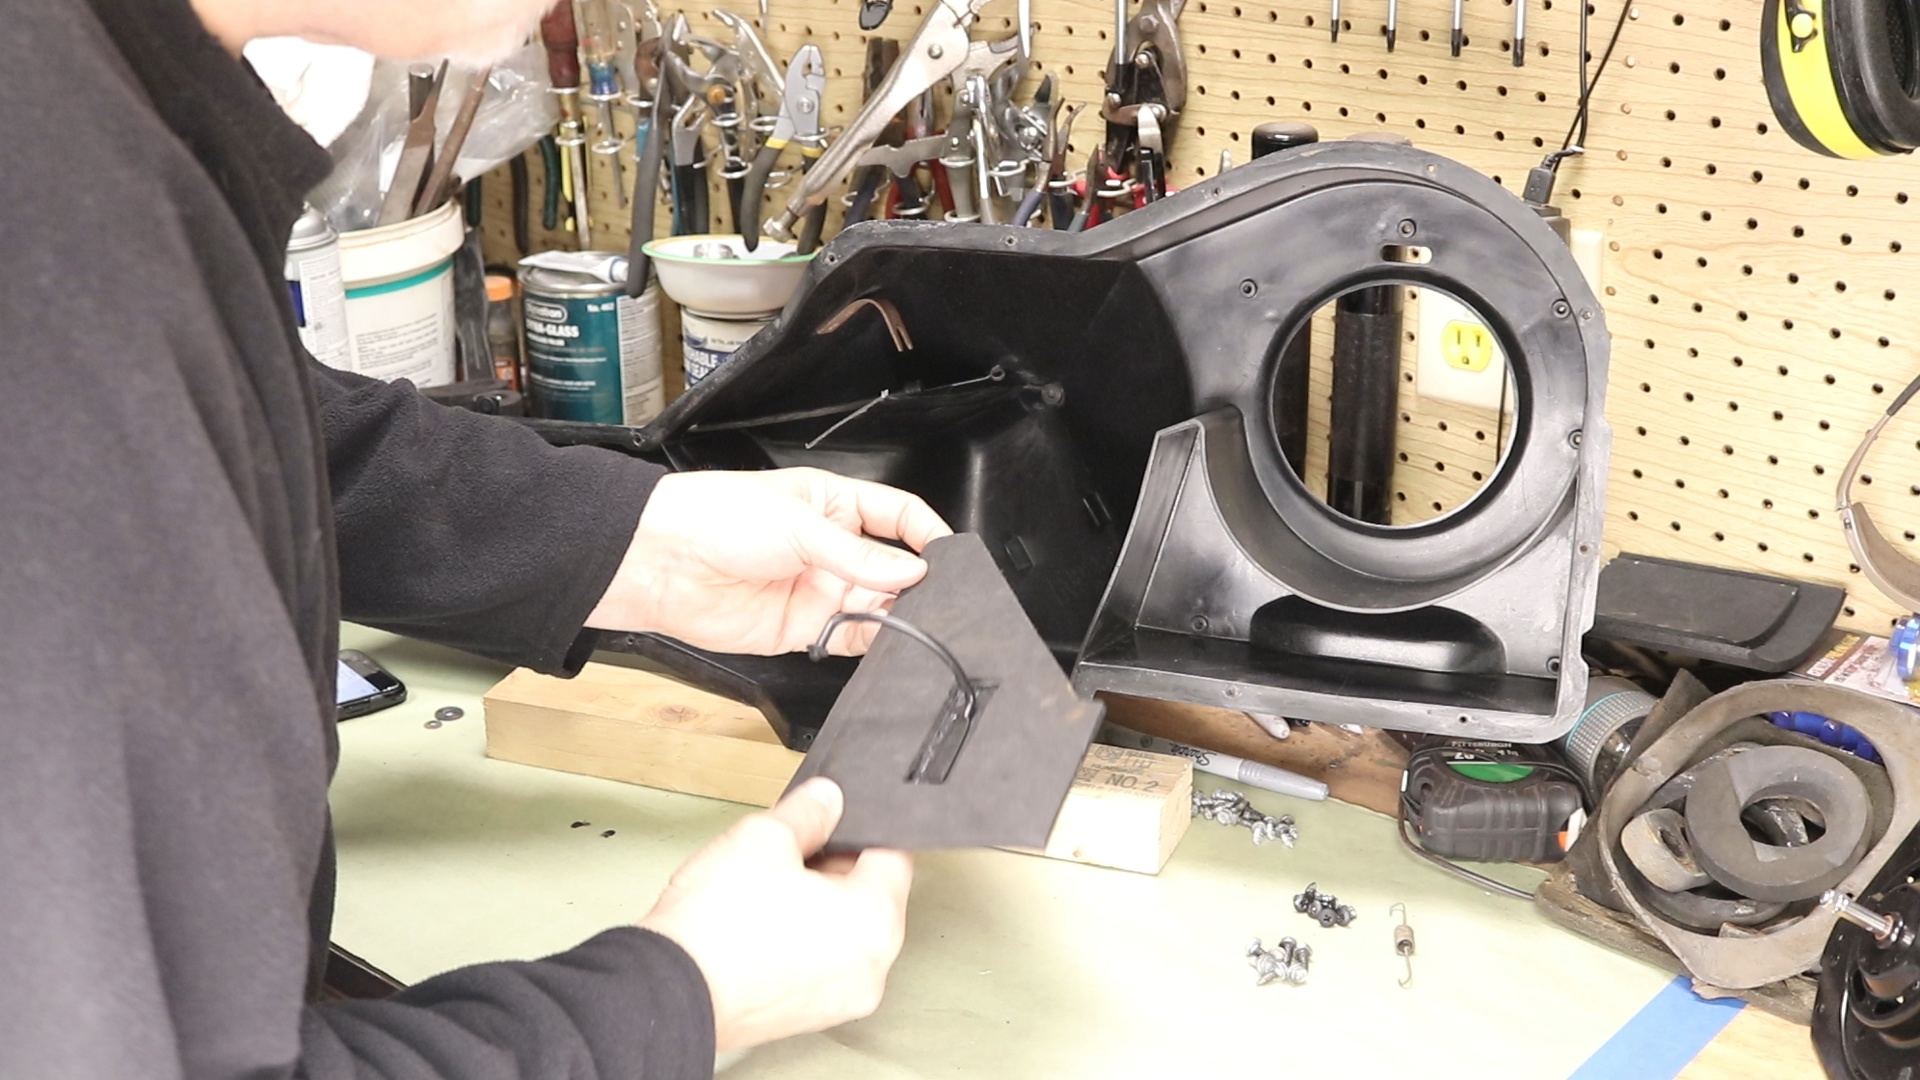
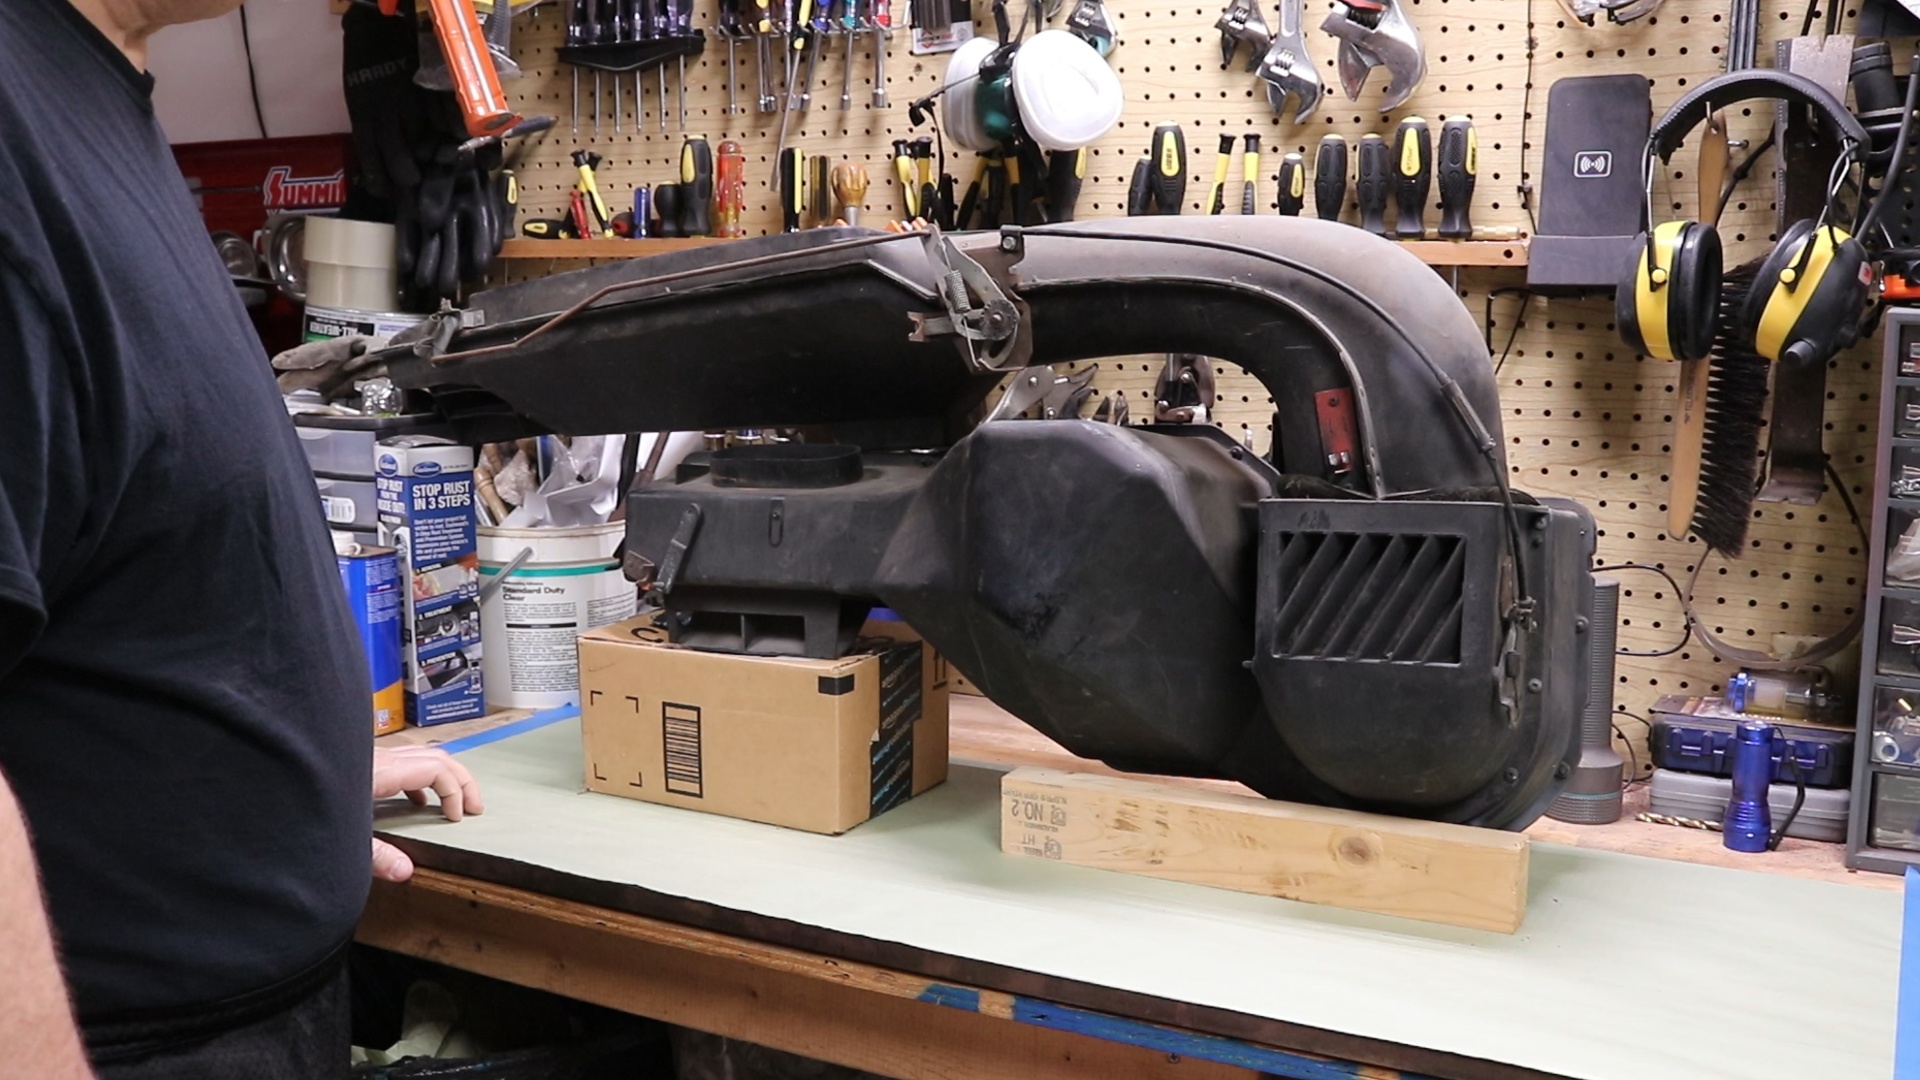
With the assembly now on the bench, I needed to disconnect the Passenger Gate Cable, which I did not do while it was in the Jeep as I could take both parts out at the same time.
![Image]()
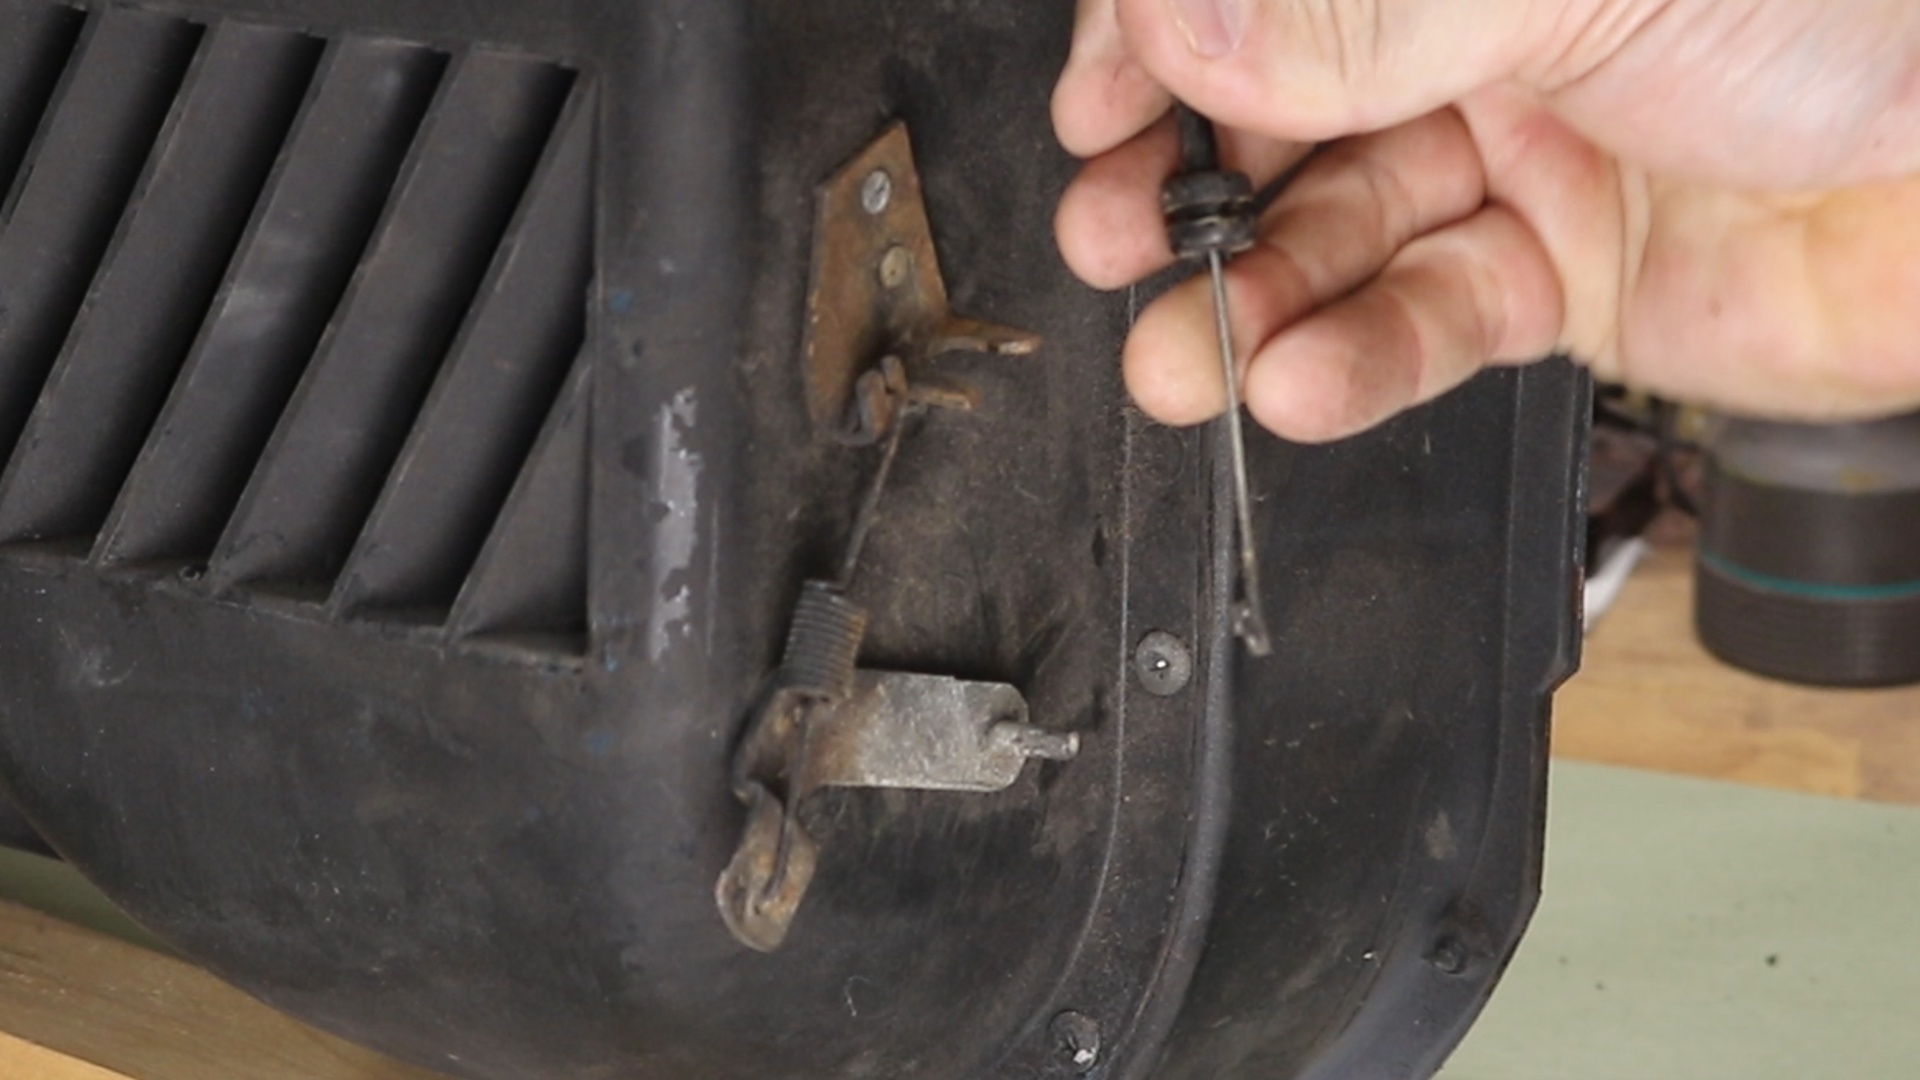
Here is a close-up of this connection. This is very typical of all cable connection on both units. There is a 3/16" Push Nut that can be removed with pliers or a screw driver, the spring just pulls off, and the cable stay snaps off with a screw driver. I needed to disconnect this so that I could separate the two units.
![Image]()
![Image]()
View attachment 3821523
The original thread can be reviewed here:
https://www.jeepforum.com/forum/f8/cj-heater-box-restoration-pic-heavy-975999/
That thread is about 8 years old and throughout the years many contributors continually provided great suggestions and new alternatives to the restoration of these units. I took many notes and pulled what I thought was the best options and applied them to my restoration.
UPGRADE INCLUDED DURING THIS RESTORATION
There are several items that will be fixed or upgrade during this process. Here is a short list of those items
• Heater Core Replacement
• Blower Motor Upgrade (Mod) - More CFM with upgraded motor
• Replace Foam padding on Air Diverter Gates - Improve control of airflow
• Seal Lower portion of Heater Box to prevent possible leaks into vehicle
PART LIST and DIAGRAMS of FOAM PIECES FOR THE GATES are located in a document that is attached to this thread. It can be downloaded for Free.
I recorded many of the options that others provided in a document and I highlighted the options that I took which will match the photos that I provide below. I also will include a link to video that wil walk you through the process that I took.
As mentioned later in this thread, I decided to create full size templates of the pads needed for the diverter gates as well as the large penetration gaskets that I used. This really helped in cutting out the replacement parts. The Parts List and Templates are available as a free downloadable 4 page PDF at the link above.
PROCESS
In my situation, I have just removed my dash as a part of the complete restoration project that I am currently working on. Removing the dash is not required to remove the Heater Box, and I cannot see any reason why the Fresh Air Duct would not also be easy to remove without removing the dash. This thread will include both items, but you could certainly use this information for just the Heater Box if that is your intent.
That's enough of an introduction and I hope you decide to follow along. And hope that this helps someone update their ole Jeep.
Mike
Let's dig in! I started by disconnecting anything that was attached to the units.
If you are just removing the Heater Box, you will need to disconnect the following items and then the
Heater box can be removed:
1. Temperature Mixing Gate Cable
2. Defrost Gate Cable
3. Passenger Vent Gate Cable (far right side)
4. Defrost flexible duct lower connection
If you are removing both the Heater Box and Fresh Air Duct, you will want to remove the Heater Box first, then also disconnect the following items:
5. Defrost vent (2 screws from the top)
6. Fresh Air Gate Cable
7. Blower Motor Resister electrical connection
Under the hood, I removed my Battery and Battery Tray. Here is a list of items that will need to be disconnected:
1. Heater Box Drain Hose (below the Blower Motor)
2. Blower Motor Electrical connection
3. 2 Heater Core Hoses (orange)
4. 4 Nuts (behind the air filter, above the heater core hoses, and two near the blower motor)
5. Fresh Air Duct Drain (only if you are removing the Fresh Air Duct)
Next, since I am remove the Fresh Air Duct, I needed to remove this grill. There are 6 screws holding on this grill and then 4 more screws underneath it. These are the only screws securing the Fresh Air Duct to the vehicle.

With those items disconnected, I was able to remove both the Heater Box and Fresh Air Duct from the vehicle.
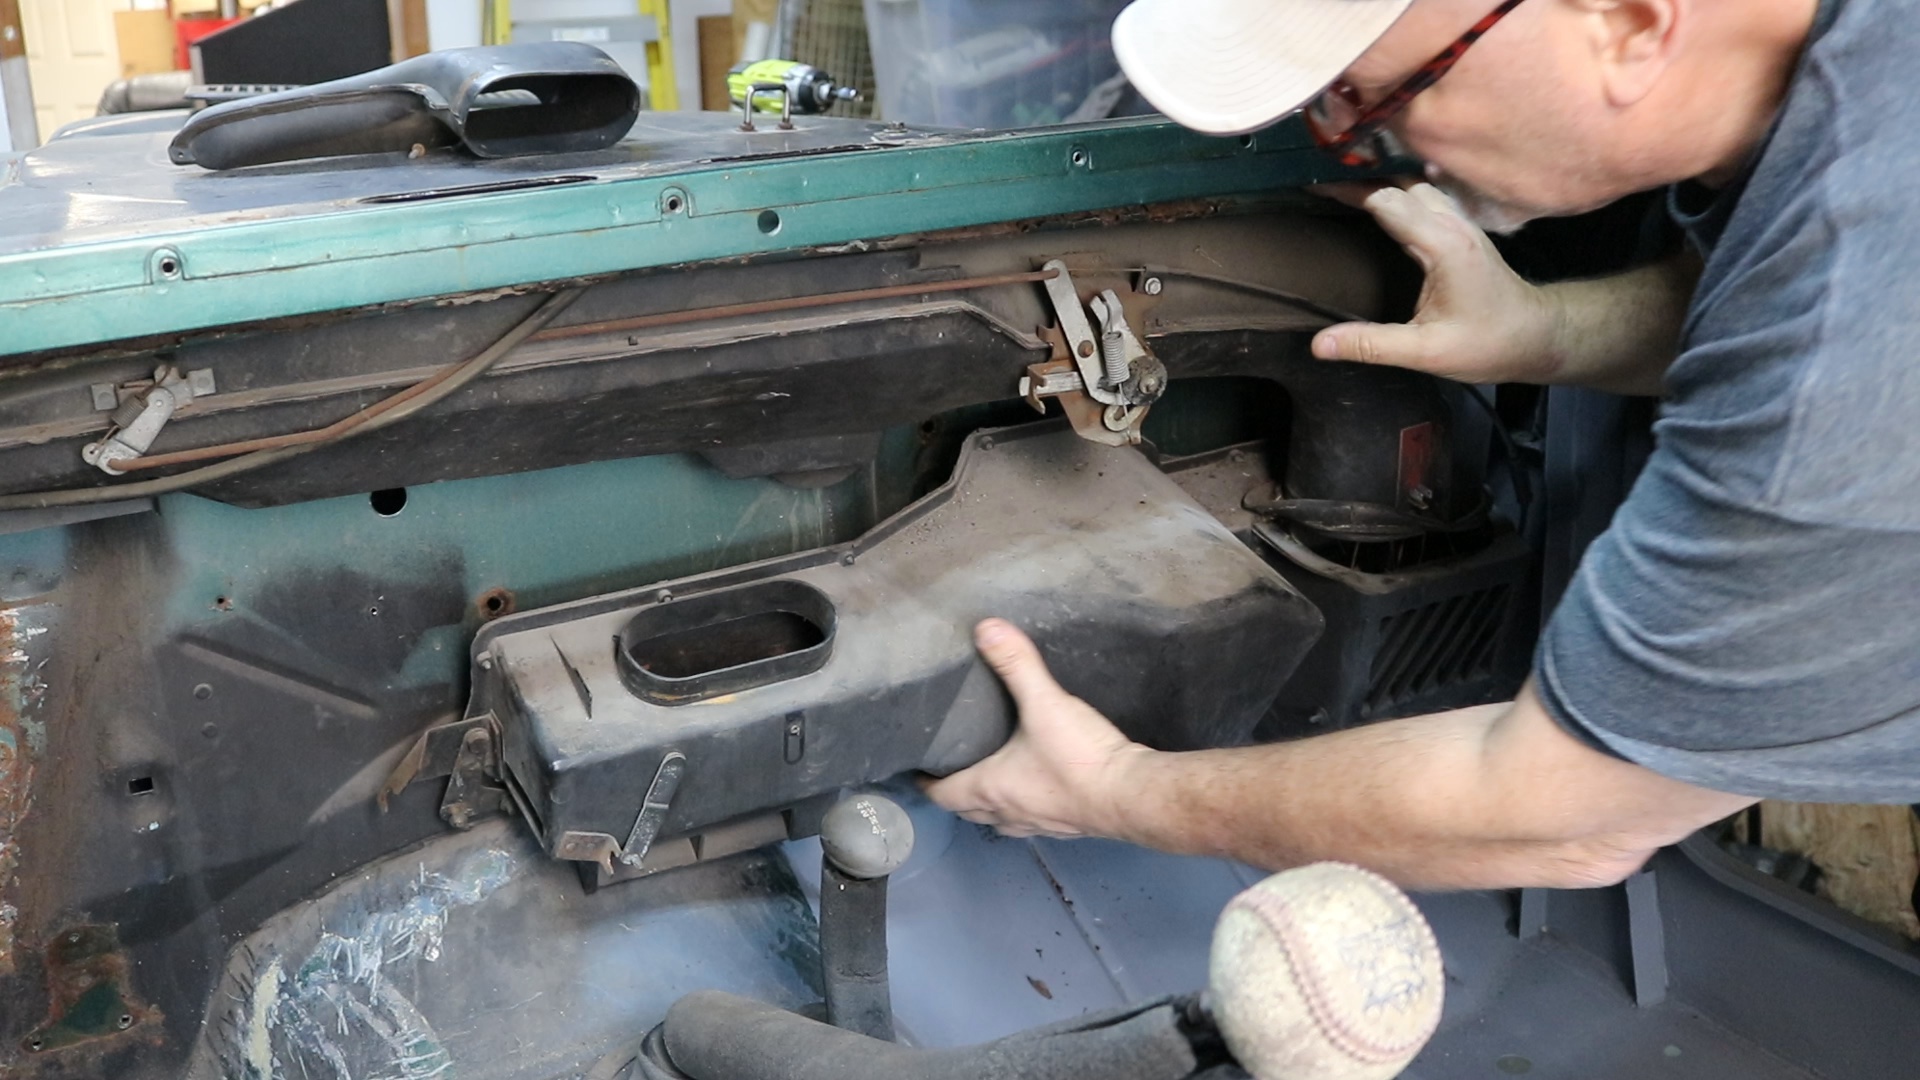

With the assembly now on the bench, I needed to disconnect the Passenger Gate Cable, which I did not do while it was in the Jeep as I could take both parts out at the same time.
Here is a close-up of this connection. This is very typical of all cable connection on both units. There is a 3/16" Push Nut that can be removed with pliers or a screw driver, the spring just pulls off, and the cable stay snaps off with a screw driver. I needed to disconnect this so that I could separate the two units.

View attachment 3821523