Jeep Enthusiast Forums banner
1 - 20 of 96 Posts

djflyy

· Registered
Joined
·
3,916 Posts
Discussion starter · #1 ·
Hey all!

Long time no talk... I've been on JF for a long, long, long time since before I purchased my TJ a decade ago, but haven't remained as active over the past few years. So this is my formal re-introduction with a new build. I write an endurance adventure blog that with stories of my Appalachian Trail thru-hike, cross country bicycle trip, and recent attempt at Vermont's 273 mile Long Trail over two weeks last month. Disappointed that one ended early, but you can go read about it and see photos if you'd like: www.2180miles.com

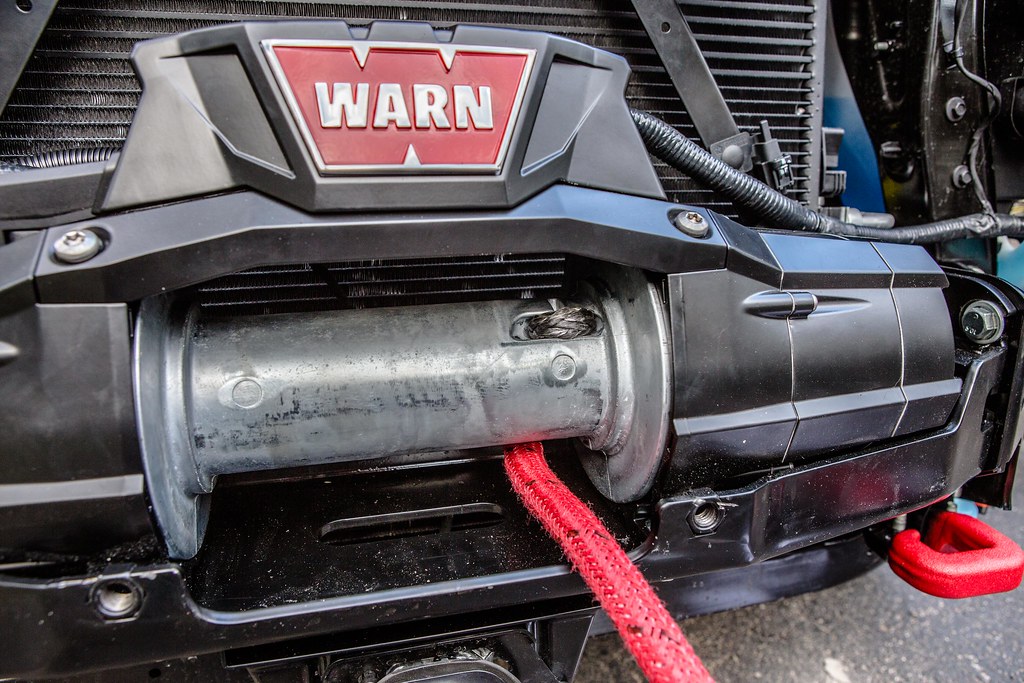
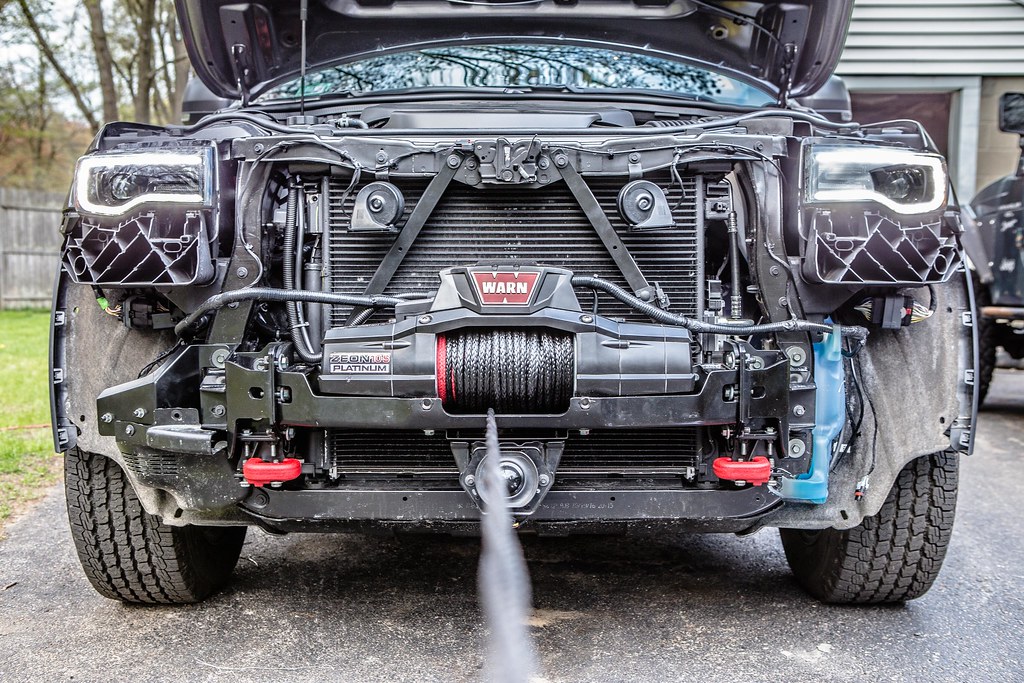
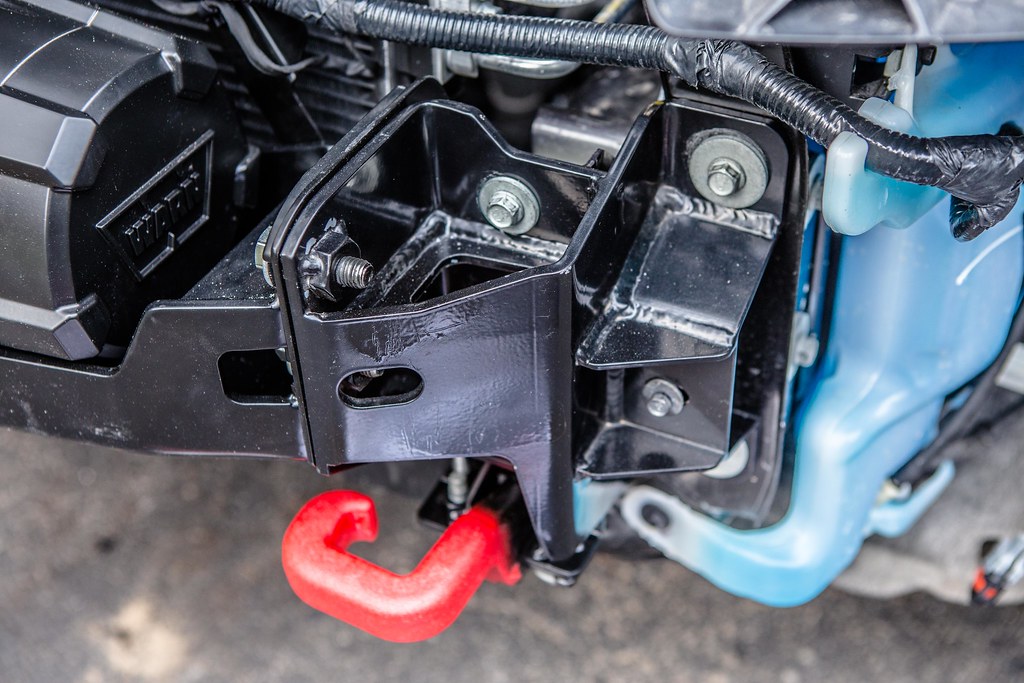
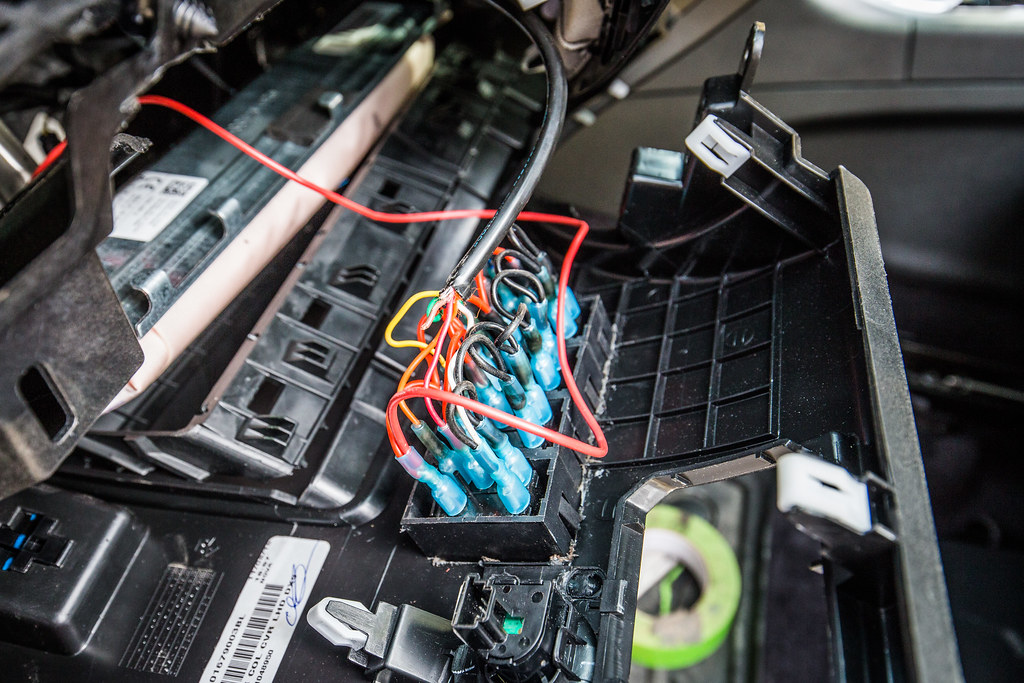
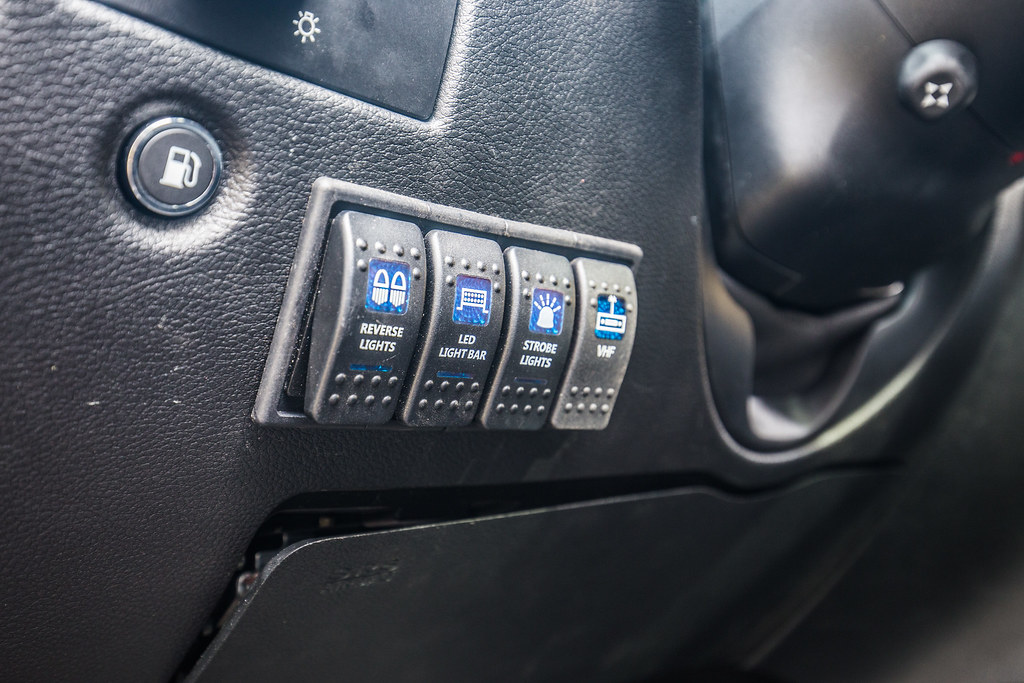
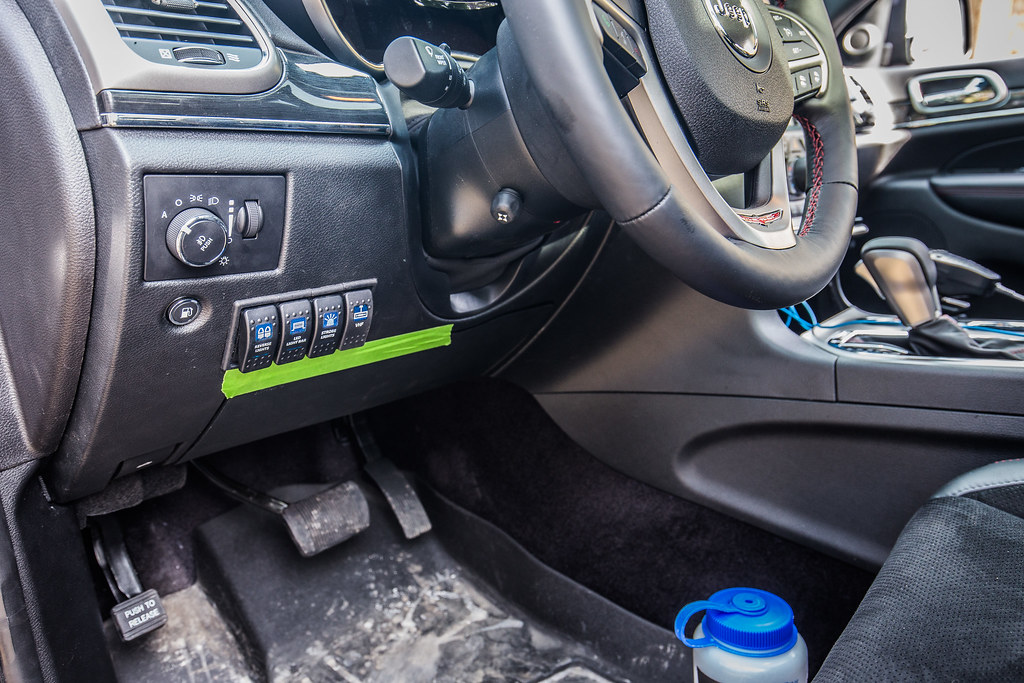
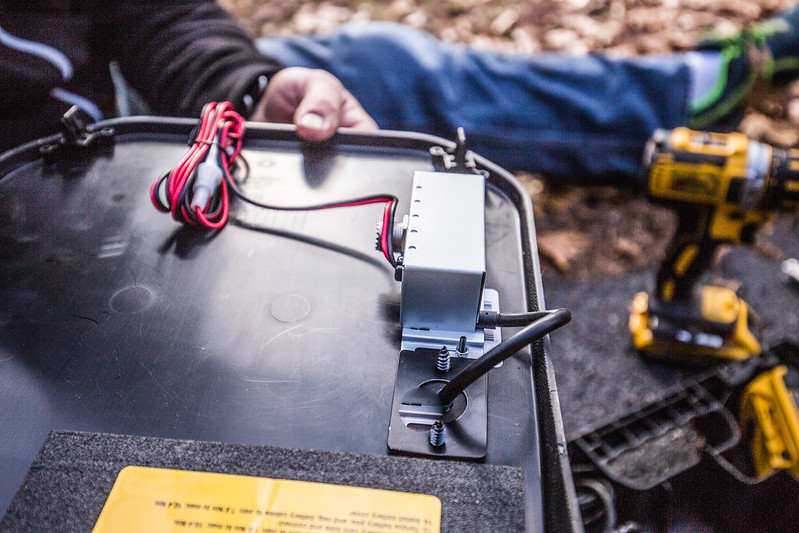
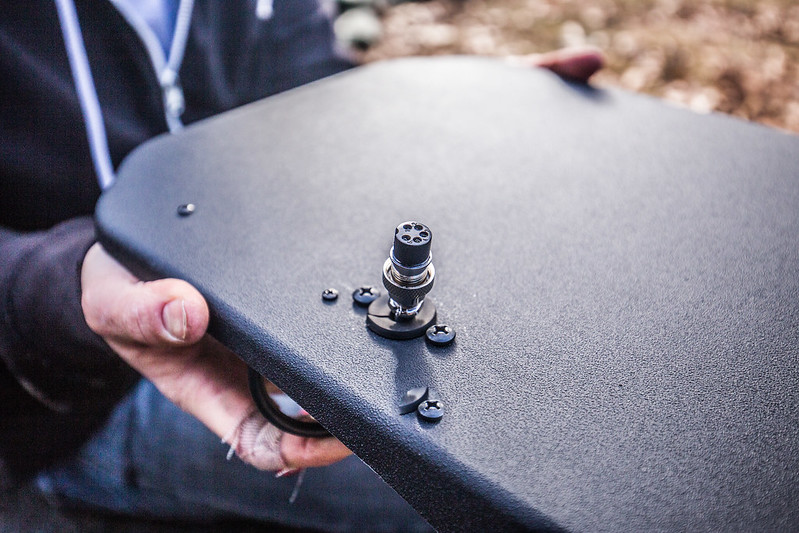
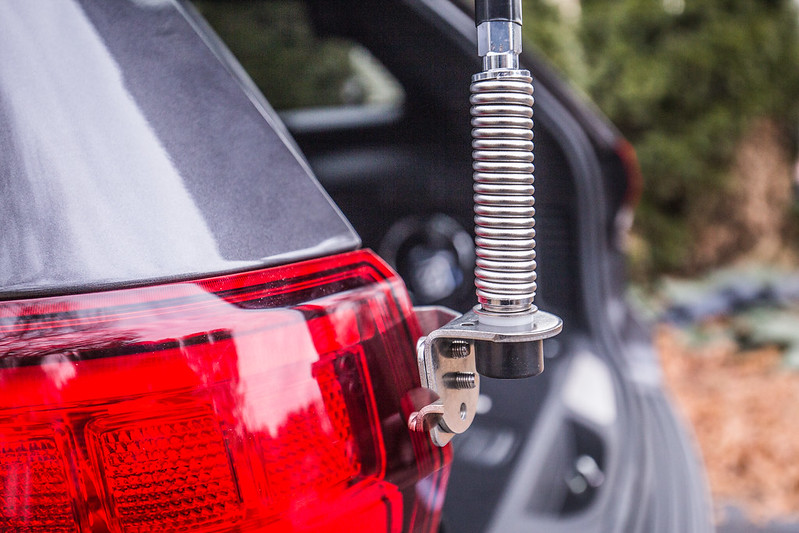
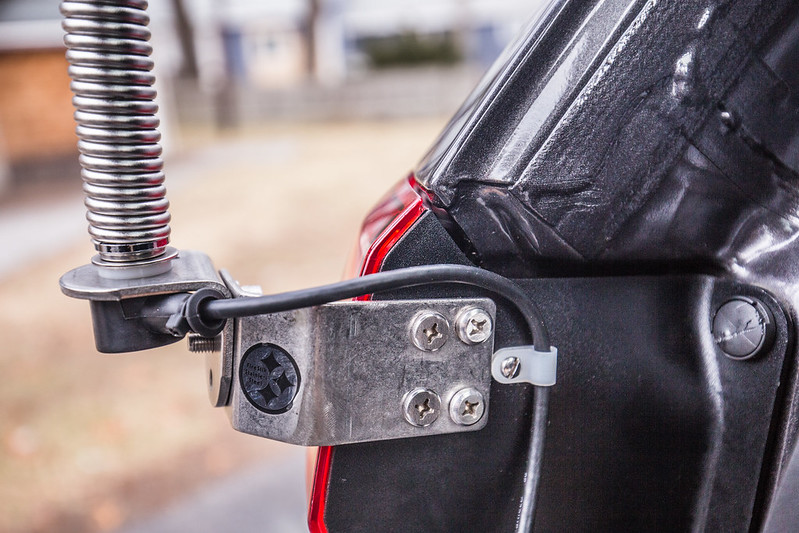
Some of you might remember Big Red from a ways back... She's up on 35" MTR/Ks, 3" lift with Currie suspension components, 8k winch, Undercover Fab aluminum skids from front to back, Rigid LEDs everywhere, strobe lights for on-road recovery stuff (good samaritan lights as I call them) and the rest of the typical works with electronics and radios. The members of the Massachusetts Jeep club I founded in 2011 affectionately call her Big Red. As our club has grown, my close group of Jeep friends began discussing an overland trip through northern New England. As I took on the planning of our adventure with my buddy Rob, I began realizing that the TJ wasn't going to be the best platform for me personally to do these kinds of trips in.

I began shopping for a JKUR, floating the idea of trading my daily driver in and keeping the TJ and the JKUR, each to serve different purposes. As my research continued and I spoke with JKUR owner friends, I realized that I'd much rather have something along the lines of an SUV that would be less of a one trick pony. I travel for work and therefore frequently have rental cars, so I began test driving the Grand Cherokees during my weeks away from home, which ultimately turned my search in that direction. Reading about the current (2016) and new models for 2017, I focused on the Overland and Trailhawk trims as ones I'd be interested in buying. Price was a factor, but I knew early on that I didn't want to heavily mod this truck, so buying a Limited trim and upgrading things wasn't really in the cards for me. The Overland is much more of a luxury oriented vehicle than the name might suggest, and the Trailhawk is the nitty gritty, but still very well equipped, model.

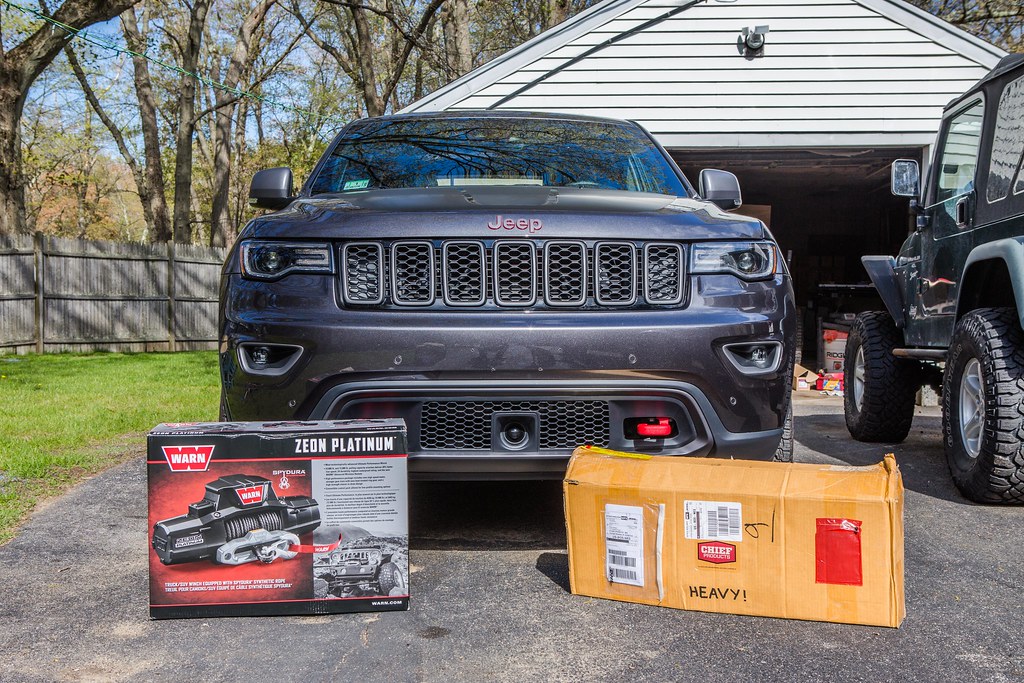
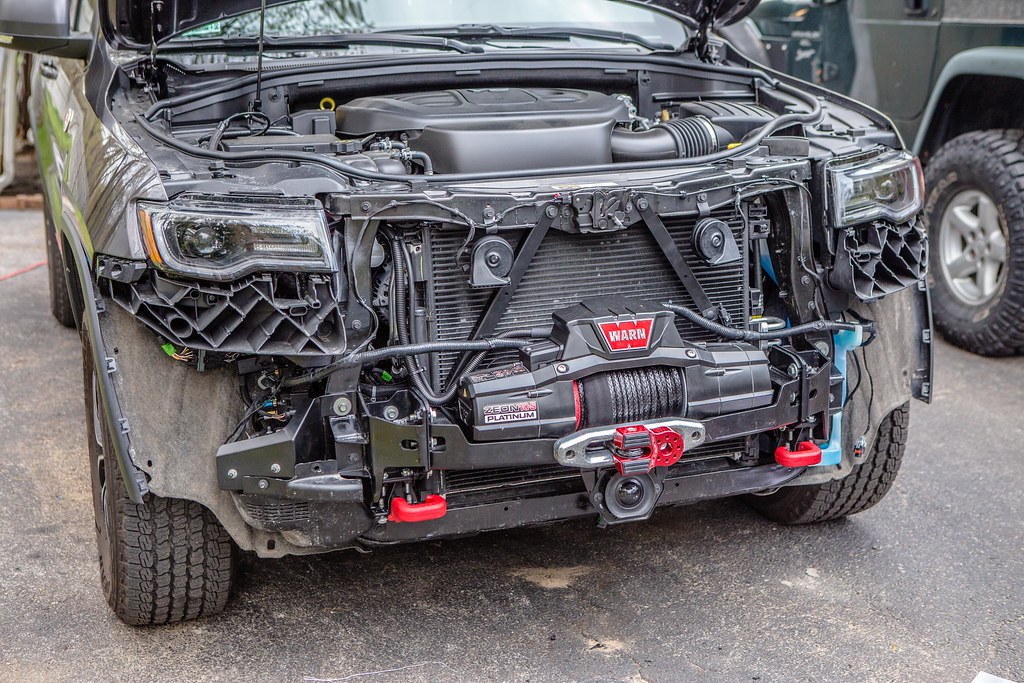
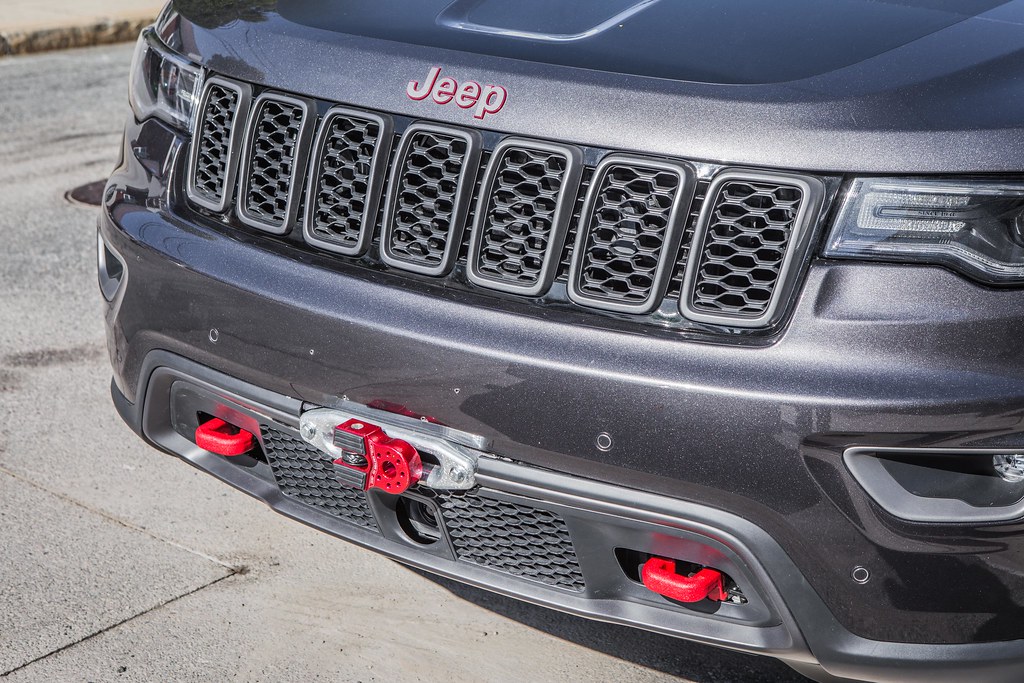
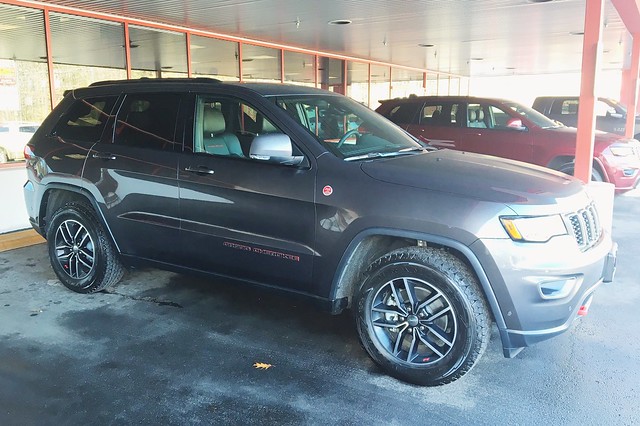
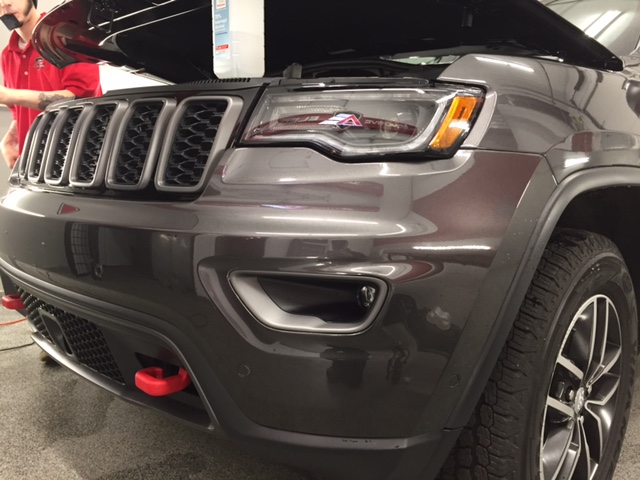
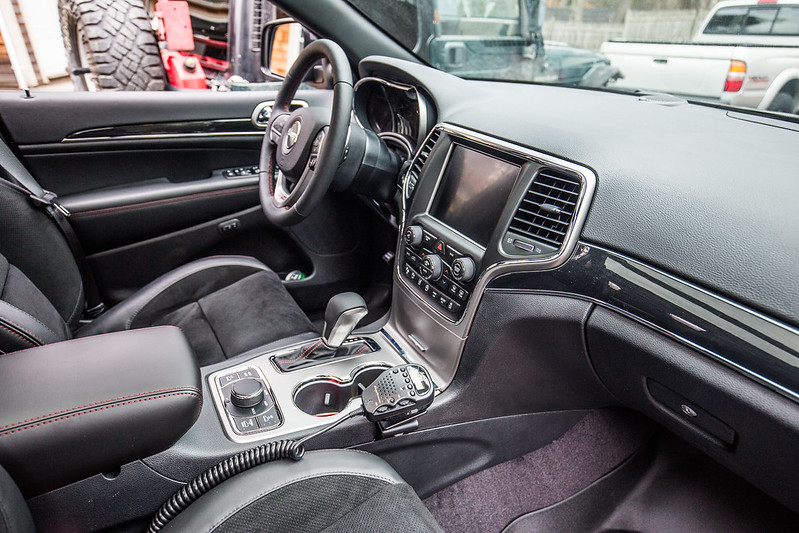
After many months of waiting, debating, test driving, yada yada, I finally went ahead and purchased a 2017 Trailhawk last week. Fully loaded (minus Blu-Ray entertainment), it was a unique package with the active safety package, luxury package - read: panoramic sunroof that I dreamed about, multiple skid plates underneath, 18" wheels wrapped in Kevlar lined Goodyear A/Ts, and the Quadra-Trac/air suspension package. Sticker was $49,500, and after a week of putting dealerships against each other, and after a bit of negotiating I got it from a dealer in New Hampshire (90 minutes from my house in Boston), for $42,799. I am quite happy with the price, and opted to add the 7-year bumper to bumper Mopar warranty for $1,300 for a piece of mind. There's a high likelihood I keep it that long, and I can get money back from FCA if I sell the vehicle first.

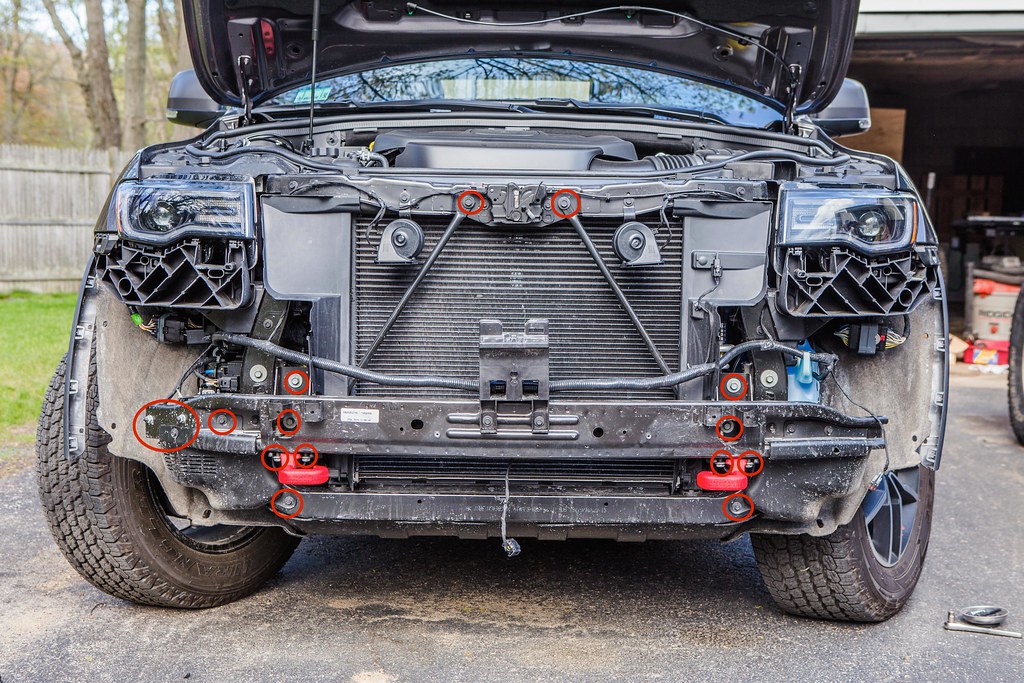
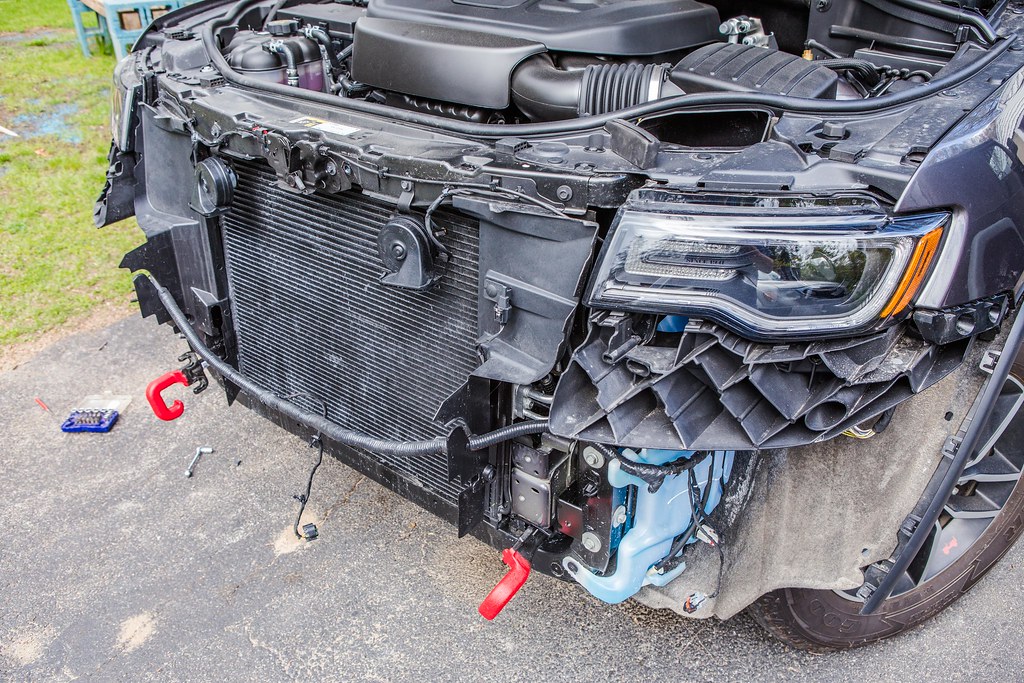
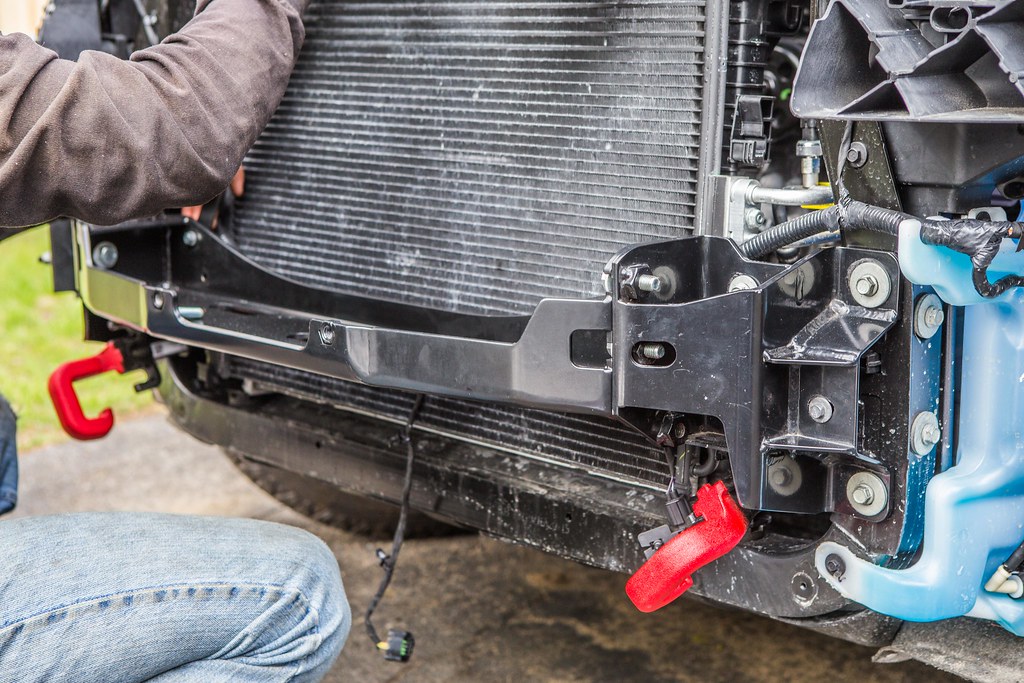
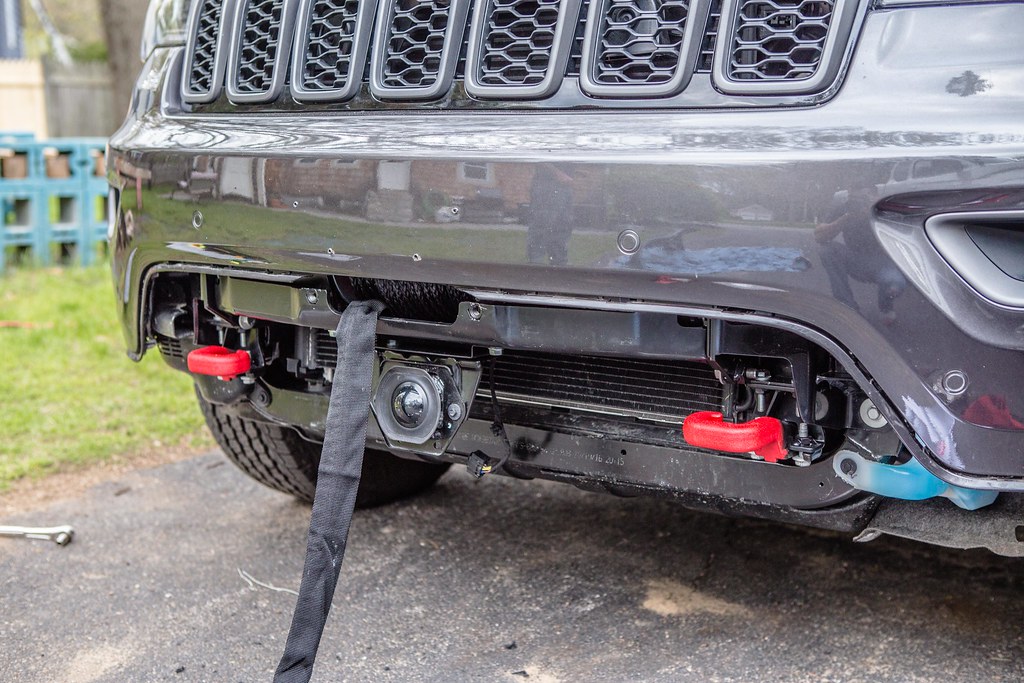
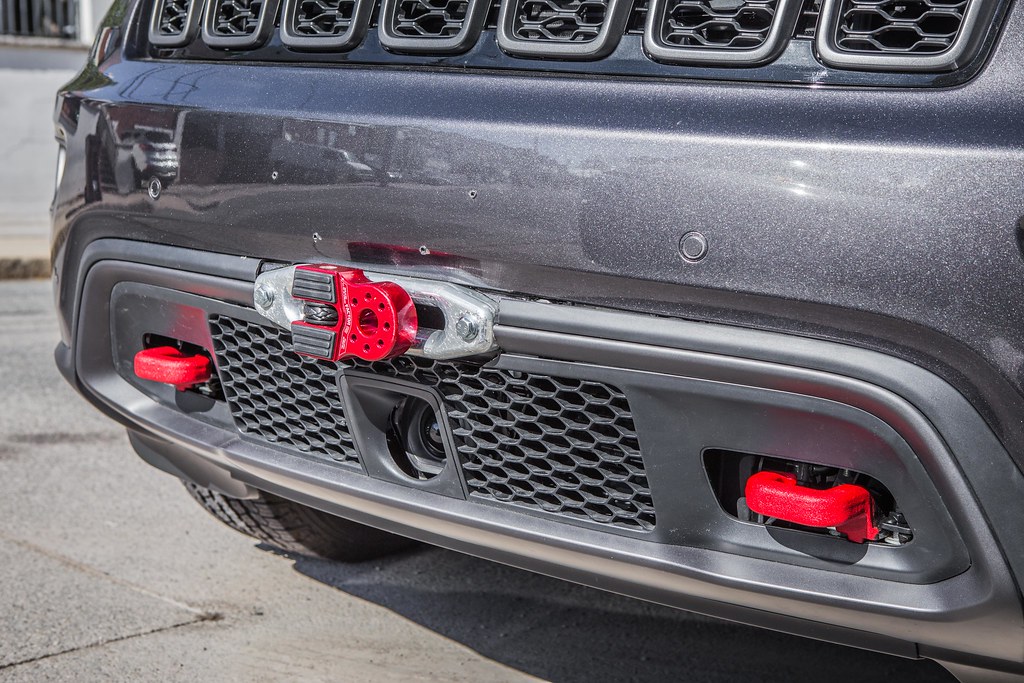
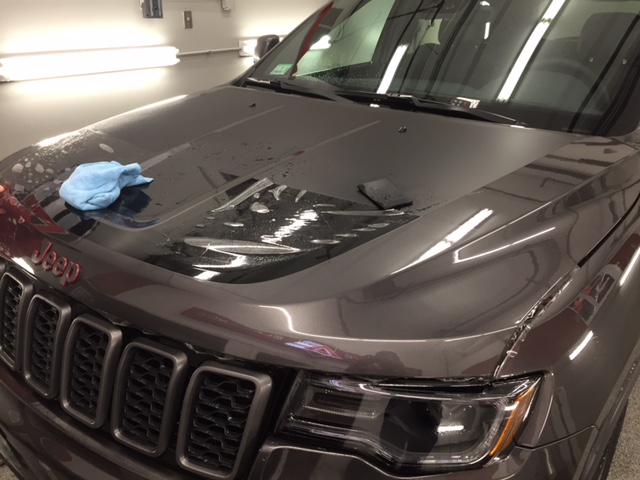
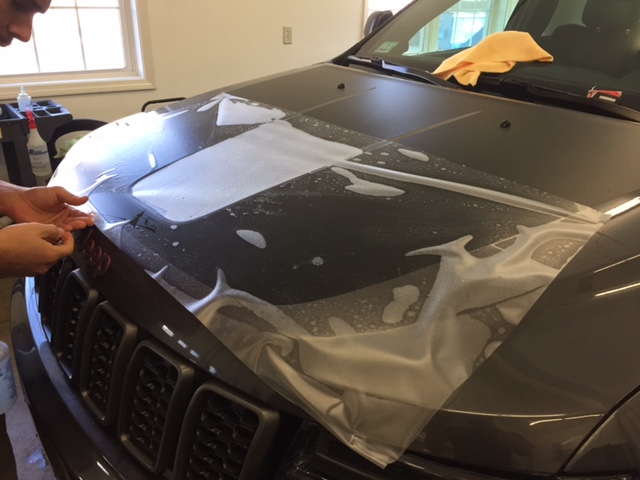
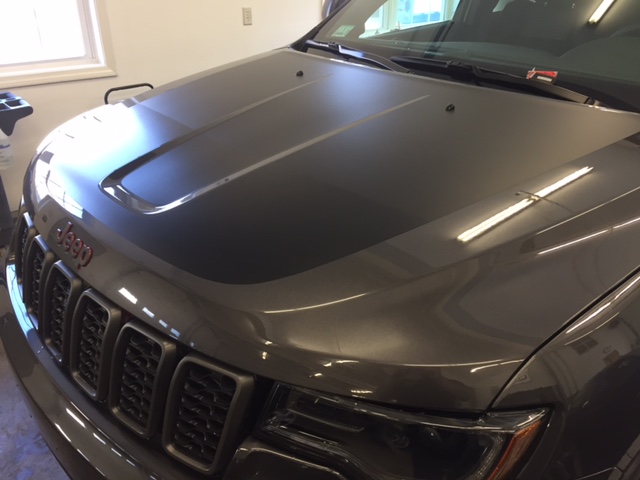
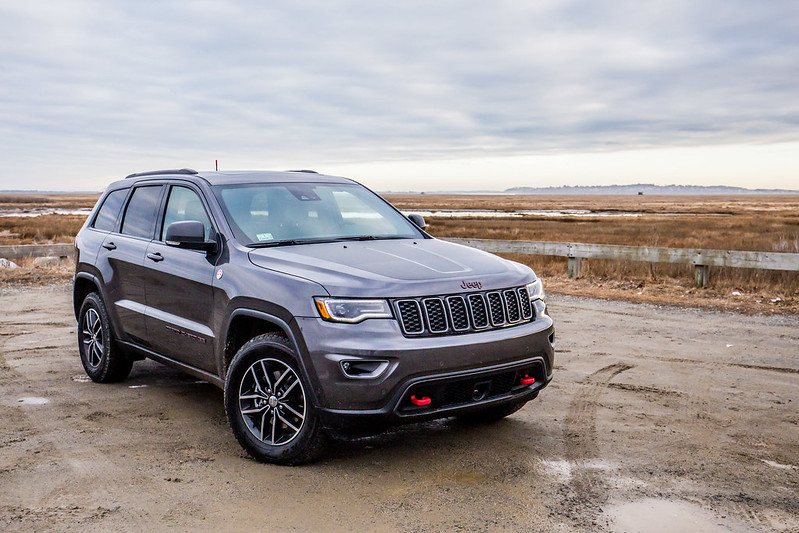
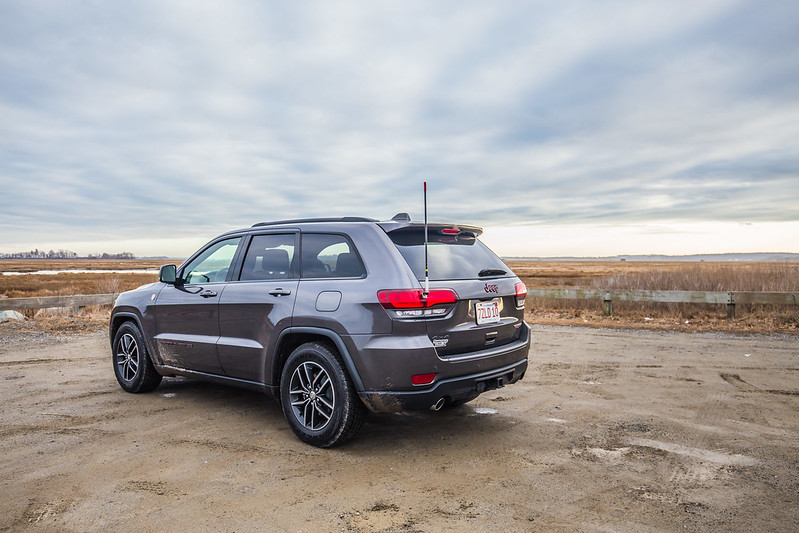
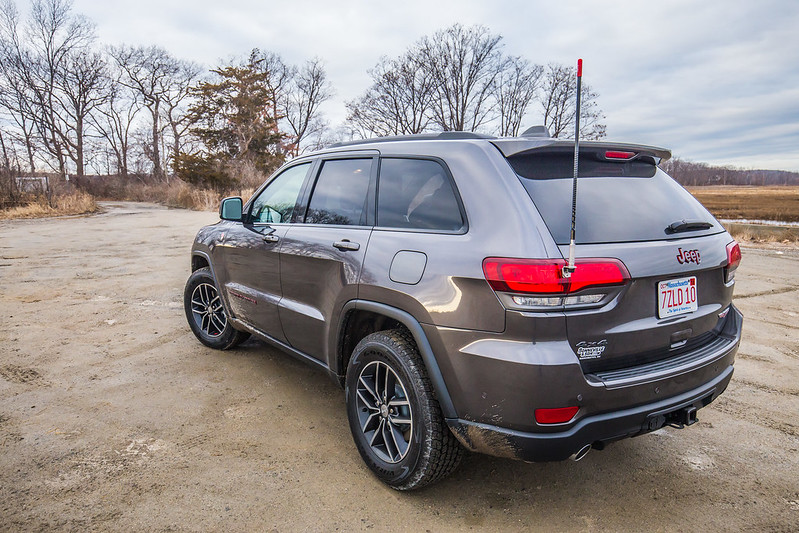
I purchased it and dropped it off immediately for the front end to be protective wrapped, so I didn't have a chance to take it for a real high-res photo shoot (save for lining the ladies up for a family photo as you'll see below). Here are some photos to start, since that's what we all love in these threads anyway. This will not be the most advanced or capable build in the history of this forum, but aside the rare iPhone photo, I promise to at least have high quality pictures.

Look forward to writing more posts with mods and adventures.

Ryan


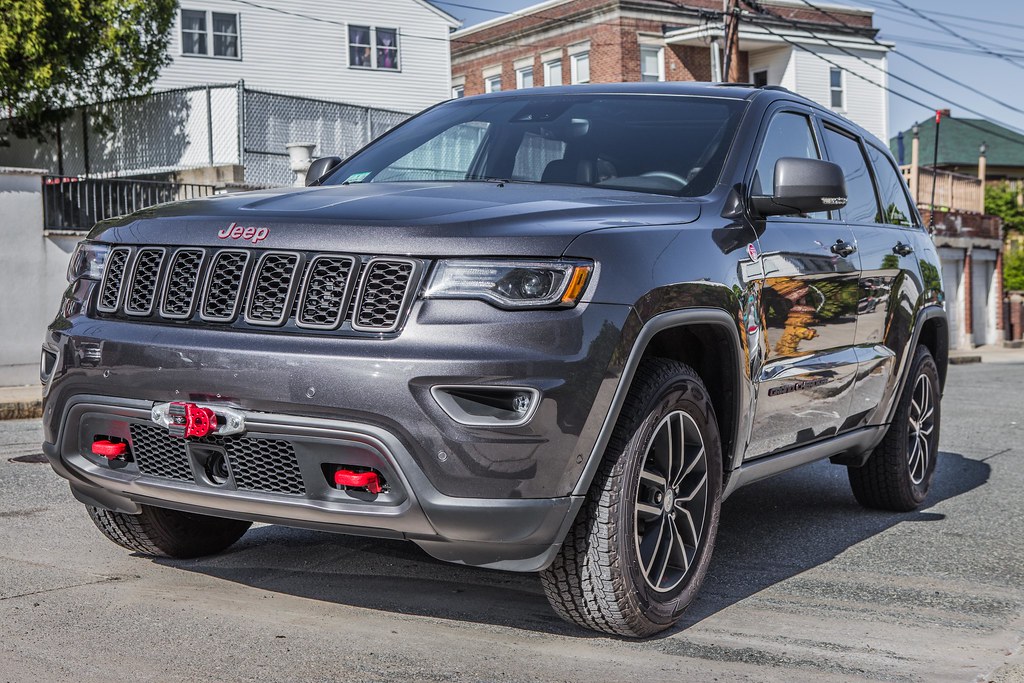
At the Dealership by Ryan McKee


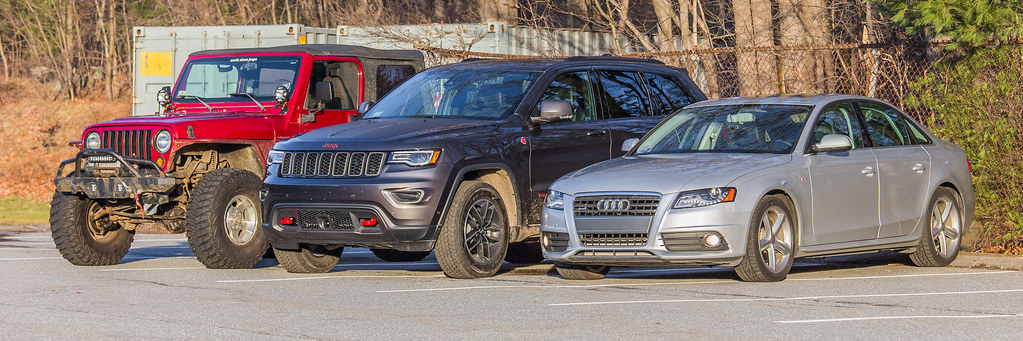
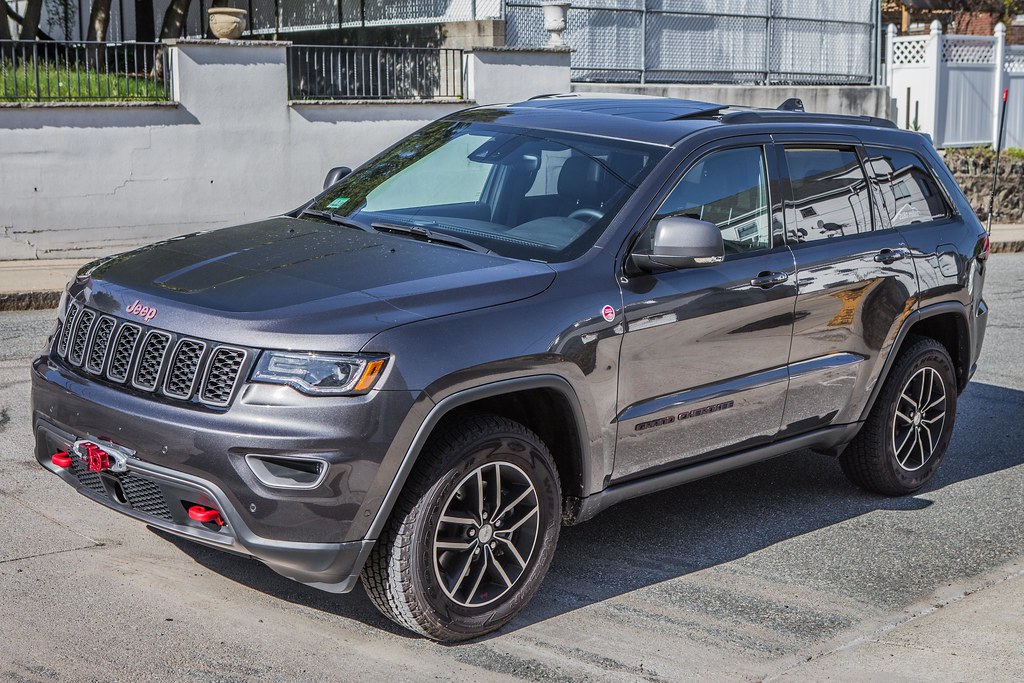
Three's Company by Ryan McKee
 
Discussion starter · #2 ·
So first up on the mods list (I guess removing the license plate bracket happened first) was to get the front end protective wrapped against road rocks and paint chips. I had been meaning to do this on the A4 when I purchased, but never got around to it. I had only had the GC home for 12 hours before I drove it a few miles and dropped it off at a local shop that has Lambos, Ferraris, and Porsches as his regular detail / wrap clients. In discussing my options with Pete, the owner of Unique Car Care, even before I took delivery of the Trailhawk, he laid out three options for protective packages that I could go with.

For $799 I chose the Xcel self-healing/UV safe/10 year warranty protective wrap for the full front bumper, grille, 1/3 hood, 1/3 front fenders, and mirrors. He even used a special "stealth black" to cover the hood decal to match the hood wrap line. In addition to this I had him do the b-pillars to protect the glossy black material from scratches, then the a-pillars and the roof line before the sun roof. My intention with the latter two was to protect the paint from scratches that I might encounter when on trails as the roofline lifts the low hanging branches up. I know a lot of you have access to wide open trails and beautiful mountain ranges, but in New England we have a ton of heavily wooded trails with overgrown vegetation that often lends pin striping to the paint jobs of our rigs.

Total cost with the pillars/roof add-ons and a detail job after the install - $1,049.00... Might seem steep, but with the road and trail miles I intend on putting on this, I think protecting it right off the bat was the only decision. Beneficial for me, he kept the car in his shop all week while I've been gone.

Here are some photos he sent me during the install...


Xpel Ultimate Bumper Install by 2180miles


Xpel Ultimate Bumper Finish by 2180miles


Xpel Ultimate Hood Finish by 2180miles


Xpel Ultimate Hood Install by 2180miles


Xpel Stealth Film Install by 2180miles


Xpel Stealth Film Finish by 2180miles
 
Discussion starter · #3 ·
So the next thing up on the mods list was a CB. Our club has a requirement for CB radios during group events and trail runs, and while I'm not entirely sure yet that the Grand will replace the TJ on those easier runs, it's still important for me to have it. I've been planning to take the amateur exam and eventually installing a 2m/440 system in the truck, but haven't gotten around to that yet. For now, a few miles of coms is all I need on a regular basis. For better or worse, there's not a ton of information on CB installs in the WK2 models. A handful of photos here and there of antenna mounts, and a bit of HAM installs, but I figured I'd go ahead and of a more detailed write-up for anyone else that may need it in the future.

In order to maintain a clean look for the cabin, and to occupy as little floorspace as possible, I chose the Cobra 75WX unit. The system is pretty much contained in the mic itself, with scan and weather functions, and has a separate box that converts the PL-259 coax to the mic cable, also adding an external speaker 1/8" jack (the 75WX is known for a weak speaker, since it's contained in the microphone itself... for now, it'll be fine, but I'll eventually put a speaker under one of the seats for a little more oomph). I also chose a 2' antenna with the approximate knowledge that when mounted on a spring by the bracket, I would get the top of the antenna about 8" over the roofline. While this isn't fantastic for any antenna, it will give me adequate reception and will still maintain a clean OEM+ look (it'll also be able to fit in the lower bay of my garage if ever the need arose, and I can easily swap in a taller antenna for trips with the club.

From the images I found on google, it seems most people rivet or velcro a mic clip into the center console or on either side of the 8.4" screen, but I wanted something that was a little more easily accessible and didn't require drilling a hole in the dash or the tacky look of an adhesive. I started searching for a cell phone type mount specific to the Grand Cherokee, and discovered the ProClip Console Mount which was designed to mate up to the center console by the cup holders. They provide a small tool to pop up the console and get the lip of the clip underneath for secure mounting. It took all of 2 minutes to get this thing hooked up, including drilling out and screwing in the mic clip that Cobra provided with the CB.


ProClip Mount by 2180miles


ProClip Mount by 2180miles

Photos of other owners who have tailgate mounted antennas on the WK2 have shown them in two locations, 1 being drilled into the brake light assembly, and the other into the lower bumper below the brake light. In both instances the antenna is mounted into plastic, so I went ahead and ordered a NGP (no ground plane) antenna from Firestik. This is a special kind of antenna where the internal wiring is designed to work at locations that do not have metal ground planes, like motorhome fiberglass, on a motorcycle where the metal is minimal, and on boats. In this instance it worked perfectly for my plastic brake light.

I initially was hesitating to drill into the brake light itself but after removing the plastic pop rivets and taking the light off the Jeep, I realized that there was plenty of room to get a metal bracket on the back side of the mount in between the tail light's plastic. I cut up a small piece (1.5" x 1.5" , if that) of 18 gauge steel to provide a firm backing to the antenna bracket. Drilling it out to the same hole pattern as the bracket I was then able to use the self-tapping screws to get through the mount, plastic brake light, and metal on the other side. I painted the metal plate and put it front of my heat gun to speed up the drying. Putting this back onto the Jeep I was able to close the tail gate and check that there were no clearance issues between the two when it closed. Initially there was a little bit of rubbing (against the tail gate side plastic, not metal thankfully!) so I took the bracket to my angle grinder with a flapper disc and smoothed it down a bit to cut down on rubbing.


WK2 Brake Light Assembly by 2180miles


WK2 Brake Light Assembly Removed by 2180miles


Firestik Antenna Bracket w/ Metal Back Plate by 2180miles

Next up in the process was figuring out how to get the coax cable back to the CB itself. I had decided from the beginning that the CB controller box would live under the battery compartment lid (the battery on the WK2 is under the passenger seat... makes 12v wiring a breeze), so the coax needed to end up there. I fed the wire through the vents in the back of the trunk, then used my interior trim tool kit to lightly bend the trim pieces and push the wiring underneath. I moved from the rear pillar to the trim piece at the very back of the trunk, then around to the passenger side. I had to unbolt the cargo tie down to lift the right side of that trim piece up, but then was able to feed the wire down along the spare tire compartment to behind the rear bench seats. Moving to the rear passenger door, I fed the coax under the door trim and then under the passenger seat bracket and into the battery compartment. It took a while to get all of this done, using patience as I was petrified of breaking a trim panel on the brand new truck, but I managed to use all 18' of the wire without any coils or major stuffing of any spare wire... all good things for signal! It's also nice that the only time the cable is exposed is the 2" between the B-pillar and the front passenger seat, and the location where it passes through the tailgate weather strip.

Once that was done, I went to check in on my buddy Rob who had been going to town with the battery compartment cover. Cobra includes a nice grommet and mount for the wire, so we decided that instead of mounting the control box on the top of the compartment cover, we'd mount it underneath. Due to where the battery lives there was a lot of room to the left side, where the control box fit perfectly. Simple crimp-on ends were easily attached to the (+) lead of the battery, and we grounded it out to the seat bracket for a good chassis ground. Drilling out the compartment cover to run the mic control cable under the seat, we then threw the grommet in there and called it good. The nice thing about this CB is that the microphone can detach from the control box so if I ever need to get it out of the way for whatever reason, it's simple to do so.

Here are the photos of the wiring (I labeled the route in red) and the under-seat bracket and wiring.


Coax Routing Through Trunk by 2180miles


Coax Through Passenger Compartment by 2180miles


Coax Into Battery Compartment by 2180miles


Batter Cover Undermount by 2180miles


Battery Cover Install by 2180miles


Battery Cover Installed- Wire Quick Disconnect by 2180miles

After this it was a matter of getting the antenna assembly onto the rear bracket, and tuning it. While Firestik tunes their CB antennas from the factory, I find it's always best to re-do the tuning on the vehicle itself to find out how the environment and install have affected its signal. The yellow band at the base of the antenna in some photos is there to denote that is is a NGP antenna and will not function normally on a standard CB antenna install. Once tightened down on the bracket and the tailgate operation was tested a few times, we took the Jeep out to the end of a state park where marshlands surround the parking lot for quite a distance in every direction. This area provides an uninterrupted surrounding for the antenna to be tuned in, not affected by power lines, buildings, or other structures that can cut down on the reception and SWR readings.

After toying around with the adjustable antenna screw for a while, Rob and I were quite pleased to have the CB measure in at around 1.2 - 1.5 SWR at channels 1, 20, and 40. In my many experiences installing CBs in my Wrangler (I've used 3, 4, and 5' antennas, so I've done a bit of tuning) and installing them in dozens of friend's rigs, this was the quickest and cleanest install to SWR readings I've ever come across. I was quite pleased. I took some photos of the Jeep while we were out there, and let Rob mess around with the air suspension, dropping it into it's lowest settings (which I hadn't yet done) and raising it up to Off-Road 2 mode, it's highest setting.

After returning back to his house, packing up my stuff and leaving, he sat in the cab of his Tacoma and we did a range-test between our radios as I drove away. I knew going into this that the 2' antenna would be a limiting factor on range, but I was happy to find that I could hear him clearly and he could receive me clearly up to around 2 miles away as the crow flies. I had measured out distances from his house online beforehand to know which landmarks marked which distances. So, a few hours and about $150 and I have a solid CB set-up in the Grand, with a range that will do just fine for what I need it for.

Hopefully this will help someone out in the future if they are doing the same thing to their WK2.

Big thanks to Rob for helping out. Here are the final photos of it installed.


WK2 Antenna Spring Mount by 2180miles


WK2 Antenna Mount Bracket by 2180miles


ProClip with CB Mic by 2180miles


Grand Cherokee CB Cabin Mount by 2180miles


WK2 Plum Island Reservation by 2180miles


WK2 Trailhawk Rear by 2180miles


WK2 Tailgate by 2180miles
 
Great writeup on the CB install. The Grand looks great too. Good call with the wrap, pricy but worth the investment. My 15 JGC already has a lot of scratches, dings, etc and I've only driven it on the blacktop.
 
Discussion starter · #5 ·
Great writeup on the CB install. The Grand looks great too. Good call with the wrap, pricy but worth the investment. My 15 JGC already has a lot of scratches, dings, etc and I've only driven it on the blacktop.
Thanks much. There wasn't much literature on the web about CBs in these things so I thought I'd be overly thorough, lol.

The wrap was pricey, but I've always regretted not getting it on my Audi (lower, way more prone to rock chips) but I knew that it was going to be the very first thing done on the WK2 when I bought it. Definitely should help keep the thing cleaner after what will likely be a lot of miles to destinations around North America.
 
Discussion starter · #6 ·
Next up... recovery points for the rear end of the rig.

While the forward bumper of the Trailhawk is adorned with red powder coated tow hooks, a large part of the aggressive appearance of the vehicle's front end, the back has nothing readily available but a trailer hitch receiver. In the interest of being ready for things like trail recovery scenarios, I wanted to put something in the hitch to allow for being yanked backwards if ever necessary. While Harbor Freight has their classic $19 option, but obviously it isn't really an option at all.

After scouring the internet I recognized a name from the ExpoOverland guys front bumpers - Factor 55. A product by the name of "Hitchlink" caught my eye as the perfect solution to my needs for a rear recovery point. A block of aluminum weighing in at just under 2 pounds and rated to 9,500lbs , this thing is a beast. Their website depicts the ultimate failure point at 51,000 pounds... a point by which the trailer hitch and frame would have been yanked out from underneath the WK2. With a multitude of color options I rolled the dice for the dark grey to match Halley, and was quite pleased to find that it did. I bought some powder coated red 3/4" shackles to add a nice accent to the back of the Hitchlink, keeping with the grey/red theme of the entire vehicle. A few minutes on Amazon found me a locking hitch pin, since I've now got nearly $120 into my rear recovery point... not something I'm ready to have stolen off the back end of the Jeep.

While on Amazon I also picked up a 125-piece first-aid kit for a whopping 20 bucks. Never a bad thing to have, and it even goes so far as to include a glow stick and space blanket. Hopefully never are needed, but for now they're stored in the nifty zipped up kit in the trunk's spare tire organizers.

Pictures, cause that's what people care about... :)


First Aid Kit by 2180miles


125 Piece First Aid Kit by 2180miles


Factor 55 Hitchlink w/ Pin Lock by 2180miles


Red Shackles by 2180miles


Factor 55 Hitchlink by 2180miles


Hitchlink Street View by 2180miles
 
Great helpful write-ups. Motivated me to have my 17 white GCTH wrapped later this week- especially since we tow it behind the Motorhome. How about a teaser list of TH mods to come? Any thoughts on increasing tire size?
Alan
 
Discussion starter · #9 ·
Subscribed. Great looking Trailhawk. It's the same color I'd get if I was buying one! Looking forward to seeing more.
So sorry for the delay in getting back to you! Thanks for the kind words.. I looked high and low for Granite Crystal with all the features I wanted. Love the color.
 
Discussion starter · #10 ·
Great helpful write-ups. Motivated me to have my 17 white GCTH wrapped later this week- especially since we tow it behind the Motorhome. How about a teaser list of TH mods to come? Any thoughts on increasing tire size?
Alan
Thanks RRUNR! I'm sorry for the delay in getting back to you. There are a TON more mods... I've got to start posting them on here. I will eventually increase tire size, just haven't figured out when yet.
 
Discussion starter · #11 ·
May of last year brought some big updates.

In March of 2017 I reached out to an Austrailian company called Chief Products who makes skid plates, push bars, etc. for the Grand Cherokee platform. Reading about their recessed winch mount, and noting their comments about looking for a 2017 M.Y. & Trailhawk platform test vehicle, I emailed them volunteering myself to assist with the test-fitting of their new WK2 Hidden Winch Mount. In a few long e-mails back and forth between myself and Bill, the owner of Chief Products, we decided that he'd ship me one of their winch mount systems in exchange for install and final-product photos, and measurements of the fitment within the 2017's new sloped grill style. This was an immense first step in making the Grand more capable on its own.

Knowing that this winch mount would need a winch to go in it, I reached out to Warn and asked about their corporate sponsorship opportunities for the Trailhawk build. In doing a fair amount of research and speaking with Bill at Chief about what winches he already knew fit the mount, it became pretty clear that the Warn Zeon Platinum was going to be the most ideal option for the WK2. Yeah, okay, it's insanely expensive - $1750 - (this especially emphasized due to me being a guy who has rocked a Smittybilt XRC-8 for 6 trouble free years on the front of my TJ), but the Platinum is the best winch on the market in Warn's 4WD product line, and has one key quality that will prove immensely useful in the Grand Cherokee: an electronic clutch. Once this puppy is recessed into the front end, accessibility of the free spool/engage clutch would become rather difficult as far as I can tell. It's waterproof, wifi-based remote operable, has an accessory 12v port for driving lights (bypassing the need to run wiring through the firewall) and is wound with the Spydura Synthetic line. After a few e-mails with a woman in the sponsorship department at Warn, I'll have the most highly regarded unit they're currently manufacturing in the front end of the WK2 on the Chief Products mount.

These, combined with a discounted FrontLink winch hook courtesy of Factor55 which I'm equally excited to install, will transform the front end and my self-recovery abilities immeasurably. For now I've got some stock imagery, but should have some great photos coming when I tackle the install with my buddy Rob in a few weeks. In the mean time, I'm pretty excited for these upcoming modifications to the rig.


Chief Products WK2 Hidden Winch - Product Image by 2180miles


Warn Zeon Platinum - Product Image by 2180miles


Factor 55 FlatLink - Product Image by 2180miles
 
Discussion starter · #12 ·
At the beginning of May, over the course of two afternoons and evenings, my buddy Rob and I dove into the installation of the Chief Products Hidden Winch system in the front end of my WK2 Grand Cherokee Trailhawk. I had been speaking with Bill Mackin, the owner of Australia-based Chief Products, since the beginning of March in regards to getting one of their mounts test-fitted in a 2017 Grand Cherokee to see what kind of adjustments, if any, would need to be made for the new generation grills and front-ends. I reached out to Warn to inquire as to sponsorships for a winch, and after speaking with someone from their Sponsorship team, was offered a steep discount on the 10-S Platinum for installation on the Trailhawk.

*It's important to note that this installation is not representative the Chief Products final version of the Hidden Winch system, as they were still getting information from me about what does and does not work with the 2017 GC model I installed it on. This is especially important as it pertains to fitment and trimming. As of my writing this they're reviewing the notes/write-up and seeing what changes may need to be made to the assembly*

-----

Having never taken the front end off of the Jeep before, and being used to the much more accessible front end of a Wrangler, I did some research as to what went into taking the lower fascia and the upper bumper off. Chief Products had a good write-up for the fascia, and a quick YouTube video showed how simple it was to remove the bumper… we were in business. It's easy enough, with a few quarter-turn screws under the fascia, two plastic rivets per side in the wheel well, the fascia then pops off from the bumper. The bumper itself requires removing a small hex-head nut in each wheel well, and two small plastic rivets along the top of the radiator brace bar.

We decided to do the installation at Rob's house, as I'm still in the process of getting my garage at home organized enough and he has a large driveway that easily accommodated our needs. I opened the shipping boxes and laid out our components on an old section of drywall he had in the shop, and we took inventory of what we had to work with.


Chief Products & Warn Zeon Platinum by 2180miles


Chief Products Parts List by 2180miles

1. Left & right tow hook mounting bracket
2. Air compressor guard bracket
3. Left & right tow hook spacers
4. ACC camera mount bracket
5. Left & right frame mount brackets
6. Winch cradle
7. Left & Right radiator brace brackets


Lower Fascia Removal by 2180miles


Upper Bumper Fastener Removal by 2180miles


Bumper & Fascia by 2180miles


Front End Removed by 2180miles

From there we disconnected the ACC camera via the two fasteners that hold it to the bottom of the OEM bumper. There's a small wiring harness that needs to be unclipped, then it was placed to the side well out of harms way (I don't want to know how much that camera costs). We then went about removing all of the fasteners that hold the OEM bumper to the Jeep itself, as highlighted by the red circles in the photo below. With the Styrofoam bar and metal backing removed, we took off the plastic protecting pieces from the air suspension system and the windshield washer fluid reservoir. Last to do here was remove the air duct pieces from in front of the radiator, and move the wiring looms as far out of the way as possible for access to the front end.

The majority of the Chief Products Hidden Winch system is comprised of 3 main pieces (comprised of 5 individual parts). The winch cradle spans the mid-section in front of the radiator, and holds the winch in place. There are two frame mount brackets, one for each side, and finally two tow-hook mounting brackets that sandwich between the cradle and frame brackets. By starting with the frame brackets, installing the mounting fasteners without tightening down, we were able to then install the tow hook pieces and the winch cradle without issue, putting the hardware in to hold the entire assembly together while we figured out how the other pieces assembled.

This was getting towards the end of our first day (night, actually… we were working by the light of the flood light in the driveway) and we were both pretty tired. We struggled for a while with the tow hooks before I called Bill at Chief Products and asked him if we were missing something. In hind sight, had we played around a bit more with the pieces we would have realized that the OEM tow hooks need to be swapped to the opposite side of their original installation location, and flipped over to work with the new brackets. Laymen's terms: move the driver hook to the passenger side, passenger hook to the driver side, flip 180 degrees, and install to Chief Products tow hook spacers.

At that point we called it a night, put the front bumper and ACC camera back on without the lower fascia, and I drove home without incident or any pieces falling off.


Fasteners to Remove by 2180miles


OEM Bumper Removed by 2180miles


OEM Air Ducts Removed by 2180miles


Chief Products Cradle Installation by 2180miles


Chief Products Cradle by 2180miles


Cradle with Tow hooks by 2180miles
 
Discussion starter · #13 ·
When we picked up on day 2, we were determined to finish the project before it got late again. It was around 16h00 by the time Rob got home from work and we got started, but we made solid progress as the sun made its way across the sky.

Now that the tow hooks had been figured out, we were able to move forward with tightening the entire Hidden Winch system down, and began the process of test-fitting the OEM Trailhawk bumper. In comparing it with the Limited / Overland / Laredo bumpers it seems that the grills is much more sloped back. I can't comment specifically because I do not own any of the other models, but I do know that the guy who installed my clear bra on the WK2 made a comment about it being different from any other grille he'd ever seen. As such, Bill and his team were intrigued to know whether or not this system would work on the new model.

As we re-installed the bumper and fascia, we noticed that there were parts of the winch cradle that were pushing out against the both trim pieces, to the point where they would not fit back into place. We looked at our options for trimming the back side of each piece, and "modified" the bumper by bending the mounting tabs for the parking sensor looms upwards, essentially lightly breaking them to alleviate some rubbing on the winch cradle. The cradle is fit with 6 mounting points for the bolts that attach to the frame mount brackets, with each of those 6 points being U shaped, opening towards the front of the Jeep. Due to the space in the U-shapes, Rob and I decided to push the entire cradle backwards ½" or so to fit better behind the bumper and fascia. In talking to Bill at Chief, their 2015 model did not have room in front of the radiator to move back the way that we were able to in the 2017.

Once it was pushed back, we re-installed the bumper without issue, and popped the fascia back in as well. Knowing it would all fit, we turned our sights towards trimming out space for the fairlead to rest against the winch cradle mounting points. Initially, I was under the impression that this would be alike the other Rocky Road winch mount, with the fairlead being in the middle of the bumper by the license plate bracket. To my delight, it barely touched the bumper, and instead the majority of trimming came out of the fascia. I made a small cut, maybe ½" tall into the bottom most portion of the bumper itself, and then went to work tracing the fairlead to the fascia. When they have a final fairlead design, Chief will include a template for future installers to use when making their cuts.


Chief Products Parts Labeling by 2180miles


Bumper Trimming by 2180miles


Bumper Trim Lines for Fairlead by 2180miles


Fascia Cuts & Removal by 2180miles


Final Fascia Cuts & Removal by 2180miles

Once we were comfortable with the trimming, we moved on to the installation of the winch. The Zeon 10-S Platinum is described by Warn as being "built for those who push the limits-with double the durability, 20% faster line speed, and extreme IP68-rated waterproofing. The Advanced Wireless Remote controls not only the winch, but also the clutch and other accessories. With a 10,000 lb. pulling capacity, high-performance motor package, and Spydura® Synthetic Rope, you'll be equipped to go places others only dream about." - for this application, it's perfect, especially with the electrically controlled clutch. Whereas my other winch sits on the open front of my Wrangler, I don't have access on the WK2 to engage and disengage the electric vs. free-spool setting. With the remote, this makes the hidden factor of the winch all that more feasible.

We followed Warn's instructions for mounting the winch and spooling the Spydura line, outfitting the end of the synthetic rope with my new Factor55 Flatlink winch hook. Rated with a breaking point far beyond what I'll ever be utilizing, the easy D-ring attachment point and red powdercoating make it a sleek addition to the front end of the Grand Cherokee. Once the line was appropriately attached we spooled it in, maintaining tension on the line by hand and wrapping it cleanly. While I don't currently have any auxiliary lighting planned for the grille of the Trailhawk, the Zeon Platinum offers 2x 12v ports to plug auxiliary lights into, to then be controlled on/off by the wireless remote. I may someday add some lights in there, at which point this will be a phenomenal way to avoid running wiring through the firewall.

I took a couple dozen shots of the front end from every angle I could think of, and then we moved forward with re-installing the ACC camera on a Chief Products supplied bracket to the rear bolts holding the winch into the cradle. We had to wallow out the mounting bracket holes a little bit to fit what I assume is a revised camera mount dimensions, but notes and photographs were taken to show the guys at Chief.

Once the camera was good to go and re-harnessed, we re-installed the front bumper securing it back into the wheel wells and above the radiator by reversing the removal process. Putting the fascia back on we realized we had a little more trimming to do to get the outer edges by the wheels to fit appropriately. We got it to fit that night, but after driving last week with regular use, I realized I have to go back and re-trim some of the area in front of the fairlead mount to get the clips to sit properly back in the bumper above the fascia.


Warn Zeon Platinum 10-S Install by 2180miles


Spydura Synthetic Line Installation by 2180miles


Warn Zeon & Chief Products Hidden Winch by 2180miles


OEM Tow Hooks Re-Installed by 2180miles


Chief Products Front End View 1 by 2180miles


Front Bumper Re-Installed by 2180miles
 
Discussion starter · #14 ·
In the weeks (now months!) after installing the Chief Products Hidden Winch system, I've had no issues other than craning in my neck every time I turn around in the grocery store parking lot to check out the Jeep as I walk away. The pieces are secure, and the front end looks sexy as all get-out with the Factor55 FlatLink hinting that there's a lot of pulling power under that front bumper.

I had an opportunity over Memorial Day Weekend to hook a tree-saver up to an Oak in my friend's driveway and pull the WK2 uphill. While it wasn't a stressful situation, the system, comprised of the mounting bracket, winch, hook, and remote performed flawlessly. I will go forward feeling more confident in the Jeep's capabilities with this new self-recovery capacity in place. I still have some more trimming to do, but here are the photos taken in the days after we finished the installation. I'll be sure to report back with notes from Bill and the great team at Chief, and will be sure to photograph the first opportunity I get to really put some stress on the system in a self-recovery scenario… not that I'm looking forward to that or anything ;-)

More photos to come in a less urban environment, but these will have to suffice for now.


Chief Products / Warn / Factor 55 Installation by 2180miles


Chief Products / Warn / Factor 55 Installation by 2180miles


WK2 Trailhawk w/ Chief Products & Warn by 2180miles


WK2 Trailhawk w/ Chief Products & Warn by 2180miles
 
Nice install write-up on the winch. It's nice that the remotely controlled clutch allows for a completely covered install. Very cool.


Jeff
 
Discussion starter · #16 ·
Nice install write-up on the winch. It's nice that the remotely controlled clutch allows for a completely covered install. Very cool.

Jeff
Thanks Jeff! Appreciate the kind words. The remote clutch is phenomenal - wouldn't want it any other way.
 
Discussion starter · #17 ·
Also Last Spring...

One of the most important things for me in vehicles is visibility. The TJ has a LOT of LED lighting, strobes, etc. - so the plan for the WK2 was bound to be pretty intricate as well. First step for any additional lighting is figuring out how it's going to be controlled, and from where it's going to be controlled. After Googling a fair amount of options, seeing if anyone had built vehicle-specific panels, I went ahead with my initial plan to install a switch panel to the lower left side of the steering column. There was a great write-up by a guy on JeepForum a few years ago that followed along the same lines as my idea.

I wanted/needed to keep the switches refined and purposeful, so I had to decide which each of the four Contura switch spaces would control. For me, reverse light is hugely important… second to that is forward facing light, so recessed driving lights or some kind of LED bar will get a spot. Third up in my mind is a strobe light system, as I've spent many years with one in the TJ and often find myself pulling over to help people on the side of the road, or utilizing them for other situations in bad weather and the like. Spot 4 then became a catch-all, or an expansion slot.

So:

Switch 1: Reverse LED Lights
Switch 2: LED Bar (likely roof mounted)
Switch 3: LED Strobe System
Switch 4: For the mean time, VHF radio power.

With a quick Amazon order for switches, wiring, heat-shrink crimp connectors, and the 4-space mount, I got to work. The VHF switch cover was from eBay for an extra seven bucks.


Switch Panel - Front by 2180miles


Switch Panel - Rear by 2180miles


Switch Panel - Side by 2180miles
 
Discussion starter · #18 ·
The Contura switches I bought were 5-pin versions… Inputs: +12v for the status light and power source, +12v for the locator light (to find the switch when it's off), and a ground. Outputs: ground loop, +12v for the light itself. It took some research to find out the exact way to wire this, but once I knew I got to work on an 18awg wire loom for them all. The night I put it together I was sitting in my girlfriend's office as she worked late and finally had to reassure her coworkers that I wasn't building a bomb in their workplace. Final results were clean, I was happy.

From there I had to figure out what kind of wire loom I would use to get from the eventually-will-be-built control box (relays, fuses, flux capacitors, etc) to the switches. I knew each of the 4 switches would need an individual wire strand to trigger each respective relay, then all would need a +12v lead which they could share, and a ground which they could also share… this brings us to 6-strands of wire for those who can't count fast.

I work in the live events industry; so 5 and 7 pin cable is a common thing in my life. The issue that I had was the fact that most of those wires, as well as DB9 data cable, are mainly 22-26 AWG, which although it's okay to push ~0.33A down through, I didn't want to mess with having to crimp 24 gauge cable to the switch pins. A quick run to Home Depot for 7-strand thermostat cable yielded me a more substantial 7-strand (solid core vs stranded) wire for sprinkler system installations. The other benefit of sprinkler versus thermostat is that the latter was brown, while sprinkler wire housing is black… cleaner to install and easier to hide.

Once I had the wire in hand, I cut each strand to the appropriate length. Red and White would be my hot and ground lines for easy decoding, and the color-coding of the rest would be easy enough to remember for when it's time to install the control box. In order of (ROYGBIV) I continued past red with Orange on switch 1, Yellow on 2, Green on 3, and Blue on 4. I cut each of the wires to specific lengths to make the sprinkler loom sit cleanly against the switch panel, and then went ahead and crimped/heat shrunk the wires to mate with their female crimp-on ends. I added a separate +12v line made of a miscellaneous five foot section of 14awg wire to tie into an ignition-based +12v line to turn on the locator/indicator LEDs in the bottom of the Contura switches, separate of the ignition.

In laymen's terms, I wanted the indicator lights to come on with the ignition of the vehicle, but the lights themselves (strobes/rev/LED) to be able to remain on even when the vehicle is turned off. The latter will get their +12v lead from a fuse panel directly tied to the battery.

The result was a rather clean switch panel, parallel grounds and +12v for the leads and switch LEDs, and a 15-foot wire-loom for the relays to be triggered by.


18-7 Sprinkler Wire by 2180miles


Switch Panel Template by 2180miles
 
Discussion starter · #19 ·
Continuing with the switch panel install…

I apologize in advance for some of the photos seeming blurry, I was shooting this outside, handheld, with a very narrow depth of field to avoid a high/grainy ISO, and had nowhere to really bounce the flash off of in these tight spaces. I know most of you won't care, but for the photographers in us, I wanted to preface by saying I know there's a lot of unintentional bohek/obvious DoF.

Next up came the actual dash install of the switches. This part was a bit unnerving, as removing the knee air bag panel from under the steering column required the removal of a fair bit of parts, and the FSM's Interior Panel Removal section wasn't really great at depicting exactly what I needed. I took a ton of photos for you to see, but I'll detail this a bit more.


WK2 Lower Steering Column by 2180miles


WK2 Left Headlight Panel by 2180miles

You can see the panel in the photos above that I'll be working with, and the approximate area the switches will go into, below and to the right of the headlight selector switch and fuel tank door switch. *** DISCONNECT THE BATTERY TERMINALS BEFORE DOING THIS AS THERE IS AN AIR BAG UNDER THE STEERING COLUMN IN SOME MODELS! ***

The required tools here are a ÂĽ" socket set, a Phillips head screwdriver, and a small interior trim pry tool.

1. Pry off the plastic cover to the left of the dash, between the door and dashboard
2. Pry off the steering column surround bezel till it's loose at the top of the wheel
3. Remove the Phillips head screw to the top left of the steering column
4. Pry back the upper left and right of the large trim piece that covers the lower steering column from where it meets the upper dashboard (there are a few retaining clips, the tool will help)
5. Remove the plastic pop rivets holding the rug piece over the gas/brake pedal
6. Underneath the dashboard, remove 4 Phillips head screws (they're roughly highlighted in the photo below)
7. At this point you should be able to pull the upper piece of the trim far enough off the dash to remove the airbag trim piece from around the airbag itself.


Lower Speedo Fastener Removal by 2180miles


Under Steering Column Fastener Location by 2180miles

At this point you should be able to pull the upper piece of the trim far enough off the dash to remove the airbag trim piece from around the airbag itself. If you do have the airbag, you might struggle here. I decided against removing the airbag itself, and instead just removed that trim, but only after I made the mistake of trying to remove the air bag panel with the pry tool (you'll see tape in the last photos, I have to re-glue it back together……)

Once I got that done I was able to pull the panel forward and down enough to access the left side, removing the wiring harnesses from the fuel door button and headlight selector. I removed the headlight panel completely in order to better get the Dremel tool in there for trimming.


Removing Steering Column by 2180miles

After measuring the switch panel and comparing it to the rear support plastic behind the dash panel, I cut out an appropriate section to fit the depth of the switch into the dashboard. After that came making the template for the switch assembly itself, and then taping off the region in the panel in which I'd cut the hole. This was the most nerve-wracking part of the project, as I wanted to make sure that if anything, I undercut the hole so that I wasn't trying to fill any extra space in if I cut it too large. With the painter's tape in place, I used the honeycomb print in the dash plastic to make sure the Dremel cut was level and even.


Cutting Dashboard Trim by 2180miles


Trimmed/Cleaned Up by 2180miles


Steering Column Prep by 2180miles


Mid-Cut by 2180miles


Final Steering Column Cut by 2180miles

After the 2"x4" hole was cut I used a file to get the edges even and less rough, then did a few test fittings to make sure the switch panel itself would fit exceptionally snugly, which it did after a couple adjustments to the plastic of the dash. At this point I ran the 7-strand sprinkler wire harness through the Jeep and began plugging the crimp connections onto the switch panel to create the final product, leaving the +12v lead for the ignition lights coiled above the dash panel for me to work with at a later date.


Switch Panel Placed - 1 by 2180miles


Switch Panel Placed - 2 by 2180miles

I reassembled the harnesses for the headlights and fuel tank, then began piecing the dashboard back together by reversing the above disassembly procedures. Once everything was back together (note the green tape on the air bag panel that I'll glue back together), I ran the 18-7 wire harness through the trim pieces along the driver's doorsill, back behind the B-Pillar, and up to the rear bench. I've yet to decide where the actual control box for this will live, so at the moment the remaining 10-feet of loom is spooled under the rear bench until I get around to the final assembly of the control box and relays.

So that's that… the incredibly nervous process of putting a gigantic hole in the dashboard of a brand new vehicle. I don't know how the XOverland guys do this all the time, but here I am one step closer to getting this Trailhawk to where I want it to be!

Final install pics once everything was re-assembled, which I'll replace with newer images once the dash has been fixed.


Switch Panel Installed by 2180miles


Wide Driver Compartment View by 2180miles


Switch Panel Installed by 2180miles
 
1 - 20 of 96 Posts