

How To: Differential pinion mount/bushing replacement for WK/XK
Hopefully this will help other people if they should run into the same problem. I have seen other threads, here and on other sites, but not all of them have the drawing/pics and all the parts and prices.
Well, I started getting a clunk when going from reverse to drive and after searching determined it was the bushings on the front diff that needed to be replaced. There are 2 actual bushings and the other one is an actual mount with a bushing inside and comes as one assembly.
Since I did not know which of the 3 were bad, I just bought all there. Total for all three was about $180 shipped from www.justforjeeps.com (the mount is over $100 alone).
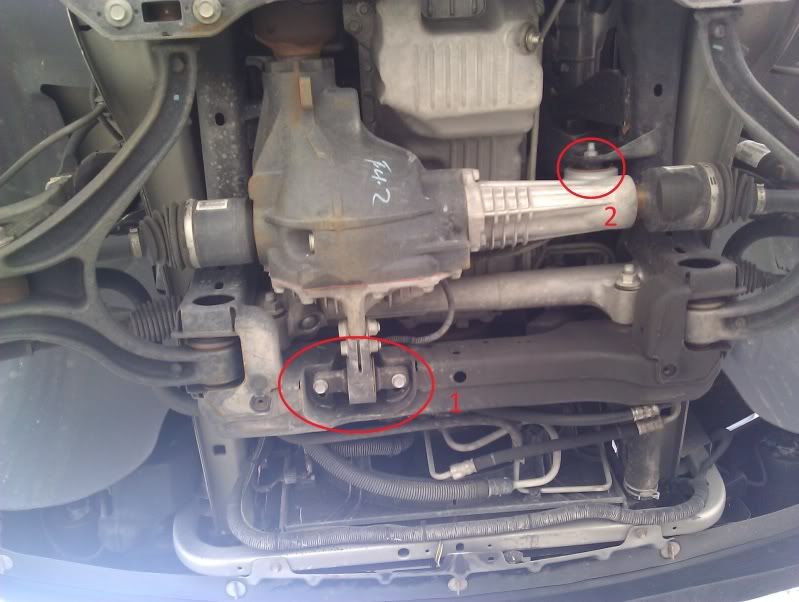
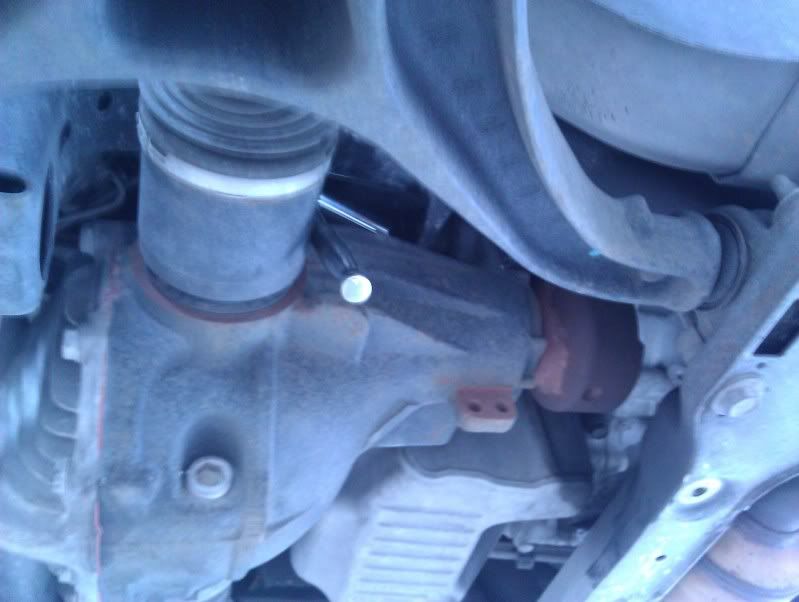
Here is a pic for reference. #1 is the easy one since you don't have to disconnect the drive shaft to change it (just remove the bolts that hold it down). #2 is the other one I could see easily that looked fine. The third is on the top, and I didn't take a pic. I originally just changed #1 since it looked bad and was easy to get to (I was hoping I would get lucky and that would be all I would have to do). Well, it didn't solve the issue, and since #1 was changed, and #2 looked fine, I am assuming #3 is the one that is causing my issues.
![Image]()
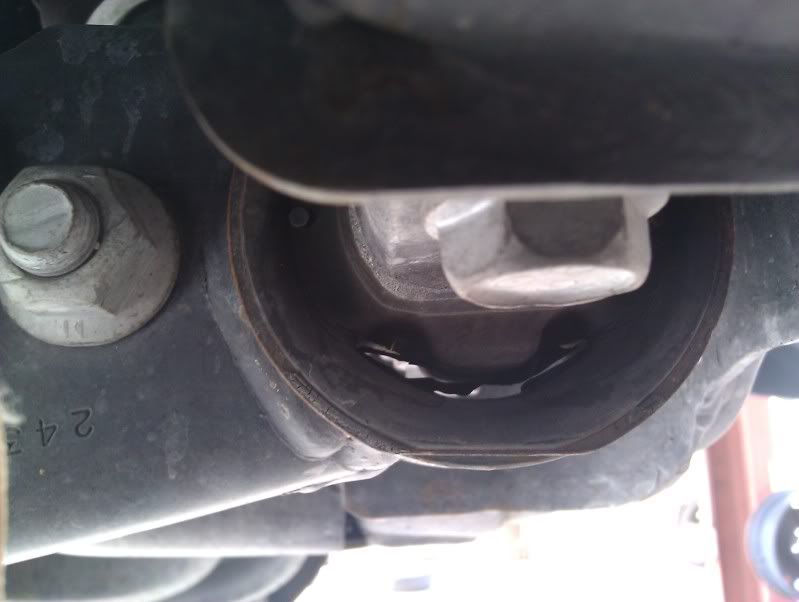
Here is a pic of #1 to try and show the cracking of it.
![Image]()
And here is a reference drawing showing all three. You need both #14's and #6:
![Image]()
Here are the parts needed:
1 of these. $107.10
http://www.justforjeeps.com/fraxmobr.html
2 of these. $29.79 a piece
http://www.justforjeeps.com/fraxmois.html
To start off, remove all the bolts from the front drive shaft. There are 6 8mm bolts holding it to the front differential and another 6 holding it to the transfer case. Once the bolts are removed, it needs to be pulled out and set aside. I had to use a rubber mallet to help unseat it, as it was a little tough. A few taps of the mallet is all it took. I let it sit on top of the cross member instead of trying to wiggle it out (I honestly don't know if it will even come out unless the cross member is removed that is there. That was too much work, as it is fine sitting there.). Before you remove the drive shaft, make sure it is marked on the drive shaft and the joint so you know how it was positioned. If it is put in different, it might cause vibrations. Mine was already marked from the factory.
![Image]()
After the drive shaft is removed and set aside, start removing the nuts and bolts holding the bushings in their mounts. I would do the upper and side bushing before removing the mount on the front of the differential (if you remove the front mount first, it will allow the differential to hang down and put stress on the bolts for the other bushings, which will make it hard to remove the bolts). I also used a transmission jack under the differential to keep it from dropping until I was ready for it to drop.
Here is the rear of the drive shaft and how it was resting on the cross member:
![Image]()
And the front of the drive shaft. It was resting on the heat shield for the exhaust:
http://img.photobucket.com/albums/v321/99formulam6/JGC/IMG_20111209_145729.jpg
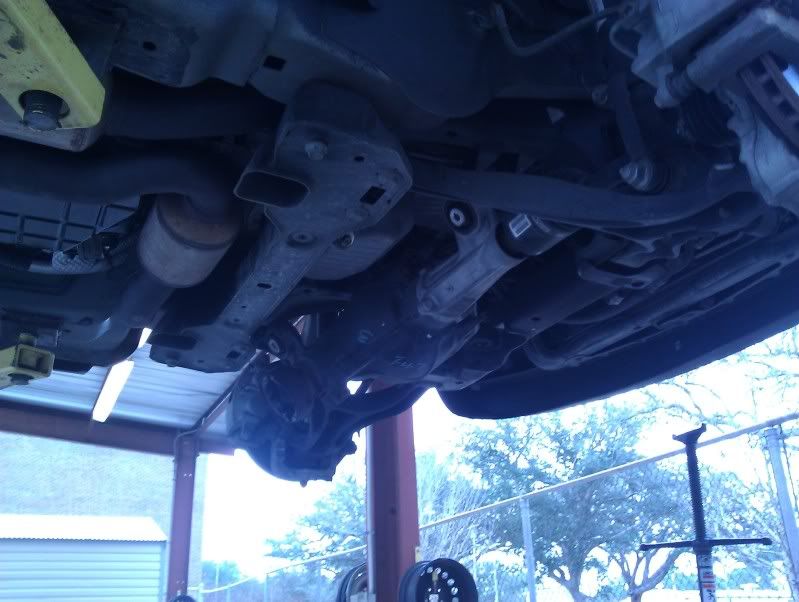
After the bolts from the bushings are removed, and the mount from the front of the differential is off, the entire assembly will be free to hang down and rotate to allow access to the bushings.
![Image]()
This was the hard part. The bushings are press fit into the housing, and mine we extremely difficult to remove. I ended up using an air chisel to remove it, but even using that was a pain. After the bushing is removed, the new one is press fit into the housing. I used a ball joint press, and it went pretty smooth.
When the new bushing(s) are in, reassembly is the reverse of removal (obviously). To get the nut on the bolt for the upper bushing, I had to set the nut in the socket and hold the wrench up against the bolt hole while using my other hand to slide the bolt in the hole. I had to do it this was because there was no way my hand would fit in the space to hold the nut. I also used the transmission jack to hold up the differential to help line everything up.
Tips:
*I did this on a frame lift and had tools/equipment that the Average Joe's garage won't have (I was able to do this on the Navy base I am stationed at and they have lifts/tools for me to use). I know people have done this with a jack and jack stands in their garage, but there is no way I would do it that way after having so much trouble with getting the bushing out of the mount.
*The drive shaft will have to be rotated to get to all of them, but I also had to have the E -brake on to be able to break the bolts loose, and tighten them when I put everything back together. So you will have to be able to get into the Jeep to put the E-brake on and off.
*The bolts for the drive shaft are 8mm. Having ratcheting box end wrenches will help a lot since the drive shaft kind of angles out around the bolts when it goes into the transfer case.
*The bolts/nuts for the bushings/front mount are 15mm for the bolt and 18mm for the nut (I believe. Don't shoot me if I was wrong, I did this last night and am trying to remember).
*Getting to the top bushing's nut/bolt is a complete pain in the ***. I had to take the wrench and slide it over the top of the differential on the driver's side and was just able to get it on the nut and hold it on by the end of the handle. For putting it back together, I had to put the socket on the end of my right index finger, and slide the wrench in the spot (without the socket on) and put the socket on the wrench while it was on top of the differential. I had to do it this way because once the new bushing was in, the differential did not hang down as low, so the few mm's of extra space I had before, was gone and that kept the wrench with the socket on from sliding up in there.
Here is a picture of how I had to put the wrench. The nut is directly in front of where the socket is:
![Image]()
Getting the bushing out was terrible. Mine was stuck like chuck. I hit it with a hammer and chisel at first and made little progress after about 20 minutes. Then I got an air chisel and that still took about 20 minutes to get it out completely.
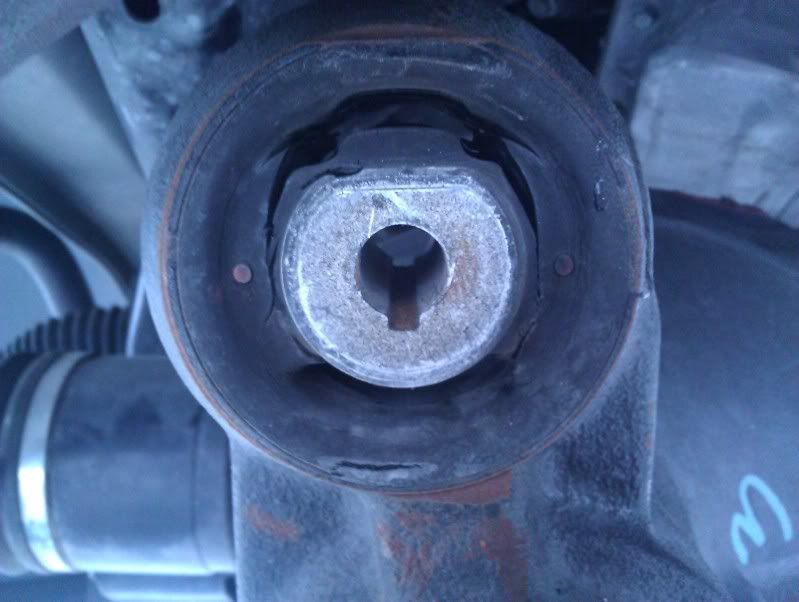
Here is a before picture of the top bushing:
![Image]()
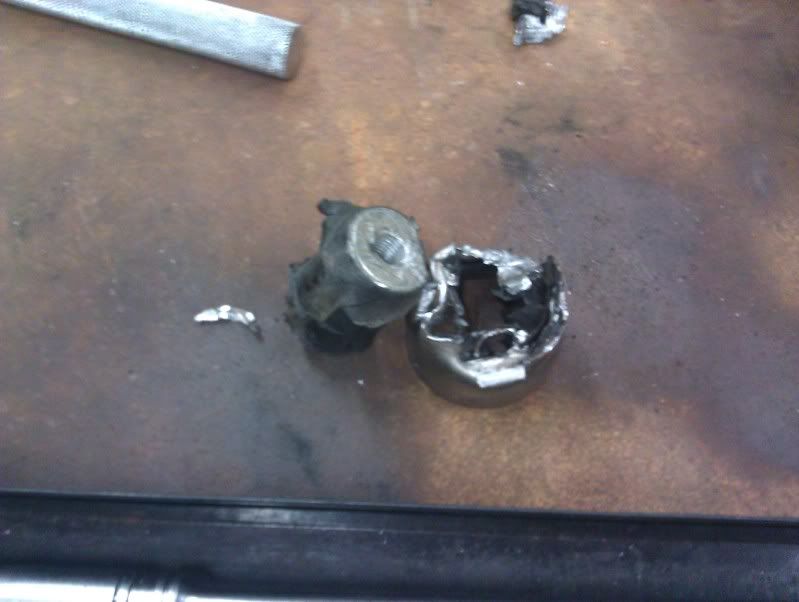
And an after:
![Image]()
This was the side bushing (wasn't bad at all):
![Image]()
Hopefully this will help some people out that have that damn clunk from the front end. Mine start off as just when going from R to D (like when pulling out of a parking spot), but it started to do it more and more while driving. As you can see from the pic, the top bushing was almost split all the way through, so it was good that I finally took care of it.
The dealership said 5-6 hours of labor, and I started around 2pm and finished around 6 or 6:30pm. I did it by myself, so it probably would go faster with another set of hands.
Hopefully this will help other people if they should run into the same problem. I have seen other threads, here and on other sites, but not all of them have the drawing/pics and all the parts and prices.
Well, I started getting a clunk when going from reverse to drive and after searching determined it was the bushings on the front diff that needed to be replaced. There are 2 actual bushings and the other one is an actual mount with a bushing inside and comes as one assembly.
Since I did not know which of the 3 were bad, I just bought all there. Total for all three was about $180 shipped from www.justforjeeps.com (the mount is over $100 alone).
Here is a pic for reference. #1 is the easy one since you don't have to disconnect the drive shaft to change it (just remove the bolts that hold it down). #2 is the other one I could see easily that looked fine. The third is on the top, and I didn't take a pic. I originally just changed #1 since it looked bad and was easy to get to (I was hoping I would get lucky and that would be all I would have to do). Well, it didn't solve the issue, and since #1 was changed, and #2 looked fine, I am assuming #3 is the one that is causing my issues.
Here is a pic of #1 to try and show the cracking of it.
And here is a reference drawing showing all three. You need both #14's and #6:
Here are the parts needed:
1 of these. $107.10
http://www.justforjeeps.com/fraxmobr.html
2 of these. $29.79 a piece
http://www.justforjeeps.com/fraxmois.html
To start off, remove all the bolts from the front drive shaft. There are 6 8mm bolts holding it to the front differential and another 6 holding it to the transfer case. Once the bolts are removed, it needs to be pulled out and set aside. I had to use a rubber mallet to help unseat it, as it was a little tough. A few taps of the mallet is all it took. I let it sit on top of the cross member instead of trying to wiggle it out (I honestly don't know if it will even come out unless the cross member is removed that is there. That was too much work, as it is fine sitting there.). Before you remove the drive shaft, make sure it is marked on the drive shaft and the joint so you know how it was positioned. If it is put in different, it might cause vibrations. Mine was already marked from the factory.

After the drive shaft is removed and set aside, start removing the nuts and bolts holding the bushings in their mounts. I would do the upper and side bushing before removing the mount on the front of the differential (if you remove the front mount first, it will allow the differential to hang down and put stress on the bolts for the other bushings, which will make it hard to remove the bolts). I also used a transmission jack under the differential to keep it from dropping until I was ready for it to drop.
Here is the rear of the drive shaft and how it was resting on the cross member:

And the front of the drive shaft. It was resting on the heat shield for the exhaust:
http://img.photobucket.com/albums/v321/99formulam6/JGC/IMG_20111209_145729.jpg
After the bolts from the bushings are removed, and the mount from the front of the differential is off, the entire assembly will be free to hang down and rotate to allow access to the bushings.
This was the hard part. The bushings are press fit into the housing, and mine we extremely difficult to remove. I ended up using an air chisel to remove it, but even using that was a pain. After the bushing is removed, the new one is press fit into the housing. I used a ball joint press, and it went pretty smooth.
When the new bushing(s) are in, reassembly is the reverse of removal (obviously). To get the nut on the bolt for the upper bushing, I had to set the nut in the socket and hold the wrench up against the bolt hole while using my other hand to slide the bolt in the hole. I had to do it this was because there was no way my hand would fit in the space to hold the nut. I also used the transmission jack to hold up the differential to help line everything up.
Tips:
*I did this on a frame lift and had tools/equipment that the Average Joe's garage won't have (I was able to do this on the Navy base I am stationed at and they have lifts/tools for me to use). I know people have done this with a jack and jack stands in their garage, but there is no way I would do it that way after having so much trouble with getting the bushing out of the mount.
*The drive shaft will have to be rotated to get to all of them, but I also had to have the E -brake on to be able to break the bolts loose, and tighten them when I put everything back together. So you will have to be able to get into the Jeep to put the E-brake on and off.
*The bolts for the drive shaft are 8mm. Having ratcheting box end wrenches will help a lot since the drive shaft kind of angles out around the bolts when it goes into the transfer case.
*The bolts/nuts for the bushings/front mount are 15mm for the bolt and 18mm for the nut (I believe. Don't shoot me if I was wrong, I did this last night and am trying to remember).
*Getting to the top bushing's nut/bolt is a complete pain in the ***. I had to take the wrench and slide it over the top of the differential on the driver's side and was just able to get it on the nut and hold it on by the end of the handle. For putting it back together, I had to put the socket on the end of my right index finger, and slide the wrench in the spot (without the socket on) and put the socket on the wrench while it was on top of the differential. I had to do it this way because once the new bushing was in, the differential did not hang down as low, so the few mm's of extra space I had before, was gone and that kept the wrench with the socket on from sliding up in there.
Here is a picture of how I had to put the wrench. The nut is directly in front of where the socket is:
Getting the bushing out was terrible. Mine was stuck like chuck. I hit it with a hammer and chisel at first and made little progress after about 20 minutes. Then I got an air chisel and that still took about 20 minutes to get it out completely.
Here is a before picture of the top bushing:
And an after:
This was the side bushing (wasn't bad at all):

Hopefully this will help some people out that have that damn clunk from the front end. Mine start off as just when going from R to D (like when pulling out of a parking spot), but it started to do it more and more while driving. As you can see from the pic, the top bushing was almost split all the way through, so it was good that I finally took care of it.
The dealership said 5-6 hours of labor, and I started around 2pm and finished around 6 or 6:30pm. I did it by myself, so it probably would go faster with another set of hands.


