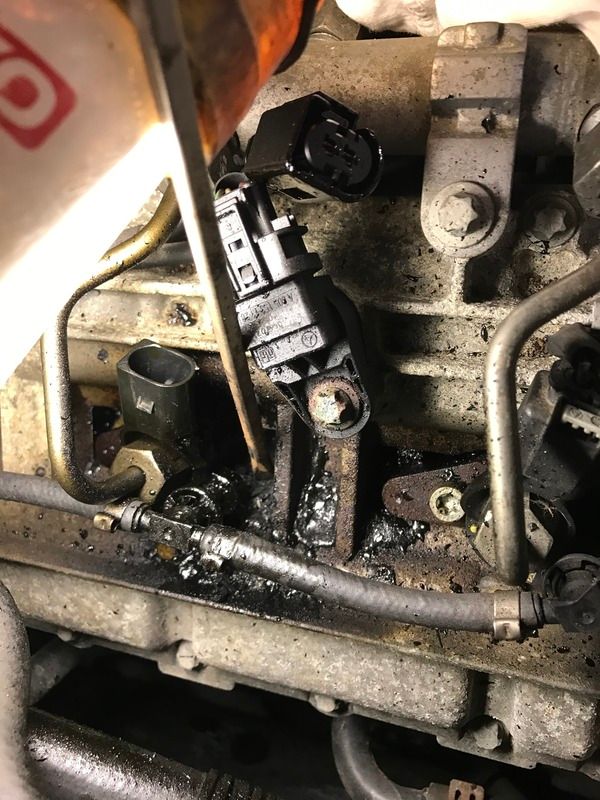
I had to replace the injector seal on the middle cylinder on the passenger size, so I figured I'd post some photos for people who might want to see what they're getting in for before they try it. This isn't really a how to, but more how I did it. This was the first time I've done this.
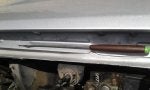
First remove the fuel return line with the plastic clips, the locking ring needs to be pulled UP to release it. There's been some conflicting information about that and I luckily saw that correction in a thread here before trying it. I had to apply more force to it than I kind of expected but it didn't break on me.
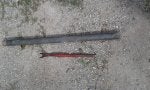
Then I removed the hard line from the injector, 18mm on the rail and 17mm on the injector I think. I had a rag over the nuts as I cracked them loose in case there was any pressure still in the rail. The engine had been shut off for a bit when I got around to this part but I wasn't sure what to expect and the pressures used isn't something to mess around with. It just drained a little without any force.
The "black death" goo stuff will chip away when cold, or kind of smear off like tar when warm. When warm I used a straight blade screw driver and removed as much as I could before attempting to remove the injector. You ABSOLUTELY want to do this job when the engine is hot otherwise you'll never get it out. I was able to just barely move the injector back and forth using the hold down bracket and a screwdriver to push it back and forth. Once I got it working back and forth I was able to pull up on it with my fingers and remove it. If the engine was cold it would have been impossible. Oh, and the hold down bolt was a t40 torx if I remember right.
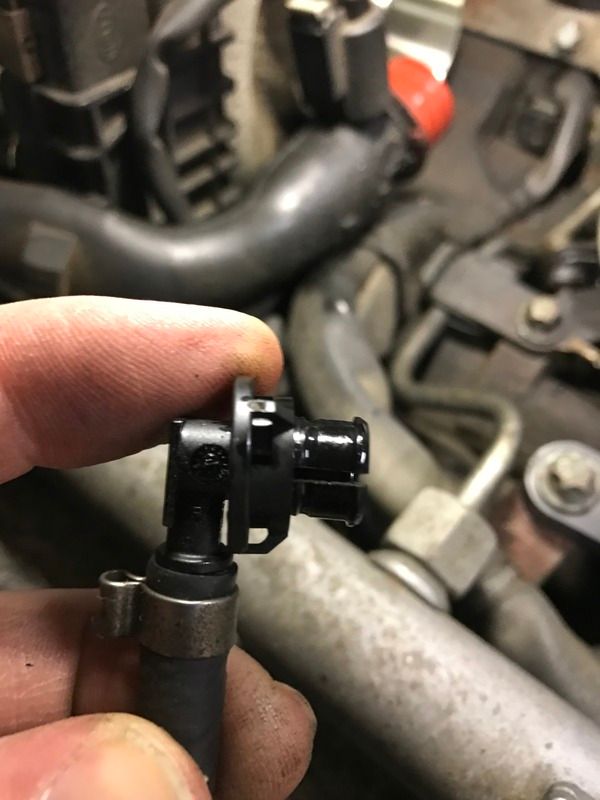
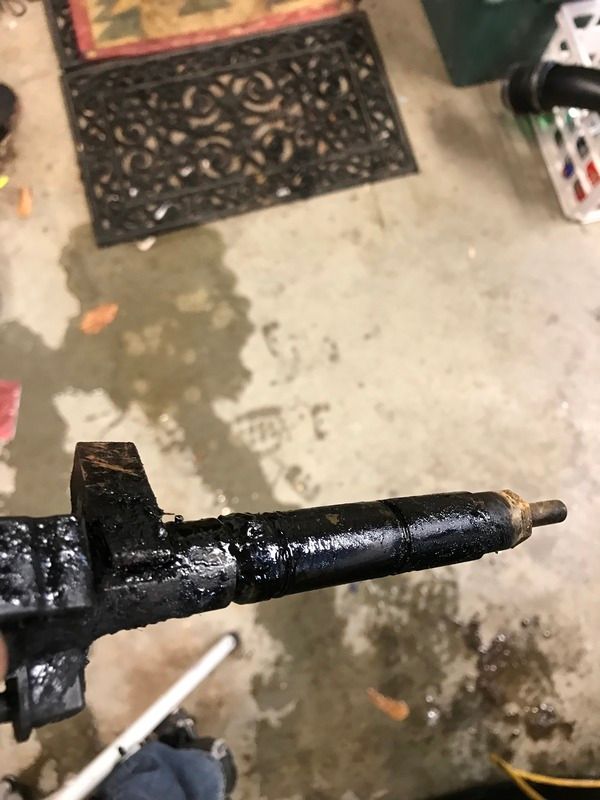
Here's what my injector looked like when I got it out.
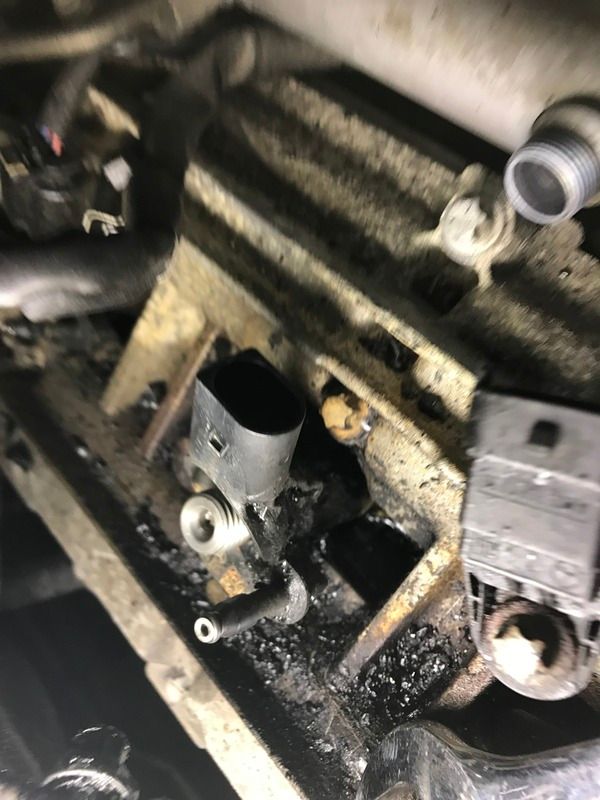
Here's the rest of the goo left around the injector hole.
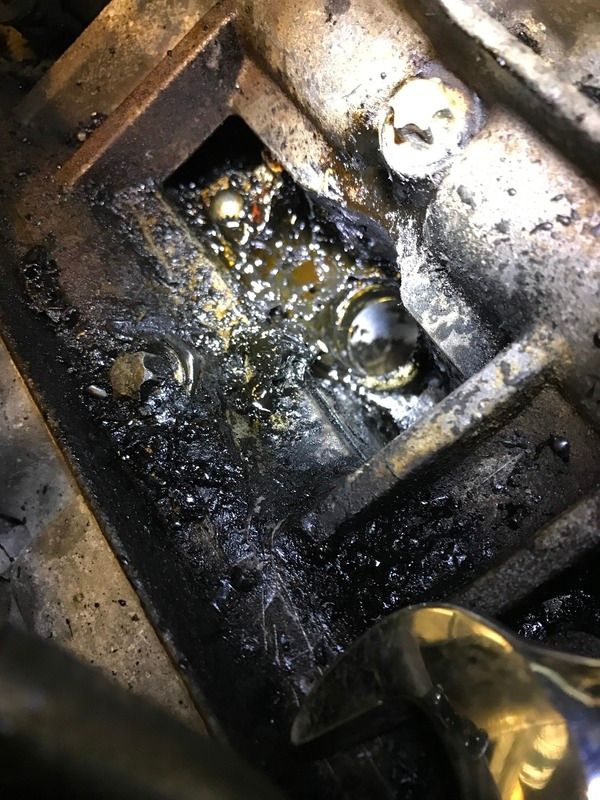
I scraped away the rest of the goo around the top of the hole after shoving some rags into the injector hole to keep any from falling in and ended up with it looking a bit better.
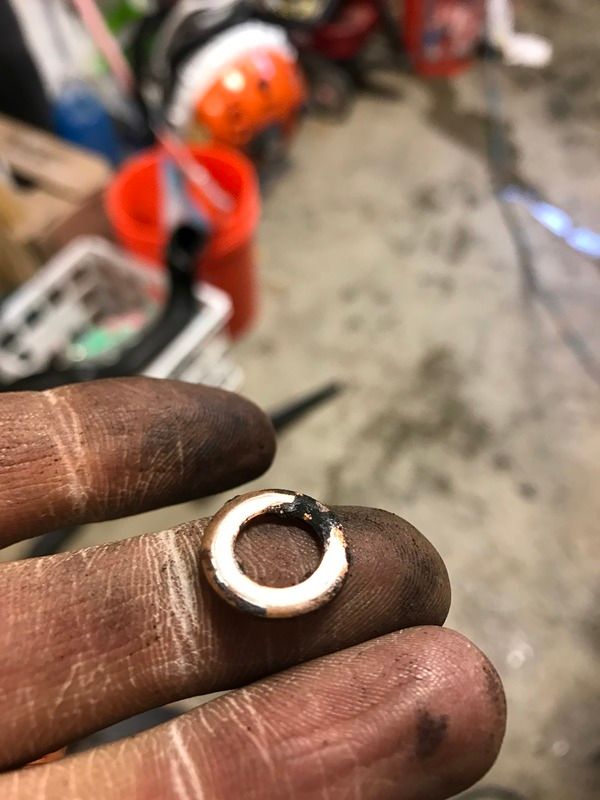
There really wasn't too much residue on bore of the injector hole luckily. I used a brass brush from a gun cleaning kit to clean it though, forget what size it was. Oh, and here's the failed copper washer that caused this mess. The copper washer stayed in the hole after I pull the injector so I used a pick to remove it.
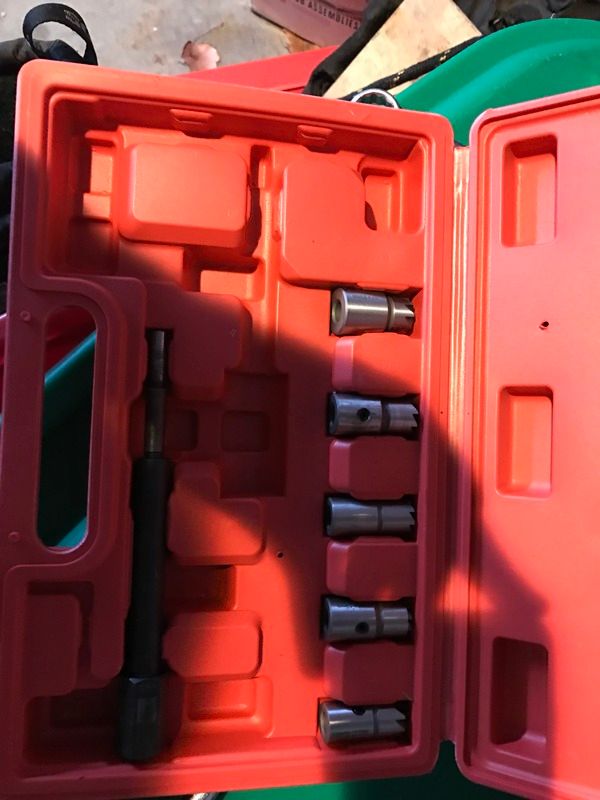
I bought an injector seal cutter to do this job (https://www.amazon.com/Qbace-7PCS-D...196_t_1?ie=UTF8&psc=1&refRID=JKFQBEB6130EB470T91B&tag=vs-auto-convert-amazon-20), and I honestly don't know if i really had the right cutter for the job. I first tried the 17mm stepped to 19mm but the step didn't let it actually reach the bottom of the hole. Then I tried a 17mm cutter and it fit nicely but it really was only removing material from the perimeter of the bore, so I would have had to remove alot of material to get it flat. There was a 15mm cutter which is the size that the washer is, so that seems to be the right one but the body on it was stepped and I couldn't get it to fully insert into the hole. I think using a dowel that's 15/16mm in diameter with fine sandpaper glued to the end of it would be best for trying to resurface mating surface if there isn't a ton of damage down there. I didn't do this, but chose to clean it up the best I could and see if it would hold. I have another washer and bolt ready if it fails on me again. Here's what the kit looks like. It's alot like the cutters to resurface compression type faucet seats. Do not work the cutter back and forth or you can get chatter marks in the seat, only go clockwise.
EDIT- the 17x17 cutter I'm told works perfectly
Next you have to clean out the hold down bolt's hole/threads. This is critical. I sprayed some brake cleaner in the hole and let it sit, then blew it out with compressed air. Then I took another small brass bore brush from the gun cleaning kit and worked it up and down the hole cleaning it off each time. Then I cleaned up the old bolt and used that to test the hole. Getting a tap long enough would be best, some people also cut groves down the old bolt and use that to clean out the threads. I was pretty confident the bore brush did a good job so I opted not to.
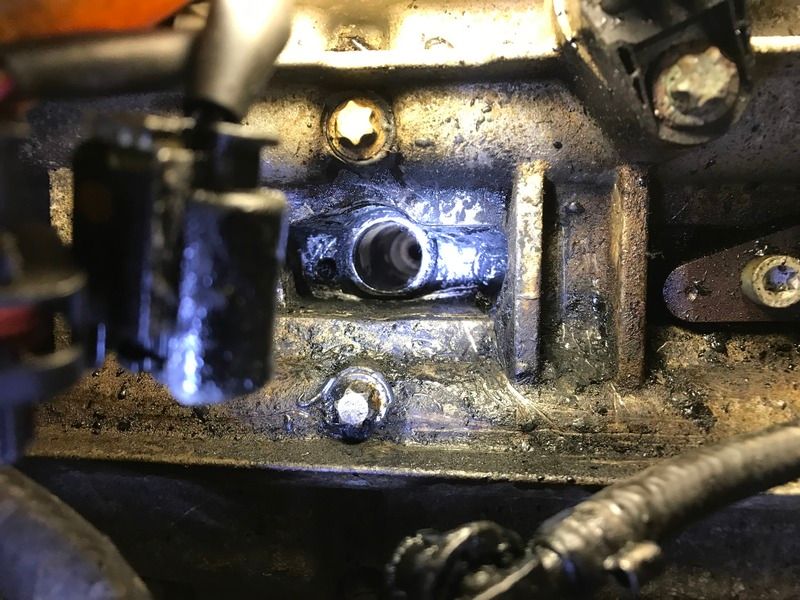
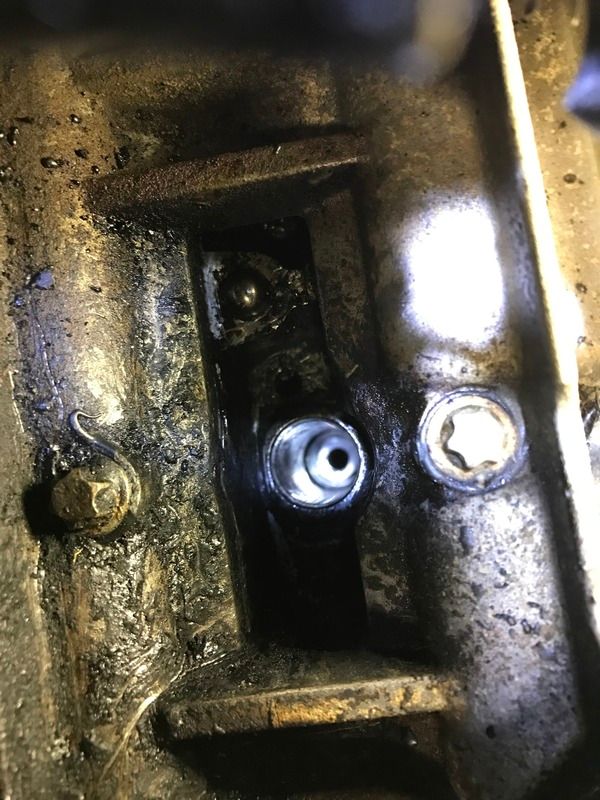
Here's my attempt to show the cleaned injector hole. Kind of hard to take a photo of it.
Put the new copper washer on the end of your cleaned injector (and put a light coating of ceramic grease on the injector body) and insert it back into the hole, put the hold down bracket onto the injector and tighten the hold down bolt to 7nm + 90 degrees. Here's where I've read a few different things, too. One spec said 7nm +90 + 90, but one guy did a test and it actually ends up with the same torque value even if you only do one +90. I chose to do 7nm +90 + 30ish just to make sure I definitely had it fully to 90 degrees. Since this bolt is torque to yield you can NOT reuse the old one
https://sprinter-source.com/forum/showthread.php?t=25300
^that's the guy who had a test head on a bench and tested the torque values.
No bleeding of the lines is necessary, it takes a few cranks before you'll get enough pressure to fire though. I had a moment where I thought I must have messed something up but then on the next crank it lit.
There's a lot of good pages if you google for Mercedes om642 fuel injector seal, I just read about this for a while before tackling it, but the info was pretty spread out all over the place. Hopefully someone will find this useful though. :cheers2:
First remove the fuel return line with the plastic clips, the locking ring needs to be pulled UP to release it. There's been some conflicting information about that and I luckily saw that correction in a thread here before trying it. I had to apply more force to it than I kind of expected but it didn't break on me.

Then I removed the hard line from the injector, 18mm on the rail and 17mm on the injector I think. I had a rag over the nuts as I cracked them loose in case there was any pressure still in the rail. The engine had been shut off for a bit when I got around to this part but I wasn't sure what to expect and the pressures used isn't something to mess around with. It just drained a little without any force.

The "black death" goo stuff will chip away when cold, or kind of smear off like tar when warm. When warm I used a straight blade screw driver and removed as much as I could before attempting to remove the injector. You ABSOLUTELY want to do this job when the engine is hot otherwise you'll never get it out. I was able to just barely move the injector back and forth using the hold down bracket and a screwdriver to push it back and forth. Once I got it working back and forth I was able to pull up on it with my fingers and remove it. If the engine was cold it would have been impossible. Oh, and the hold down bolt was a t40 torx if I remember right.

Here's what my injector looked like when I got it out.

Here's the rest of the goo left around the injector hole.

I scraped away the rest of the goo around the top of the hole after shoving some rags into the injector hole to keep any from falling in and ended up with it looking a bit better.

There really wasn't too much residue on bore of the injector hole luckily. I used a brass brush from a gun cleaning kit to clean it though, forget what size it was. Oh, and here's the failed copper washer that caused this mess. The copper washer stayed in the hole after I pull the injector so I used a pick to remove it.

I bought an injector seal cutter to do this job (https://www.amazon.com/Qbace-7PCS-D...196_t_1?ie=UTF8&psc=1&refRID=JKFQBEB6130EB470T91B&tag=vs-auto-convert-amazon-20), and I honestly don't know if i really had the right cutter for the job. I first tried the 17mm stepped to 19mm but the step didn't let it actually reach the bottom of the hole. Then I tried a 17mm cutter and it fit nicely but it really was only removing material from the perimeter of the bore, so I would have had to remove alot of material to get it flat. There was a 15mm cutter which is the size that the washer is, so that seems to be the right one but the body on it was stepped and I couldn't get it to fully insert into the hole. I think using a dowel that's 15/16mm in diameter with fine sandpaper glued to the end of it would be best for trying to resurface mating surface if there isn't a ton of damage down there. I didn't do this, but chose to clean it up the best I could and see if it would hold. I have another washer and bolt ready if it fails on me again. Here's what the kit looks like. It's alot like the cutters to resurface compression type faucet seats. Do not work the cutter back and forth or you can get chatter marks in the seat, only go clockwise.
EDIT- the 17x17 cutter I'm told works perfectly

Next you have to clean out the hold down bolt's hole/threads. This is critical. I sprayed some brake cleaner in the hole and let it sit, then blew it out with compressed air. Then I took another small brass bore brush from the gun cleaning kit and worked it up and down the hole cleaning it off each time. Then I cleaned up the old bolt and used that to test the hole. Getting a tap long enough would be best, some people also cut groves down the old bolt and use that to clean out the threads. I was pretty confident the bore brush did a good job so I opted not to.
Here's my attempt to show the cleaned injector hole. Kind of hard to take a photo of it.

Put the new copper washer on the end of your cleaned injector (and put a light coating of ceramic grease on the injector body) and insert it back into the hole, put the hold down bracket onto the injector and tighten the hold down bolt to 7nm + 90 degrees. Here's where I've read a few different things, too. One spec said 7nm +90 + 90, but one guy did a test and it actually ends up with the same torque value even if you only do one +90. I chose to do 7nm +90 + 30ish just to make sure I definitely had it fully to 90 degrees. Since this bolt is torque to yield you can NOT reuse the old one
https://sprinter-source.com/forum/showthread.php?t=25300
^that's the guy who had a test head on a bench and tested the torque values.
No bleeding of the lines is necessary, it takes a few cranks before you'll get enough pressure to fire though. I had a moment where I thought I must have messed something up but then on the next crank it lit.
There's a lot of good pages if you google for Mercedes om642 fuel injector seal, I just read about this for a while before tackling it, but the info was pretty spread out all over the place. Hopefully someone will find this useful though. :cheers2:
")