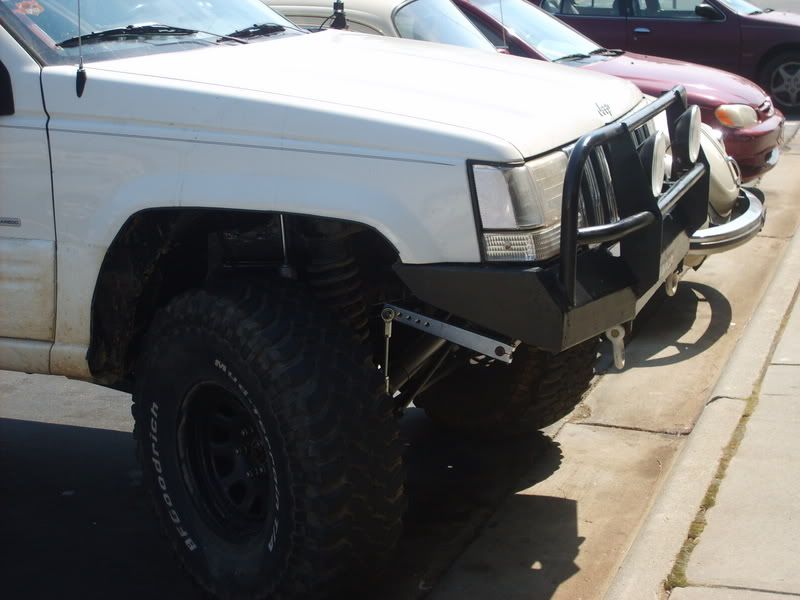
I've been wanting to do this for awhile and after plenty of research I think this is a pretty effective way to get a stable ride on the highway and the trail yet still allow for plenty of suspension travel. Just as a little history, I was running a stock swaybar with JKS disconnects in my ZJ which worked great. When I got a daily driver I decided swaybars weren't that important so I ditched them altogether. After a few trail rides and extended periods on the road, I knew that running no swaybars, longarms, and soft shocks was not going to work. So I looked into this.
There are a few different brands of swaybars like this. Teraflex makes one, Currie produces their popular anti-rock, and a relatively low-key company "Rock Equipment" makes one as well. Considering price and quality I chose the rock equipment swaybar kit.
![Image]()
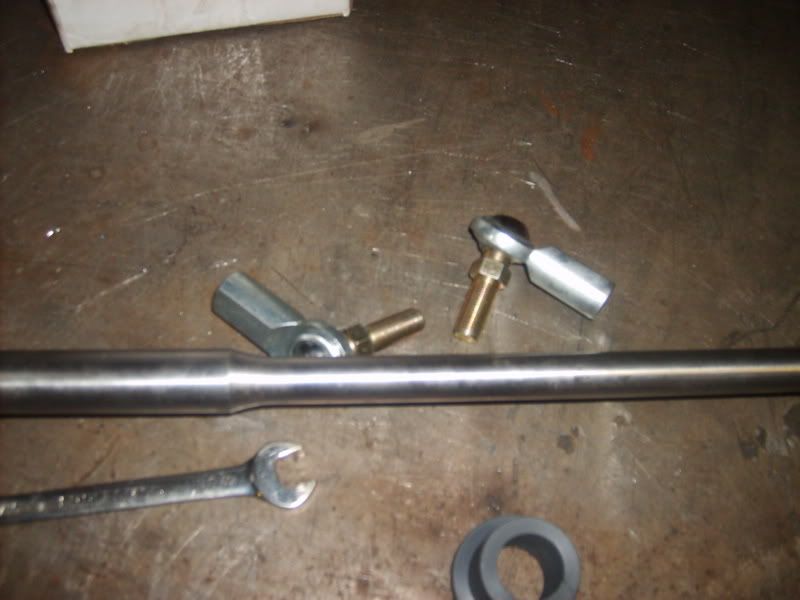
I got the 36" bar kit that comes with threaded rod, nylon locknuts, heim joint rod ends, bushings, and stainless arms (pictured black), and tubing inserts to hold the bar. It was a little bit cheaper than the Currie anti-rock and essentially the same thing.
Time to get started.
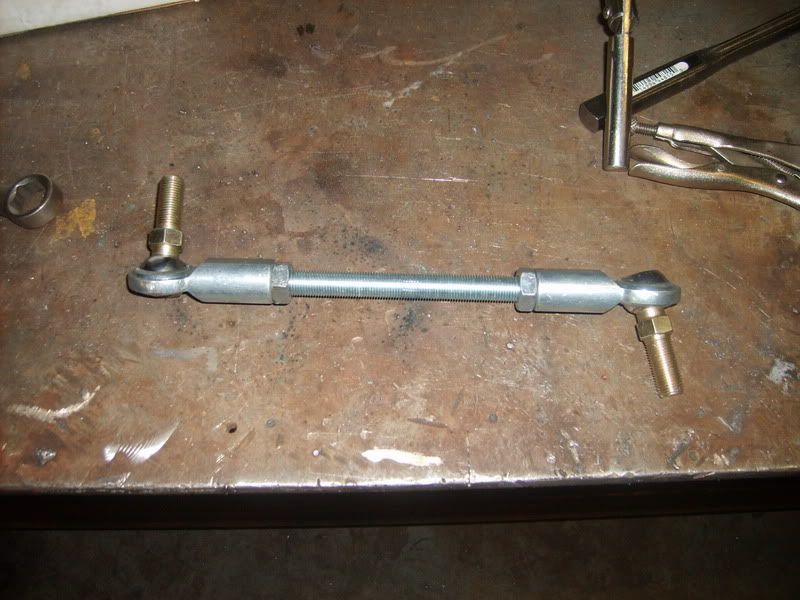
Here is the swaybar and arms all put together. Pretty bling and top notch quality.
![Image]()
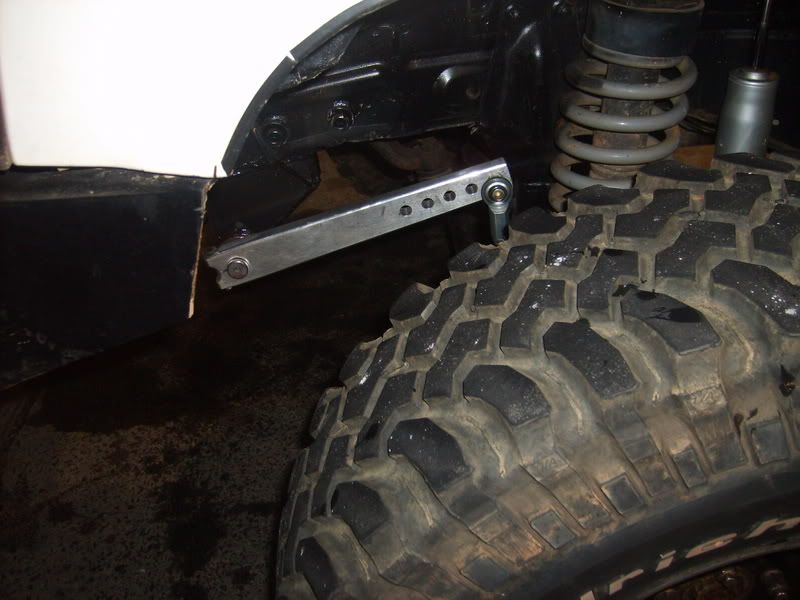
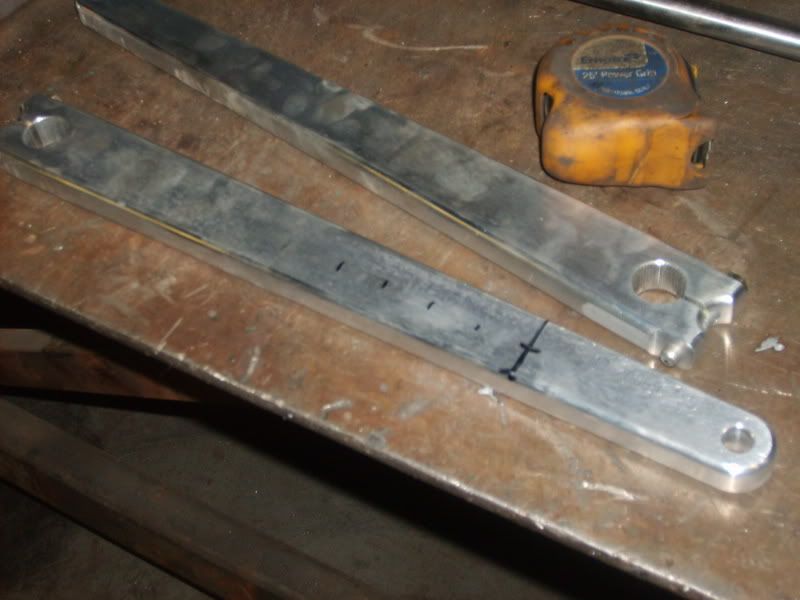
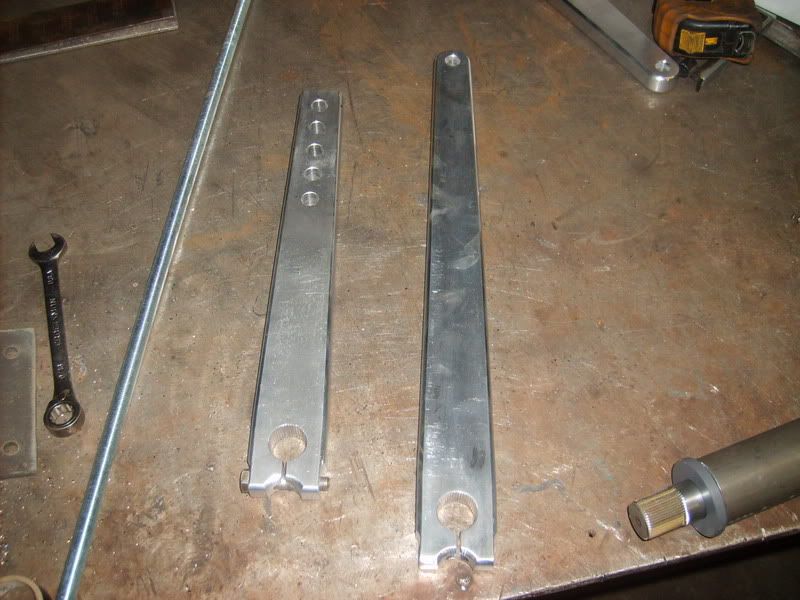
Now since my front axle is stretched about 3" the arms are way too long to fit without rubbing on the springs. The only solution to this was mill the arms down to make them a more managable size, OR move the swaybar mounts forward about 5". Since I don't want to bash this thing on every rock at Tellico I chose to cut down the arms. Doing this also makes it easy to add some extra holes for ride stiffness adjustability.
BEFORE
![Image]()
AFTER
![Image]()
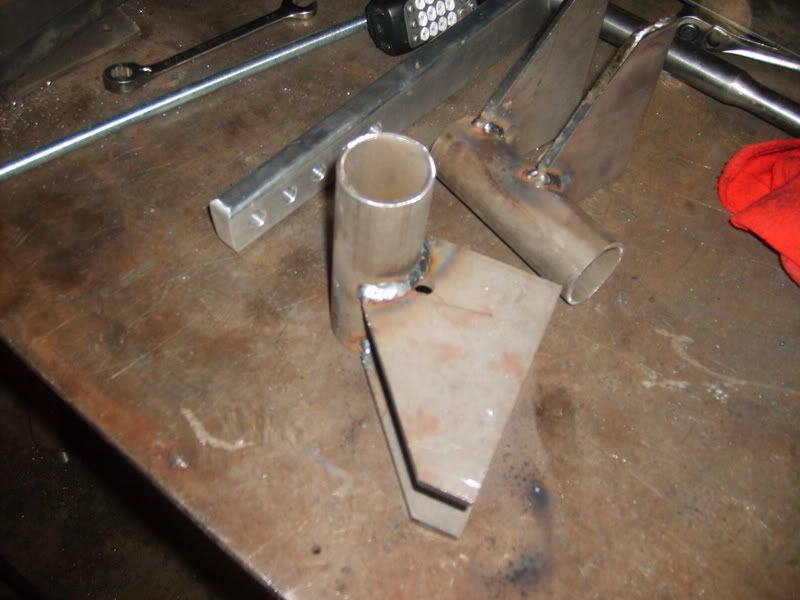
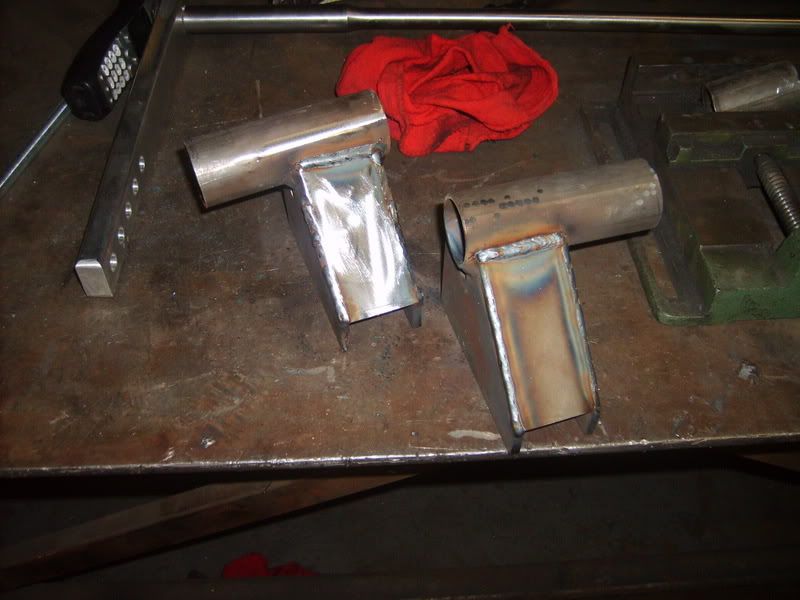
Now that everything was sized up right it was time to make brackets. The tubing is 1.75" HREW .120 wall and the plate is just some hacked up 1/4" link brackets. The tubing's ID matches the bushings OD.
![Image]()
![Image]()
![Image]()
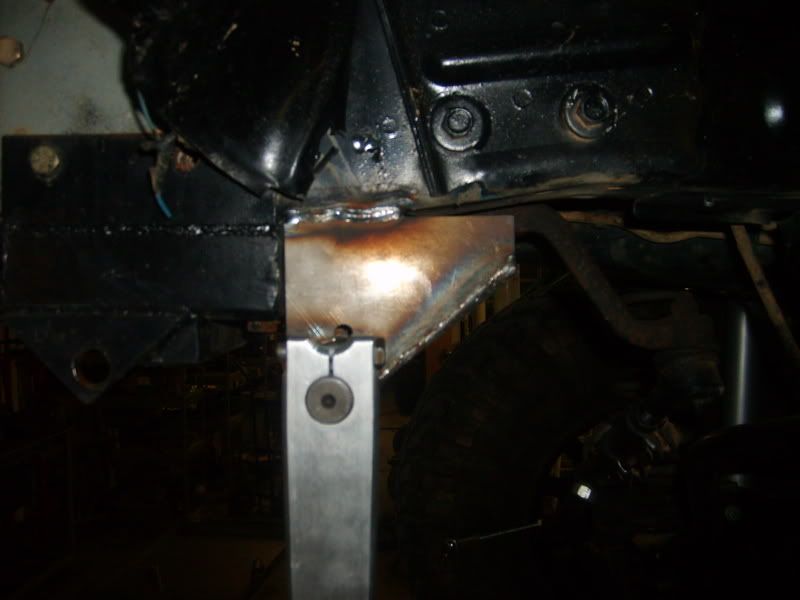
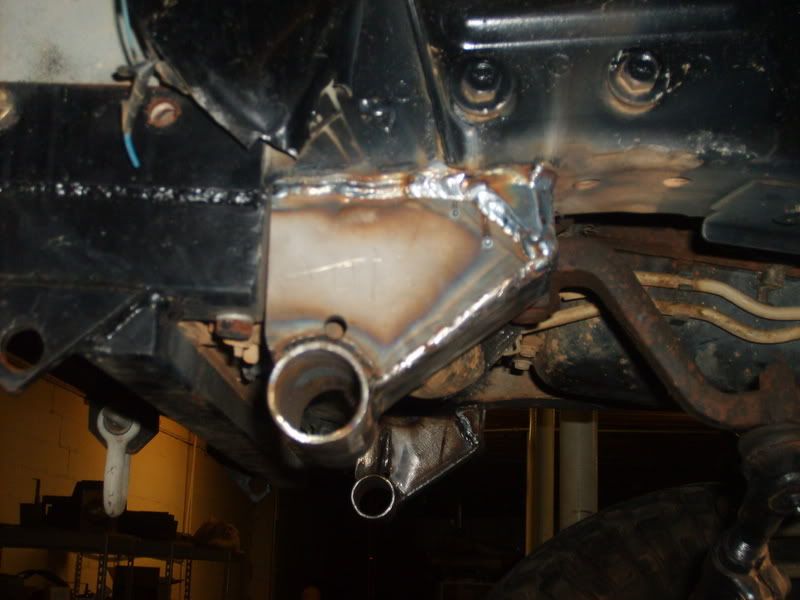
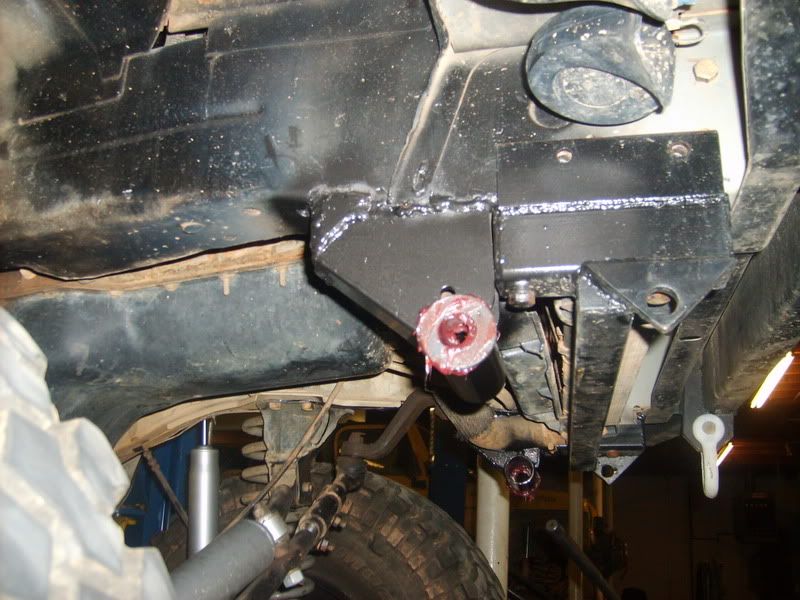
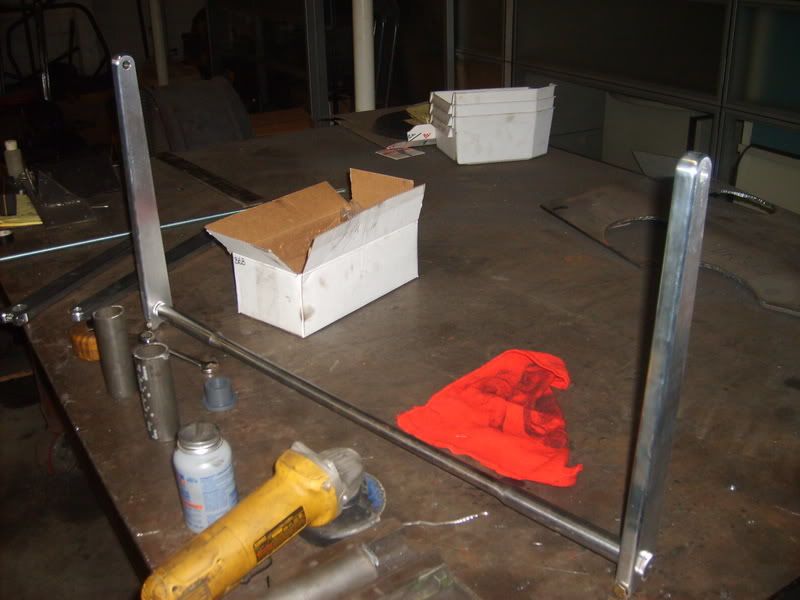
Now to get everything up on the "frame". Not a perfect fit but a little plate and alot of welding wire will fix that problem.
![Image]()
![Image]()
There are a few different brands of swaybars like this. Teraflex makes one, Currie produces their popular anti-rock, and a relatively low-key company "Rock Equipment" makes one as well. Considering price and quality I chose the rock equipment swaybar kit.
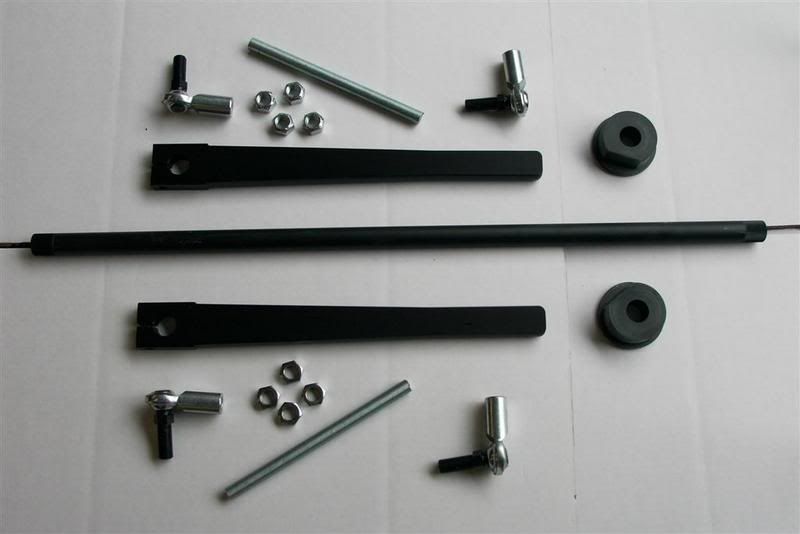
I got the 36" bar kit that comes with threaded rod, nylon locknuts, heim joint rod ends, bushings, and stainless arms (pictured black), and tubing inserts to hold the bar. It was a little bit cheaper than the Currie anti-rock and essentially the same thing.
Time to get started.
Here is the swaybar and arms all put together. Pretty bling and top notch quality.
Now since my front axle is stretched about 3" the arms are way too long to fit without rubbing on the springs. The only solution to this was mill the arms down to make them a more managable size, OR move the swaybar mounts forward about 5". Since I don't want to bash this thing on every rock at Tellico I chose to cut down the arms. Doing this also makes it easy to add some extra holes for ride stiffness adjustability.
BEFORE
AFTER
Now that everything was sized up right it was time to make brackets. The tubing is 1.75" HREW .120 wall and the plate is just some hacked up 1/4" link brackets. The tubing's ID matches the bushings OD.
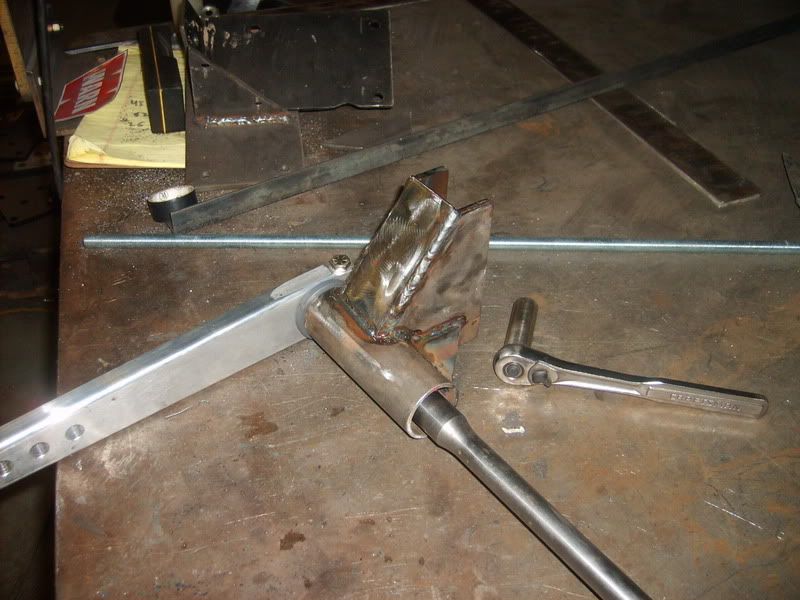
Now to get everything up on the "frame". Not a perfect fit but a little plate and alot of welding wire will fix that problem.